The UberChart plugin gives you the ability to generate charts based on data available in a spreadsheet generated with Google Sheets.
We have split this guide into three chronological steps:
- Create a Google Sheets Private Key
- Store the Google Sheets Private Key in the UberChart Plugin Settings
- Configure the Specific Chart
1. Create a Google Sheets Private Key
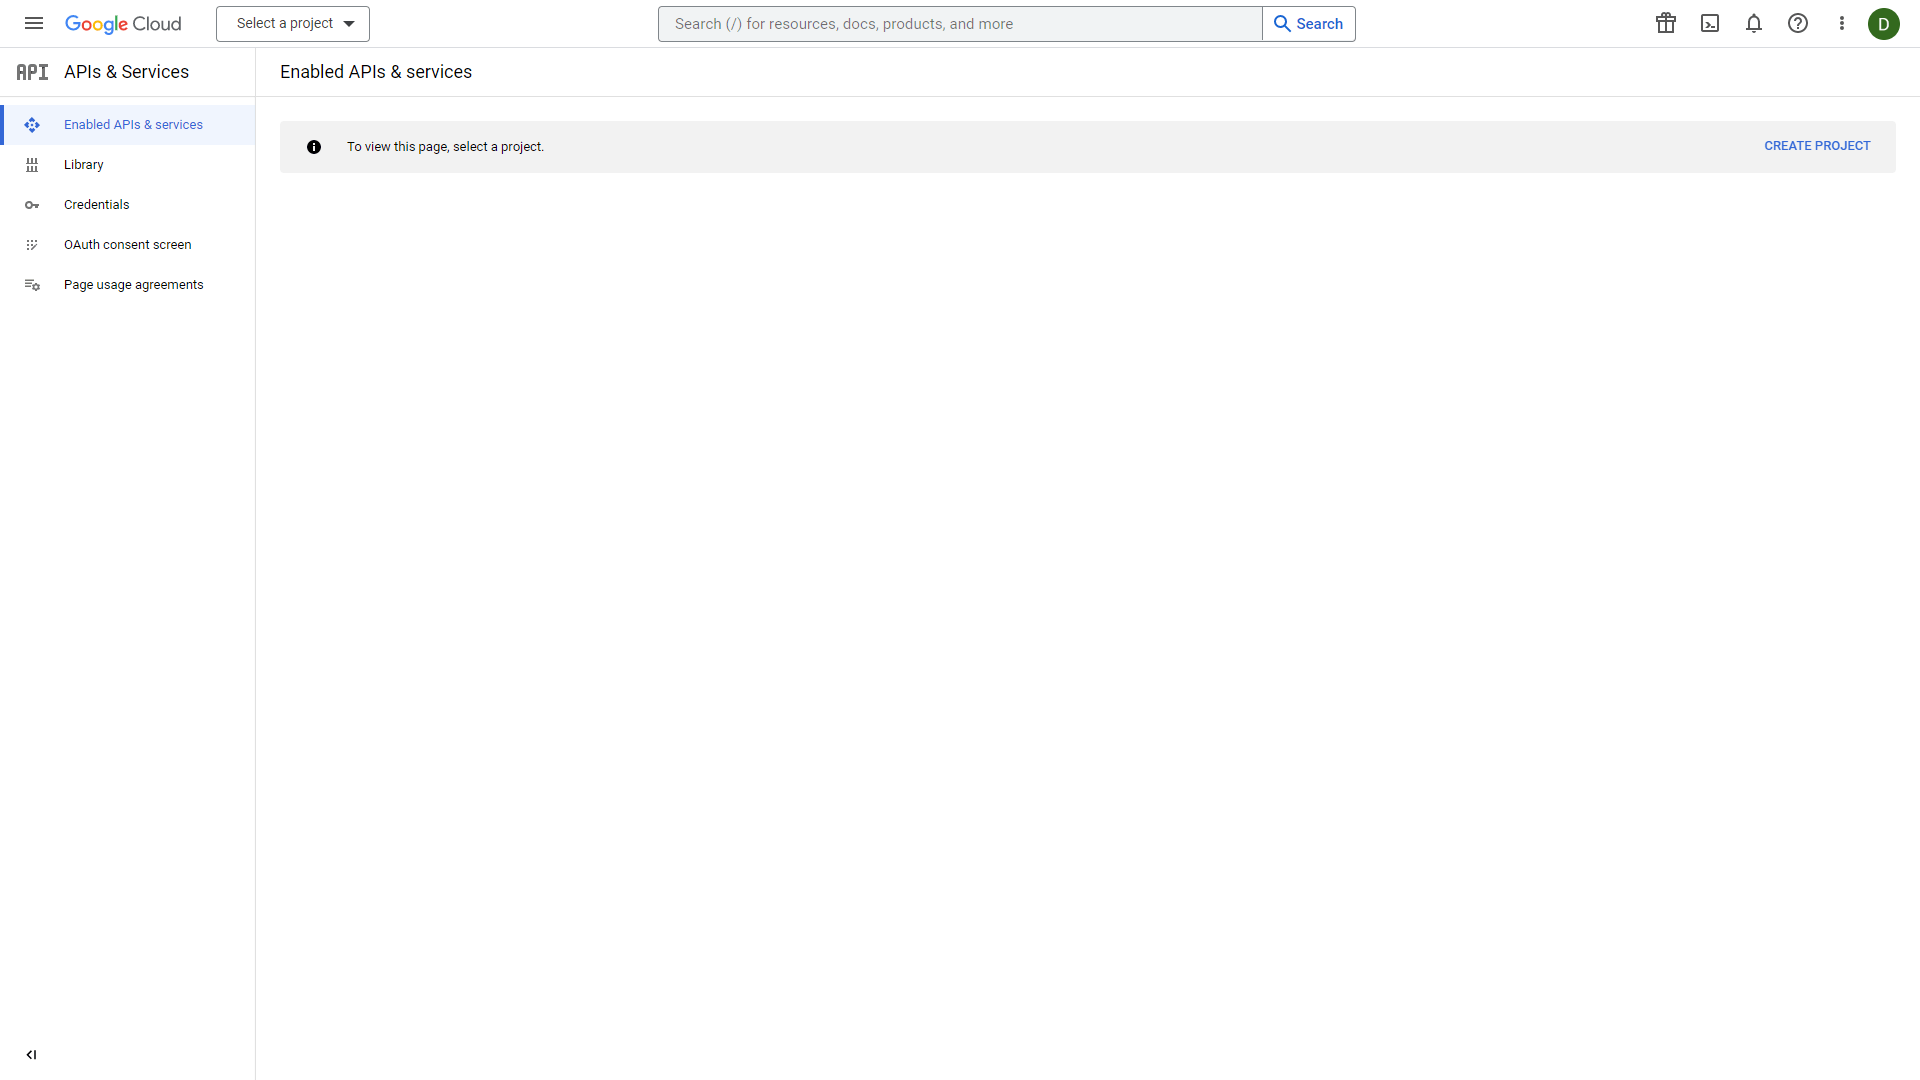
Access the Google API dashboard with this link. Note that if it’s your first time accessing Google Cloud, you have to accept the terms of service.
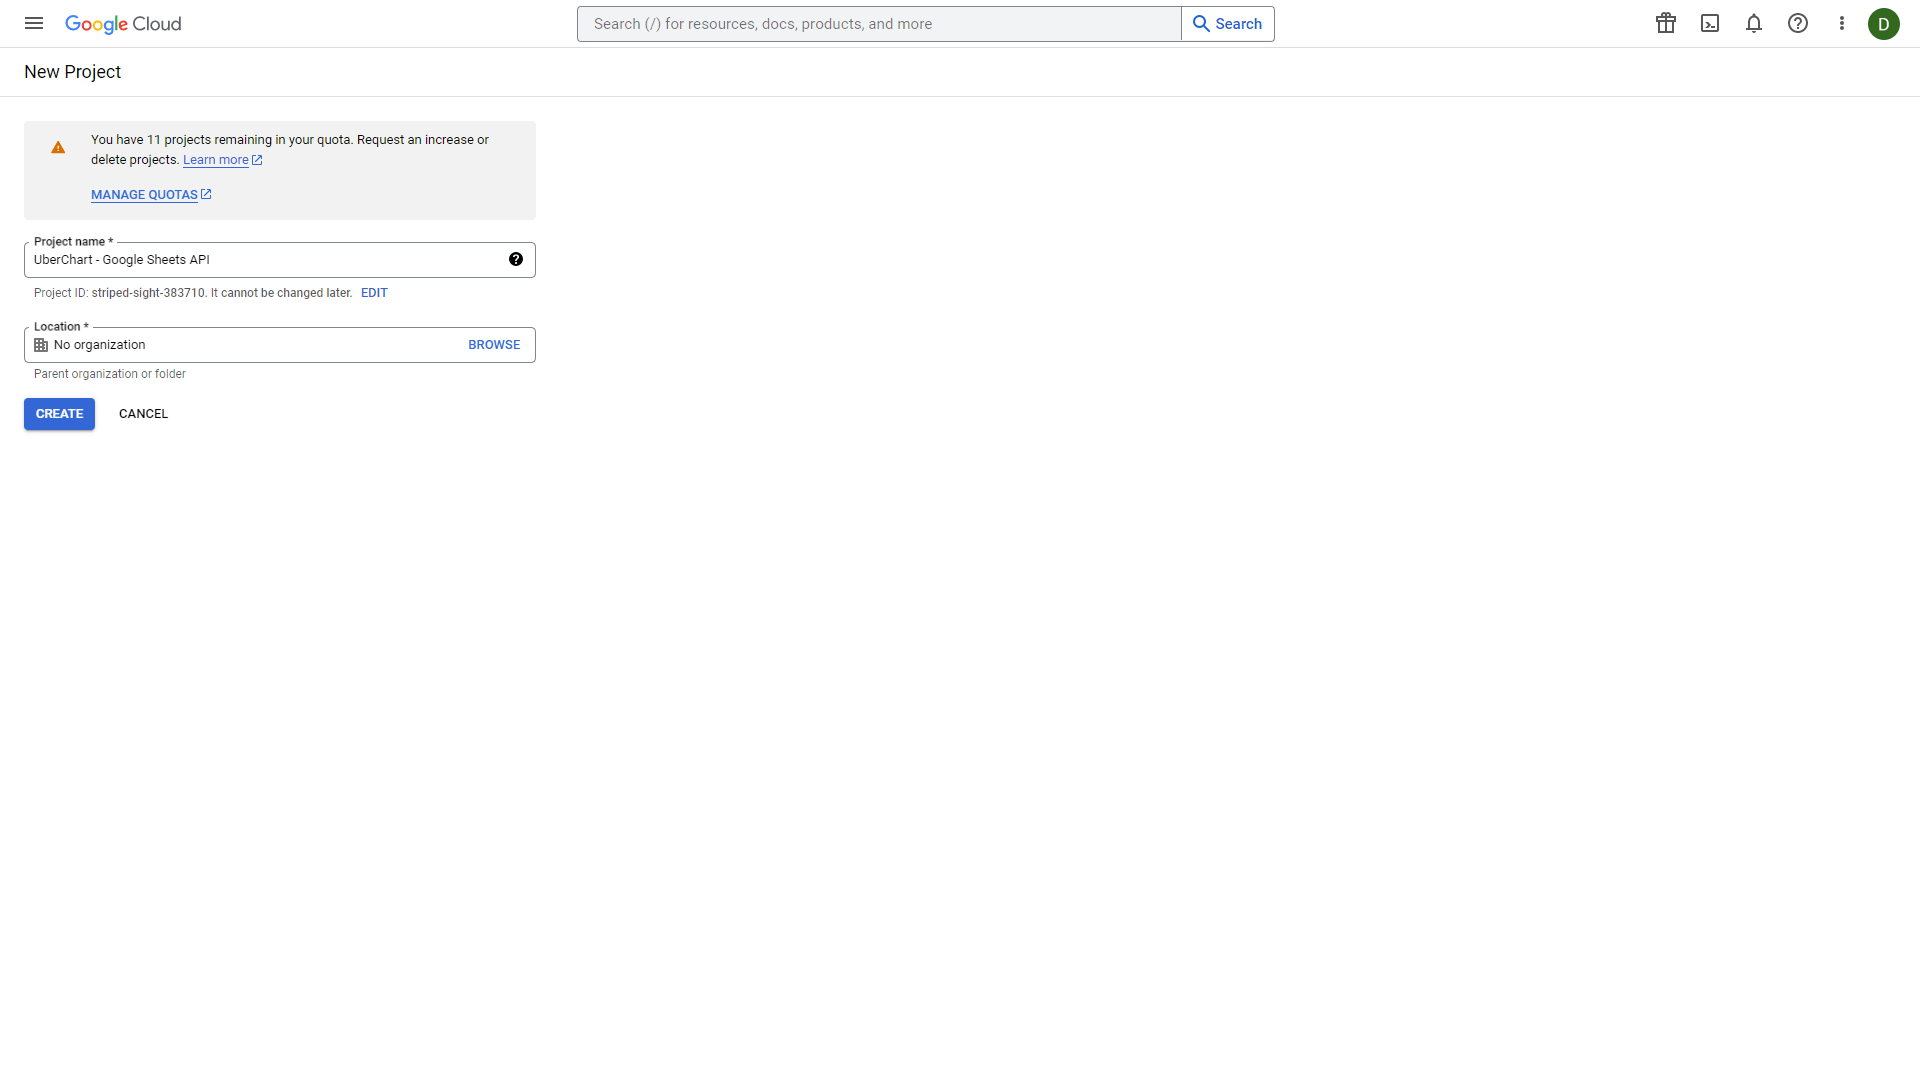
Here you can create a new project by clicking on the Select a project selector or the Create Project button available in the top bar.
Now you have to assign a name to the new project. You can name it, for example, “UberChart – Google Sheets API”. To conclude, click the Create button.
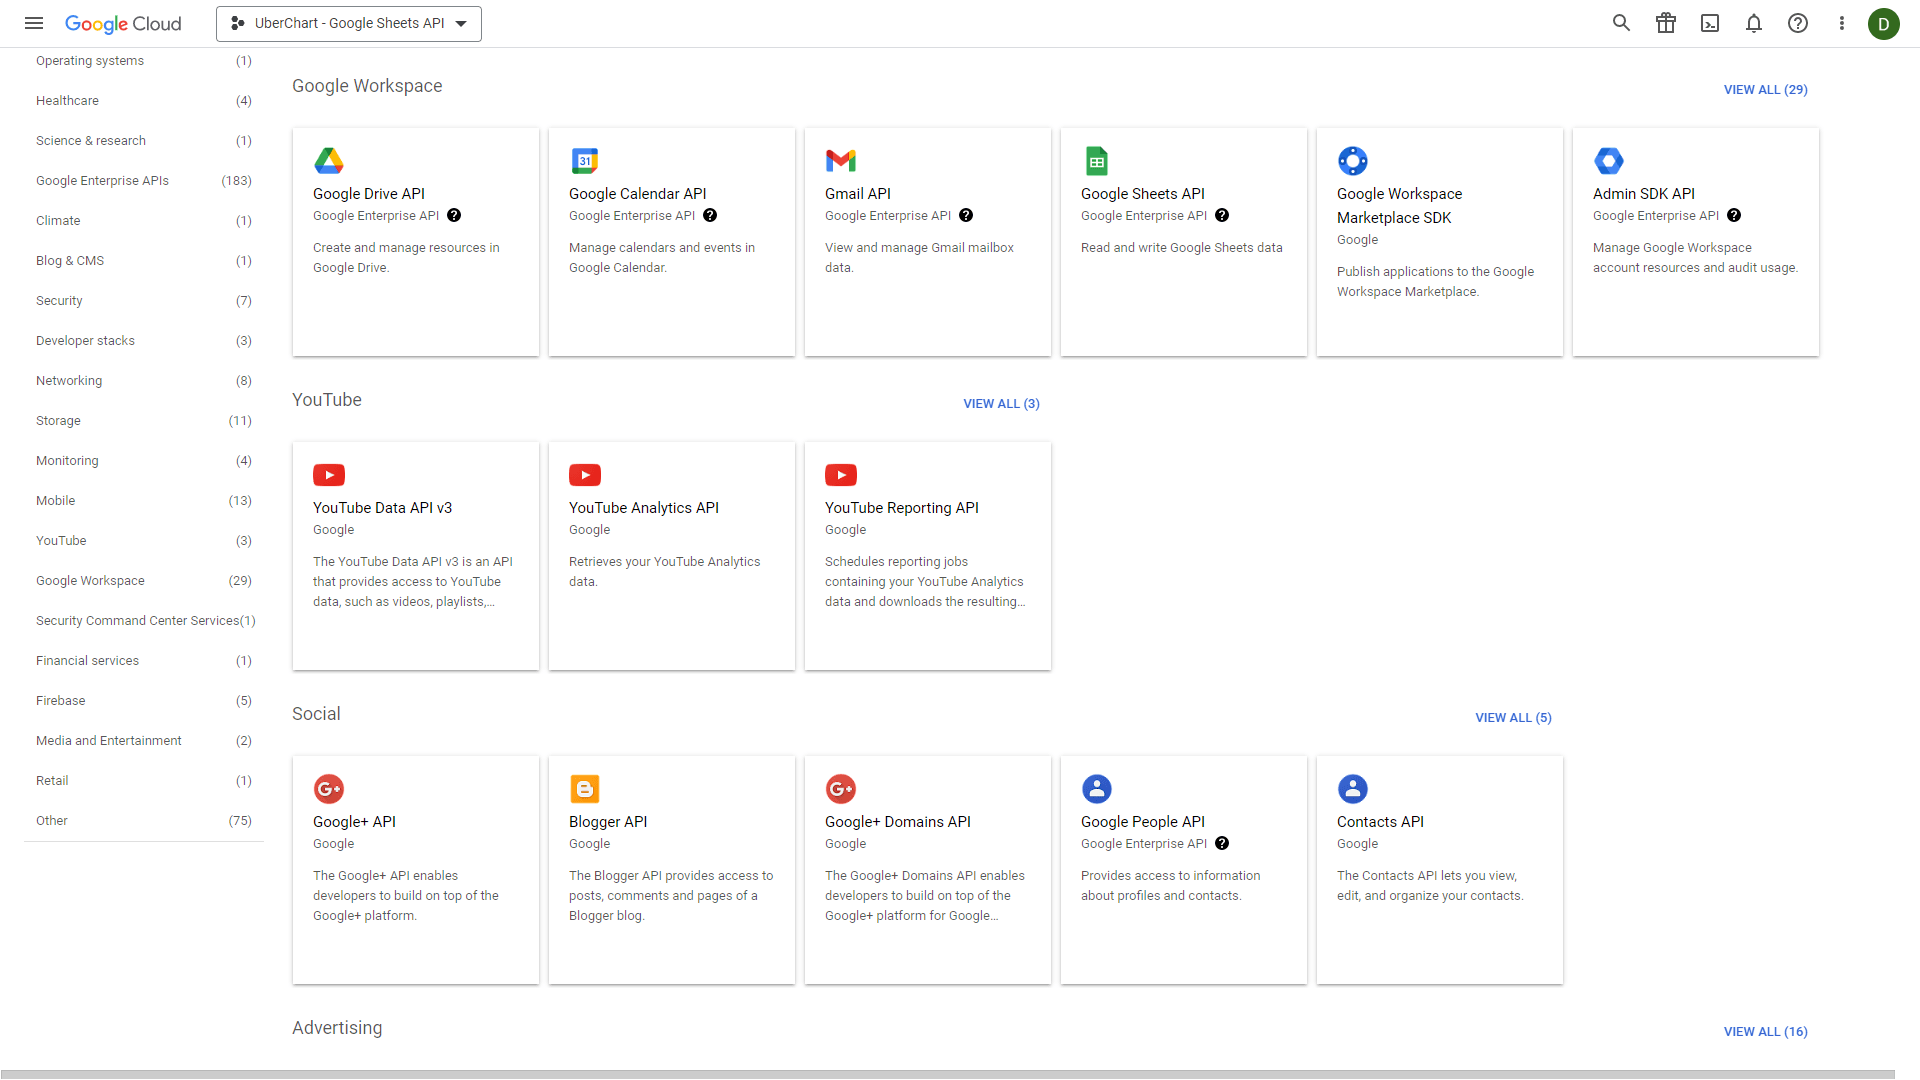
Make sure to have the new project “UberChart – Google Sheets API” selected and then proceed to the APIs & Services -> Library menu.
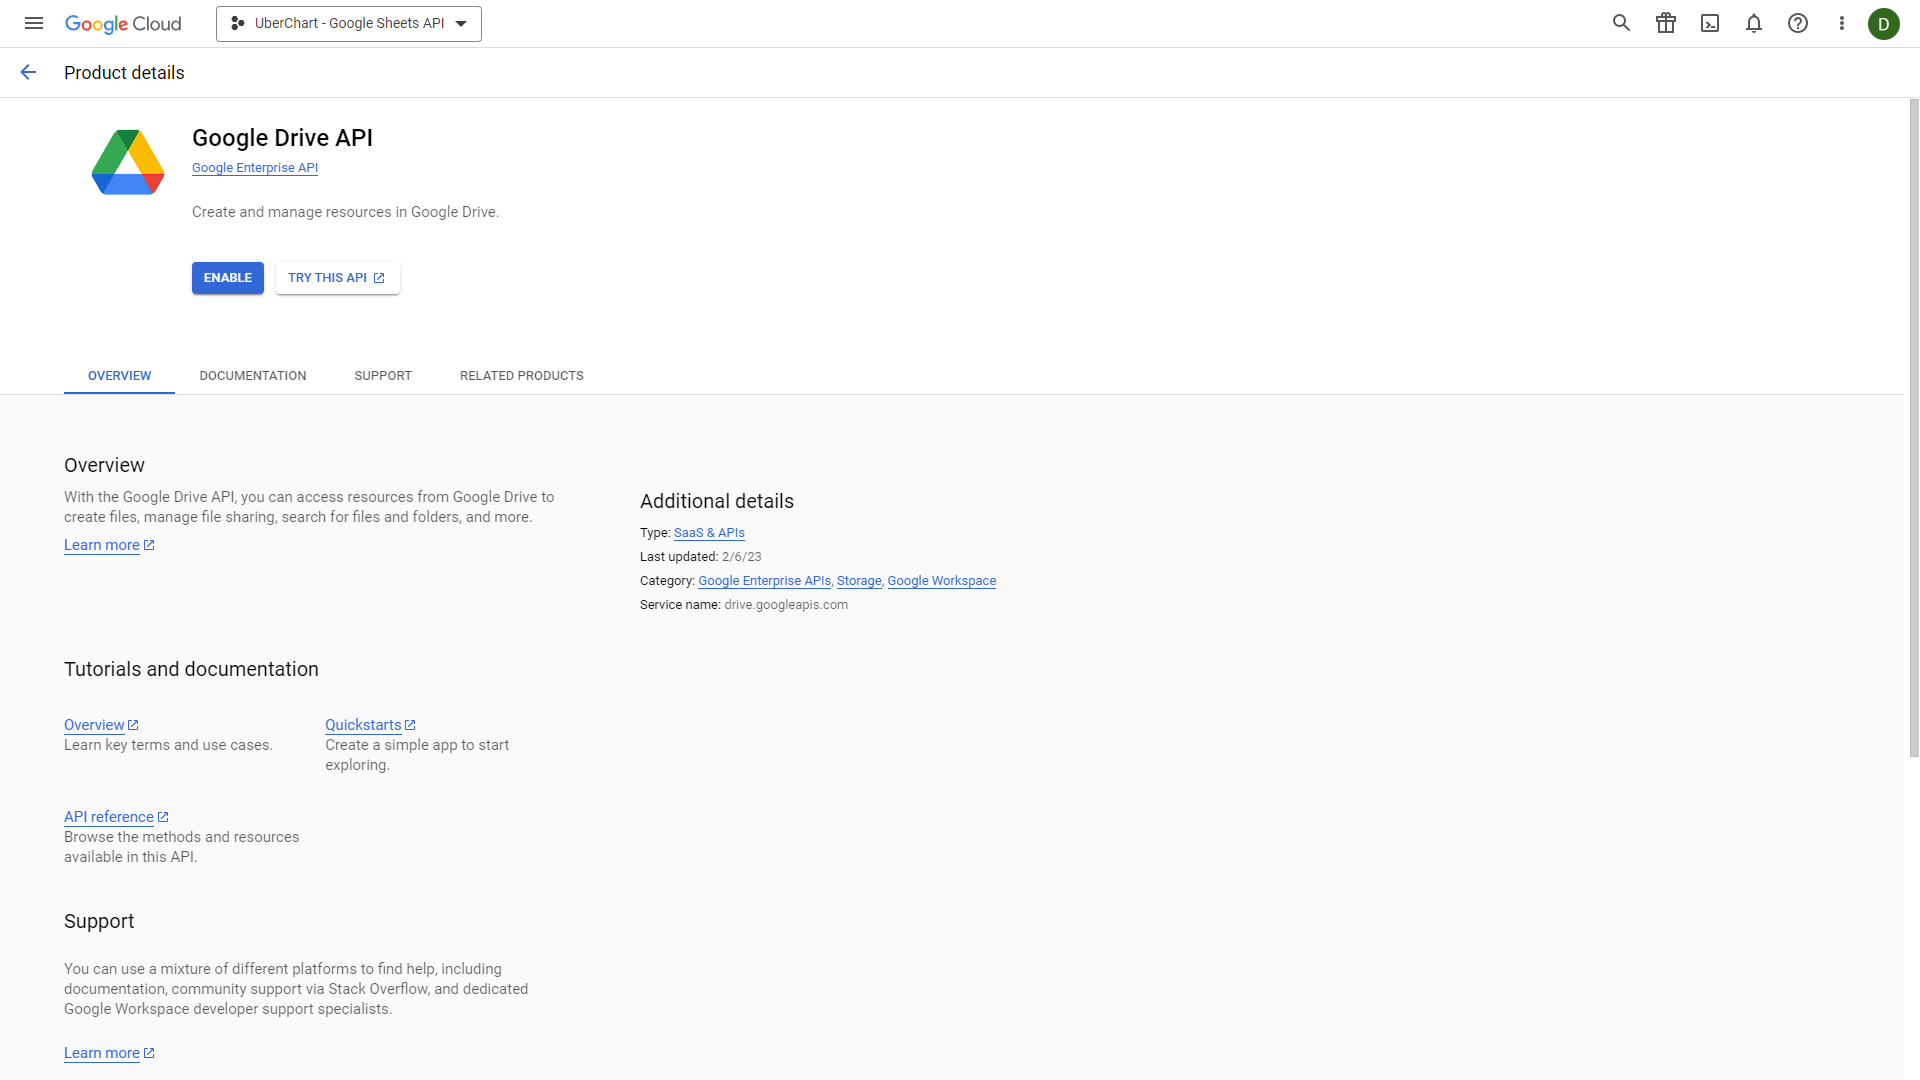
Here scroll down until you find the Google Drive API. Click on it to open the screen that allows you to enable this API.
Click on the Enable button to complete the process.
Now we have to repeat the same process for the Google Sheets API. So visit the APIs & Services -> Library menu again, select the Google Sheets API, and enable it by clicking the Enable button.
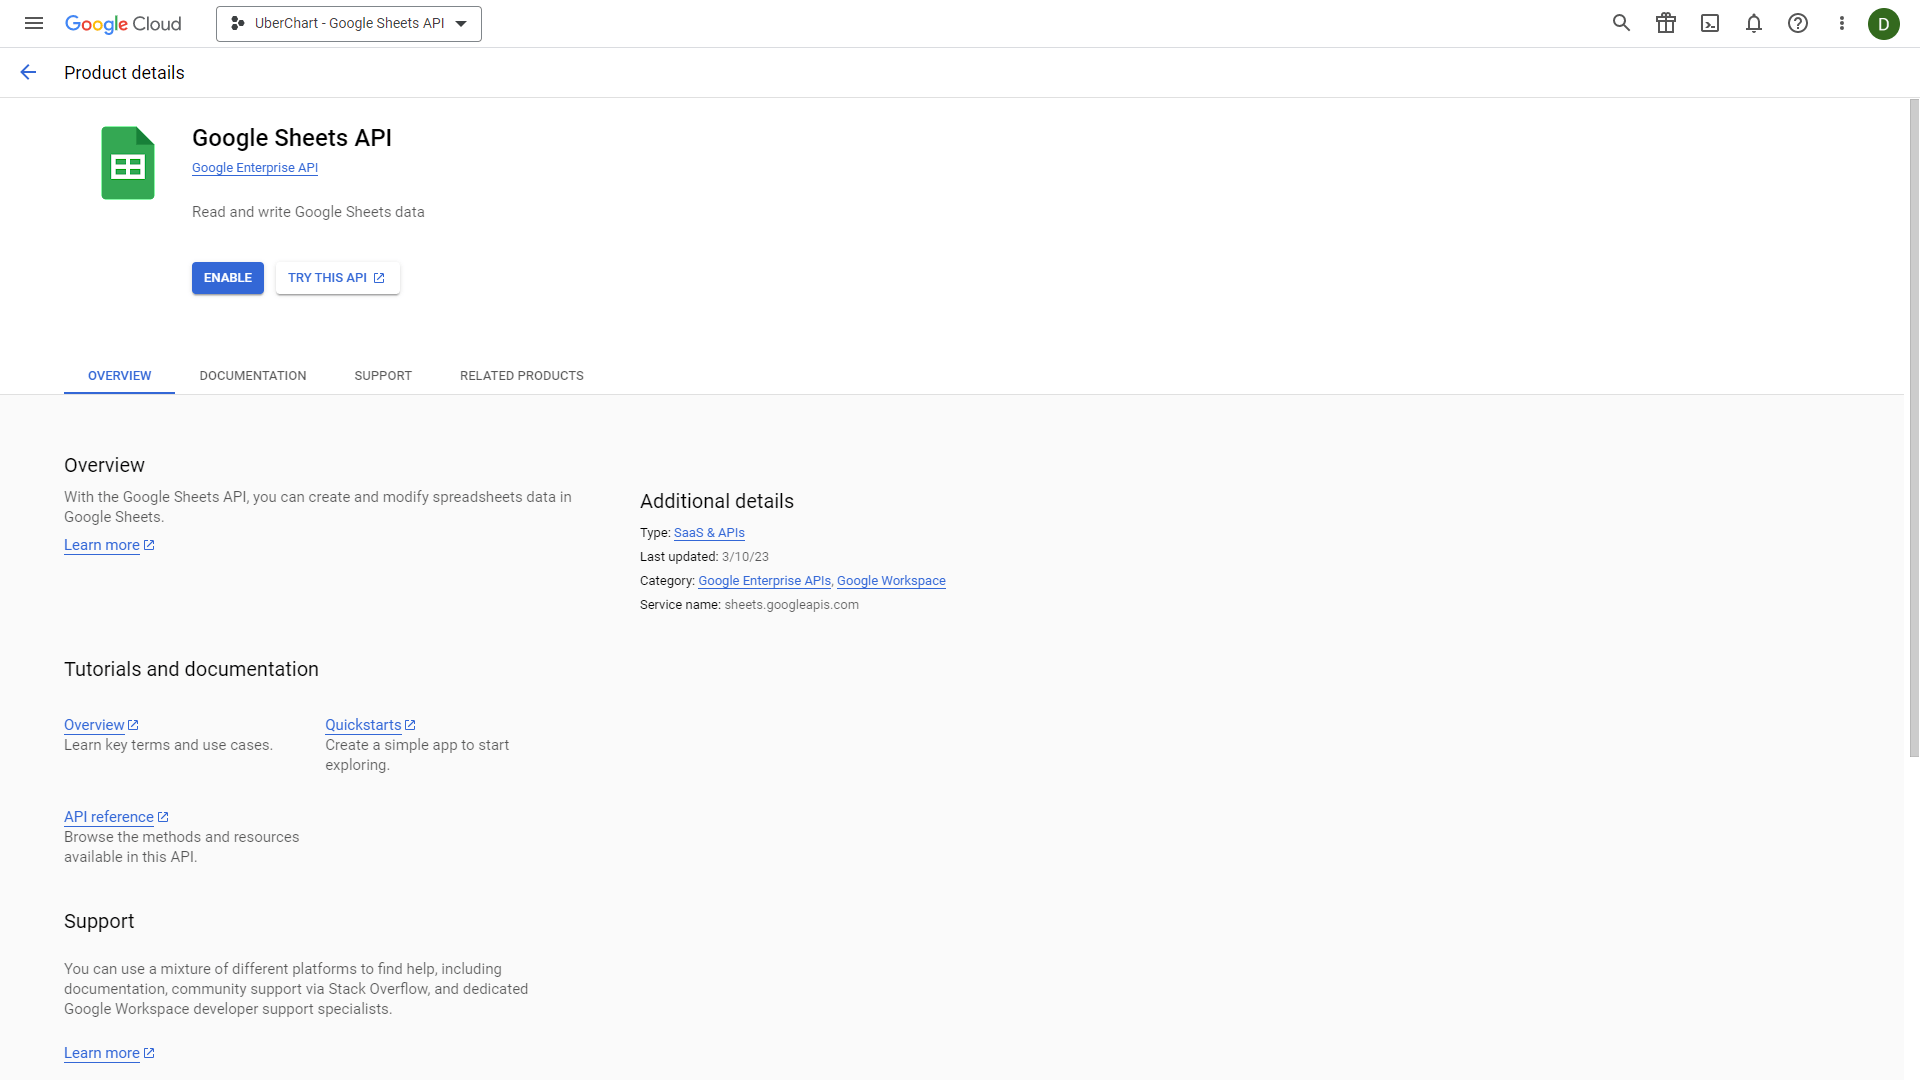
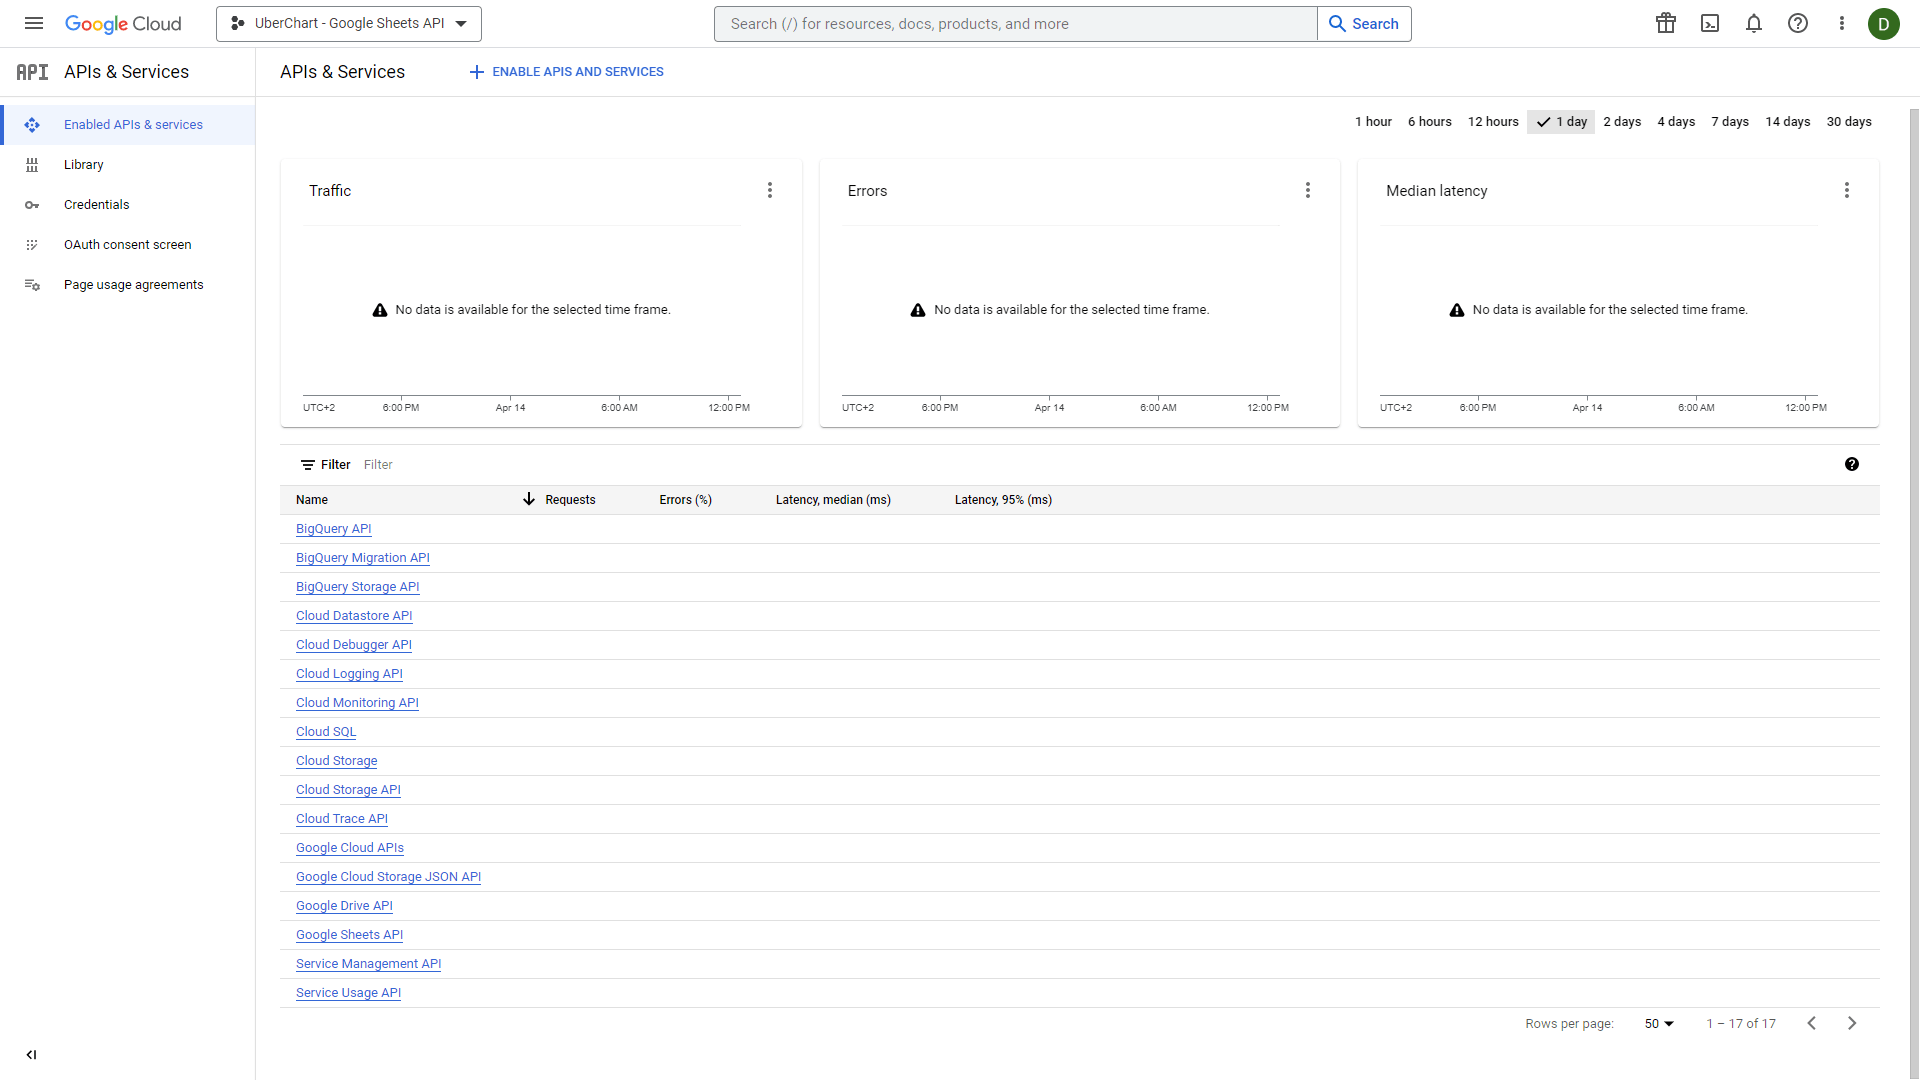
While on the Enabled APIs & services, scroll down to verify that both Google Drive API and the Google Sheets API are on the list.
Now enter the Credentials menu.
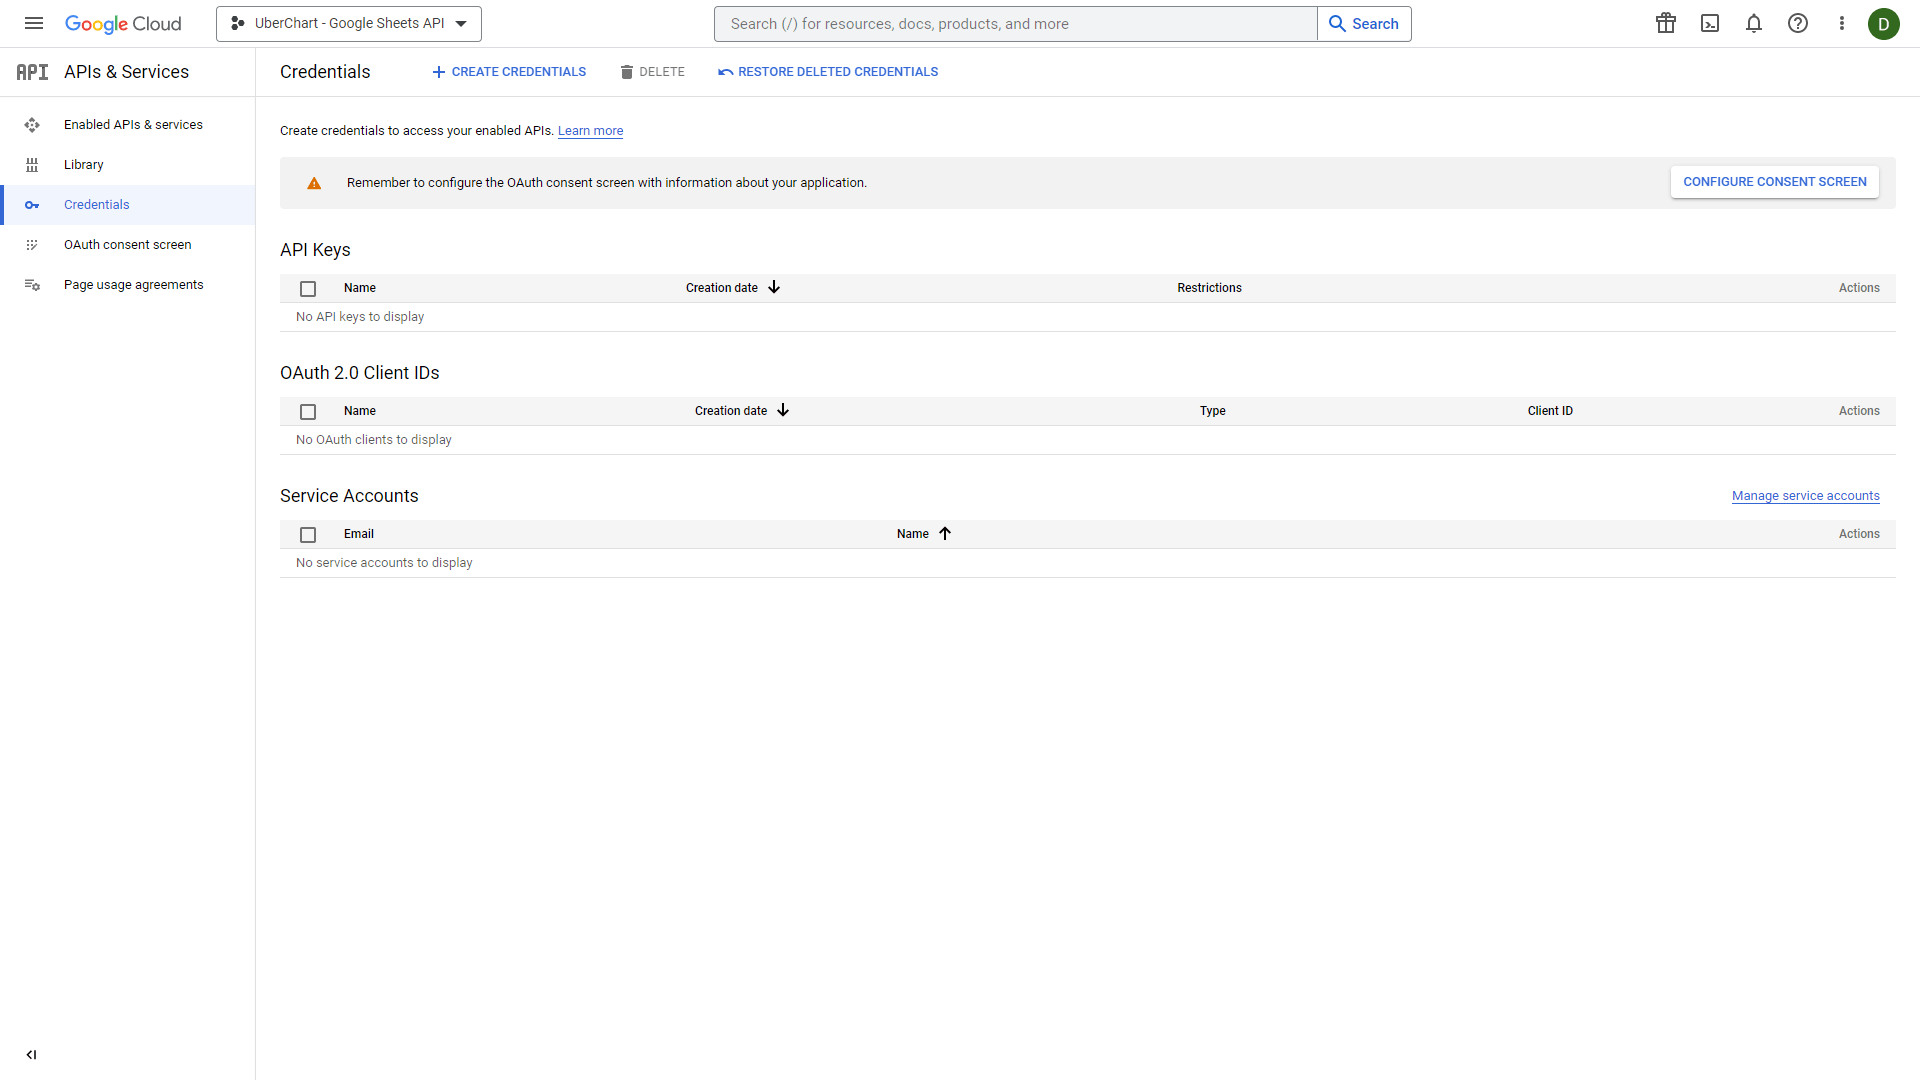
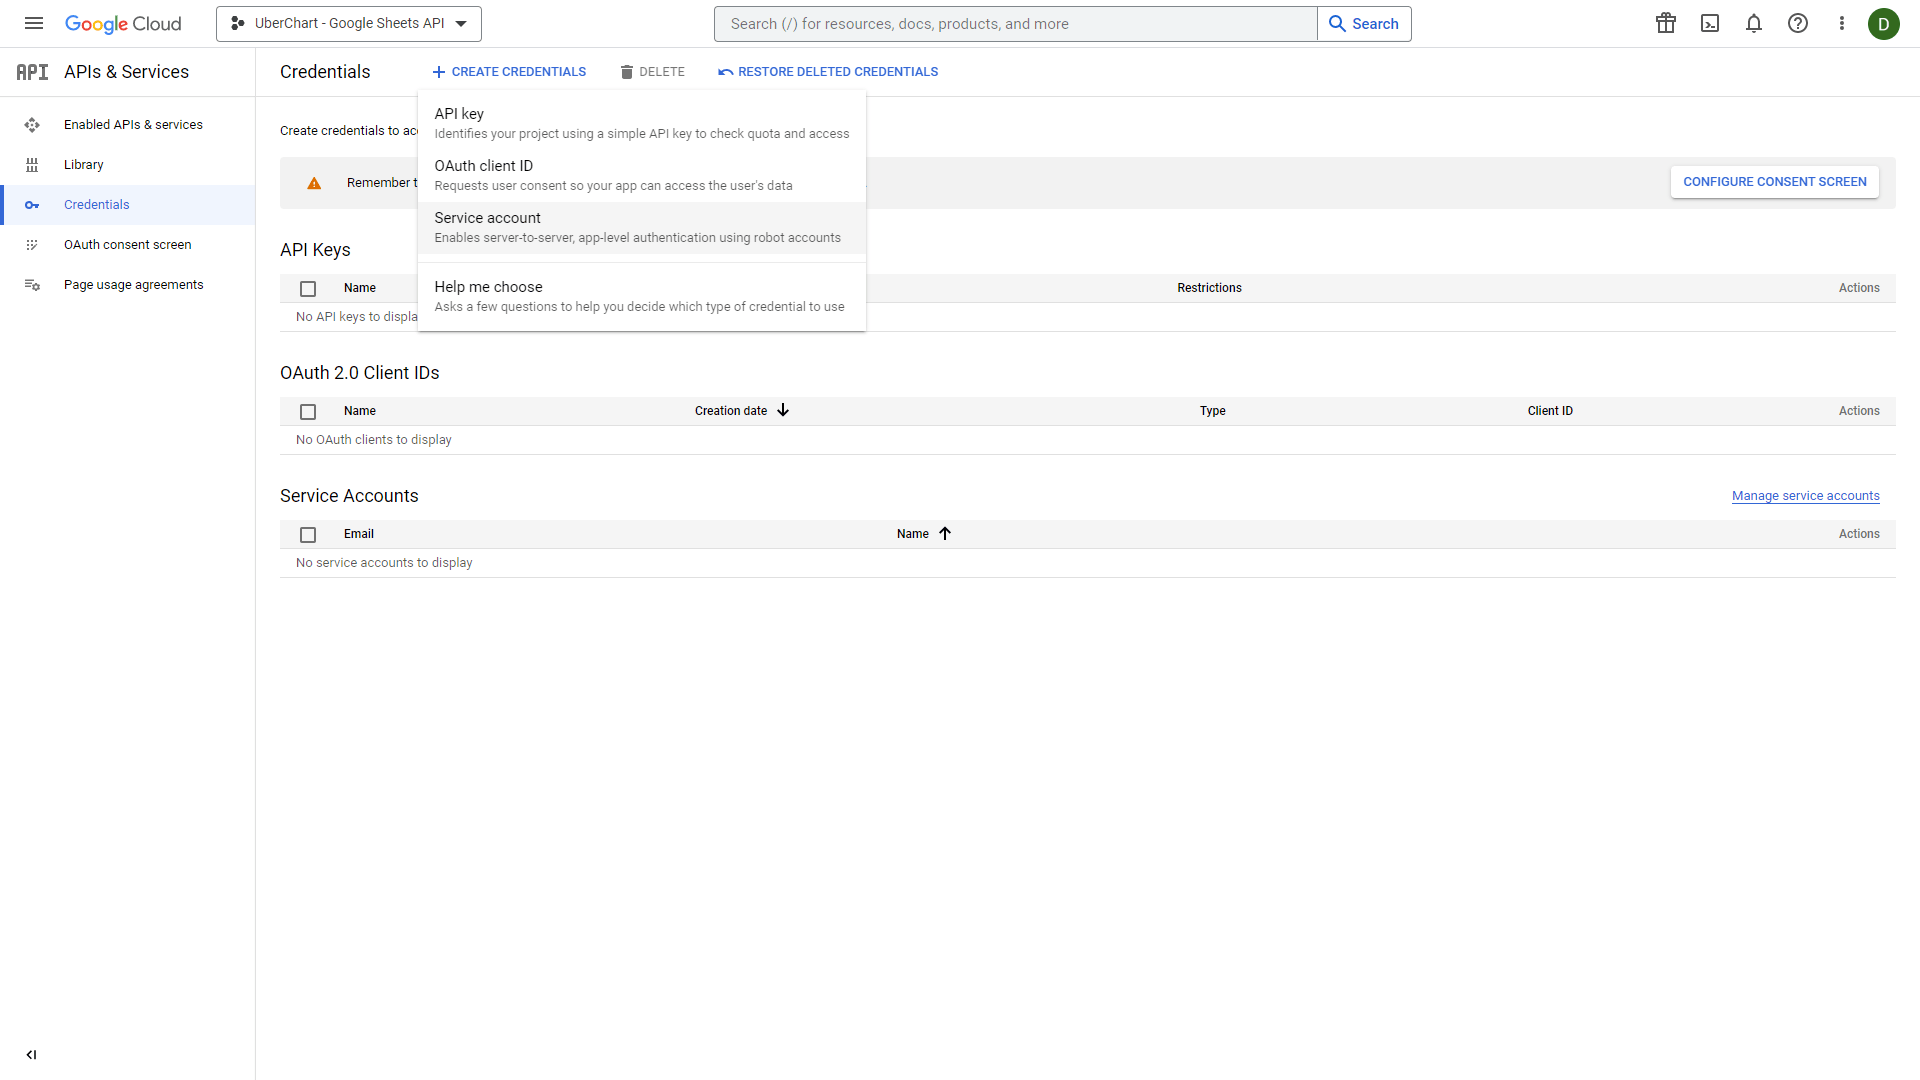
To create credentials for this project, click the Create Credentials button and select the Service Account dropdown menu item.
In the Service account details form, enter the Service account name. In our case, we set “UberChart connection to Google Sheets API”. Then click the Create and Continue button.

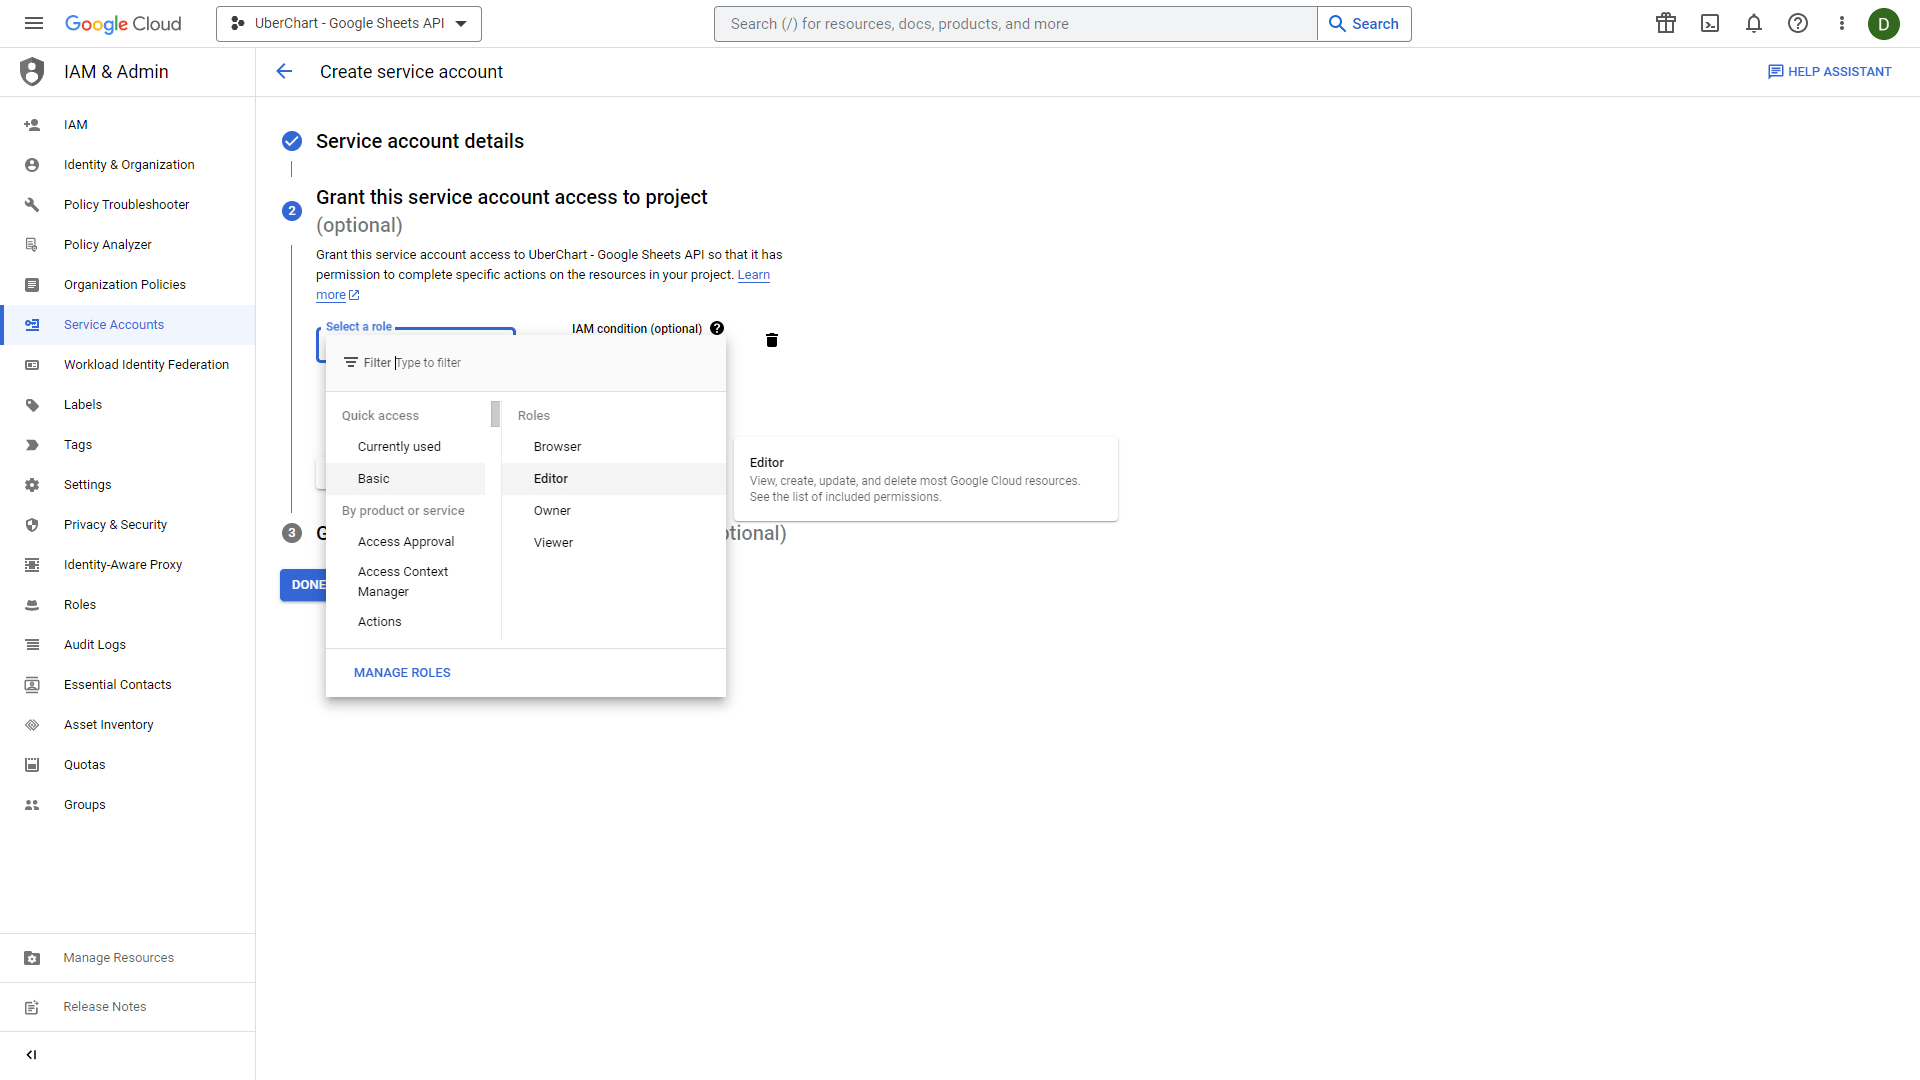
Then you have to select a role. Here set the Basic -> Editor role and click Continue.
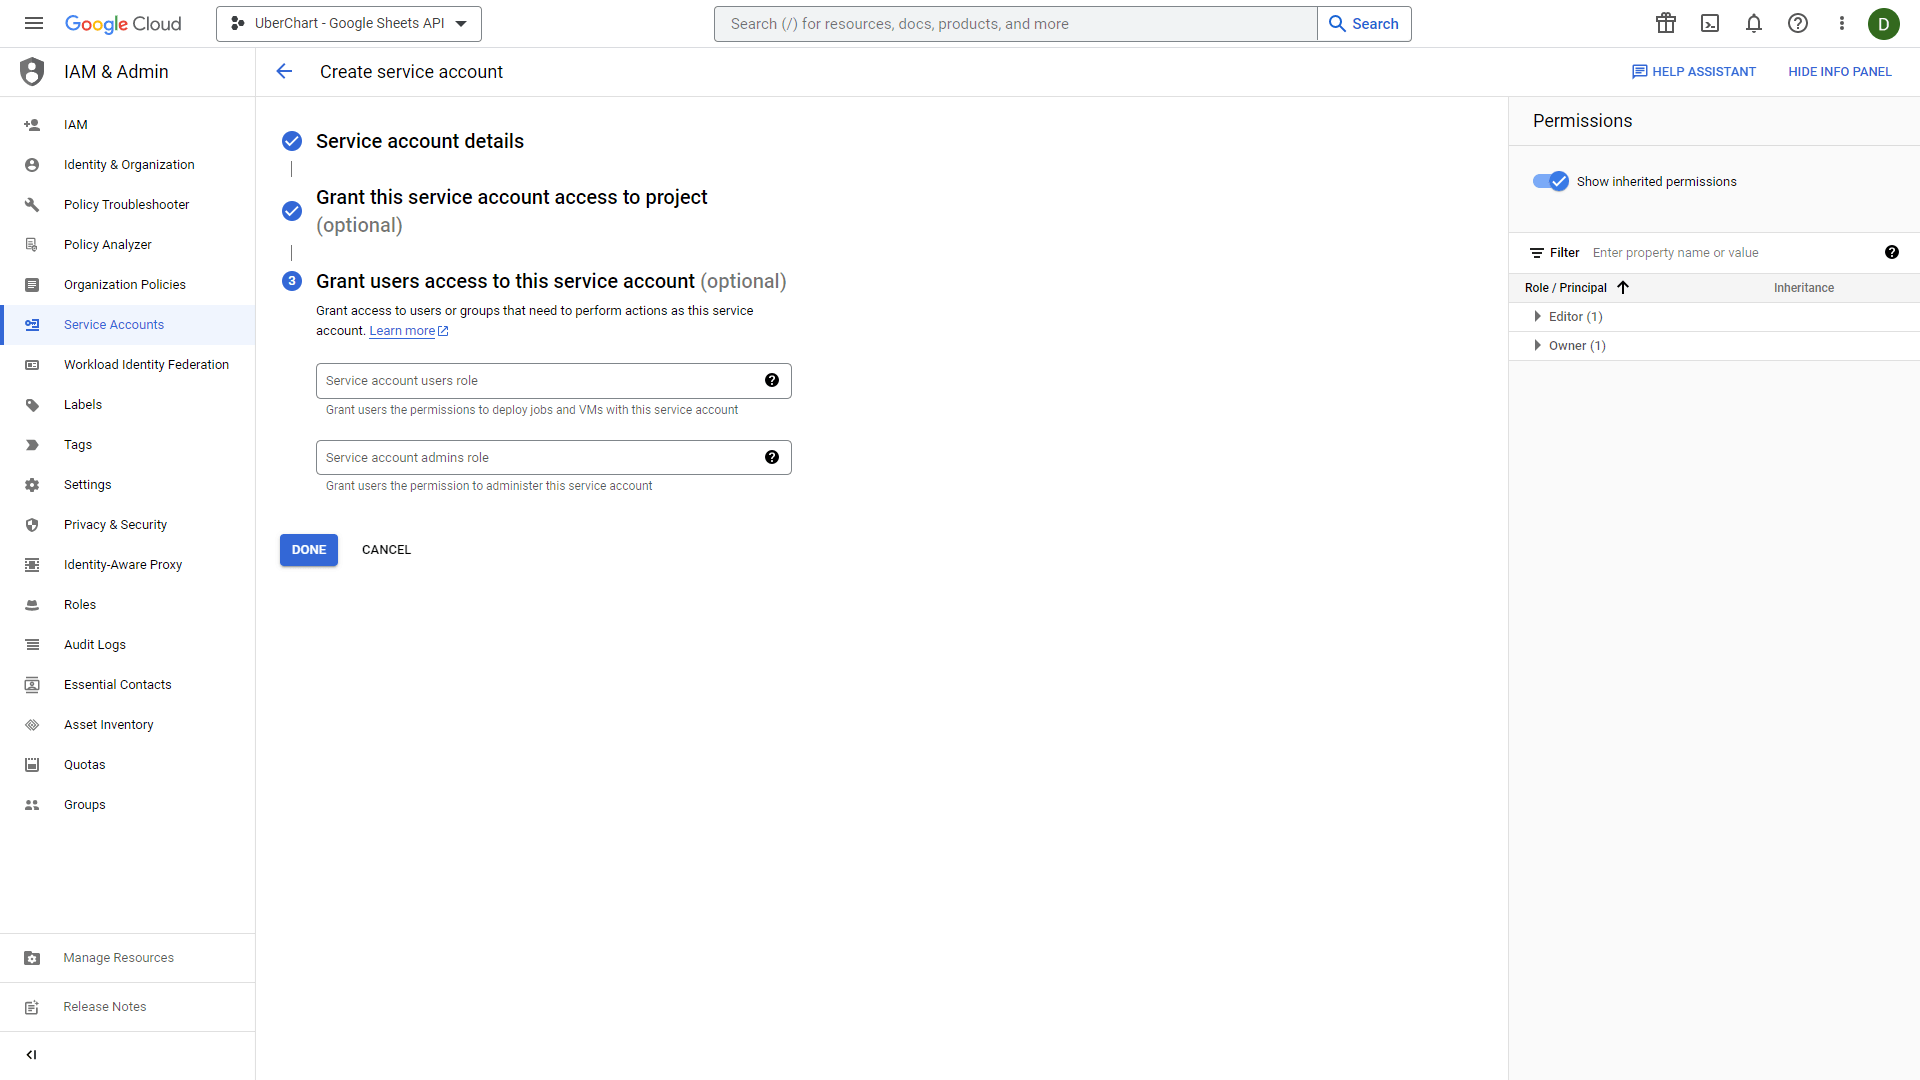
After that, click the Continue button to conclude the configuration of the Grant this service account access to project section.
Note that you can skip the configuration of the Grant users access to this service account section and conclude the process by clicking the Done button.
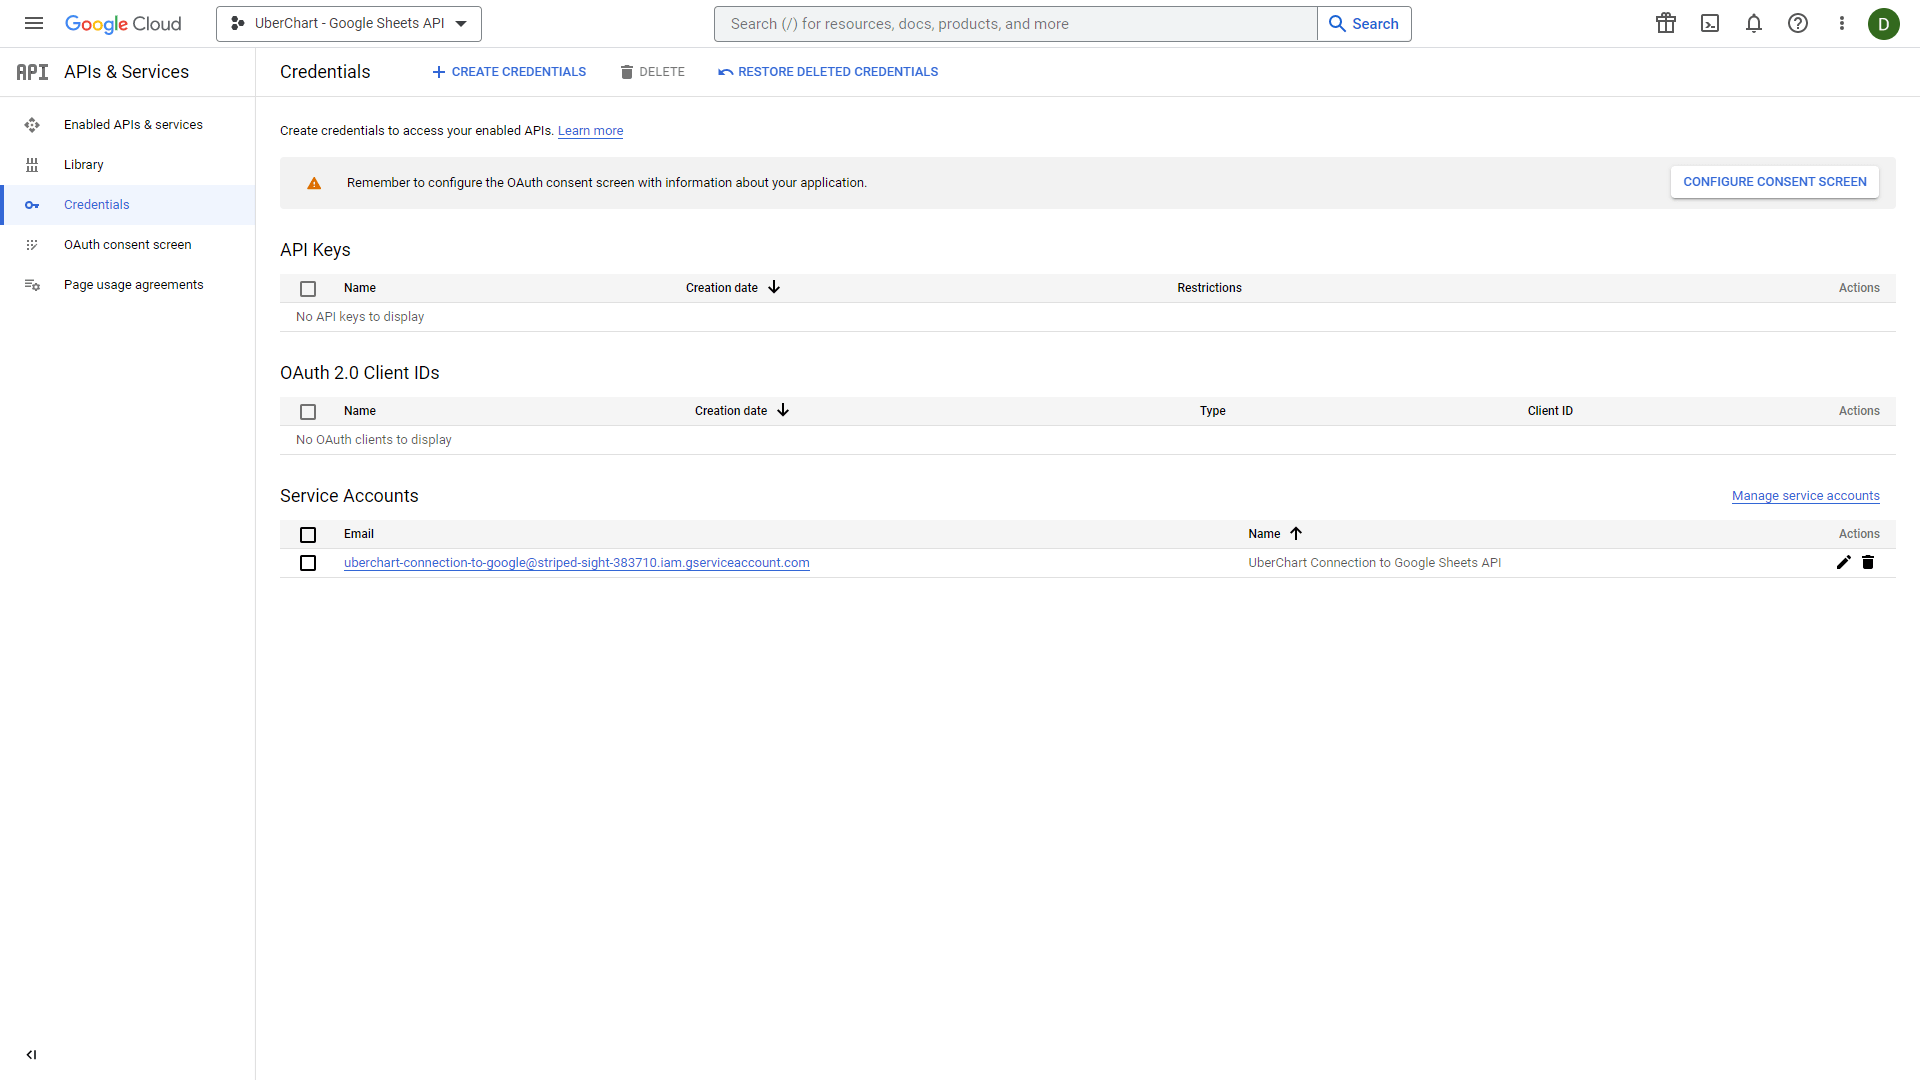
Click on the Service Account you just created.
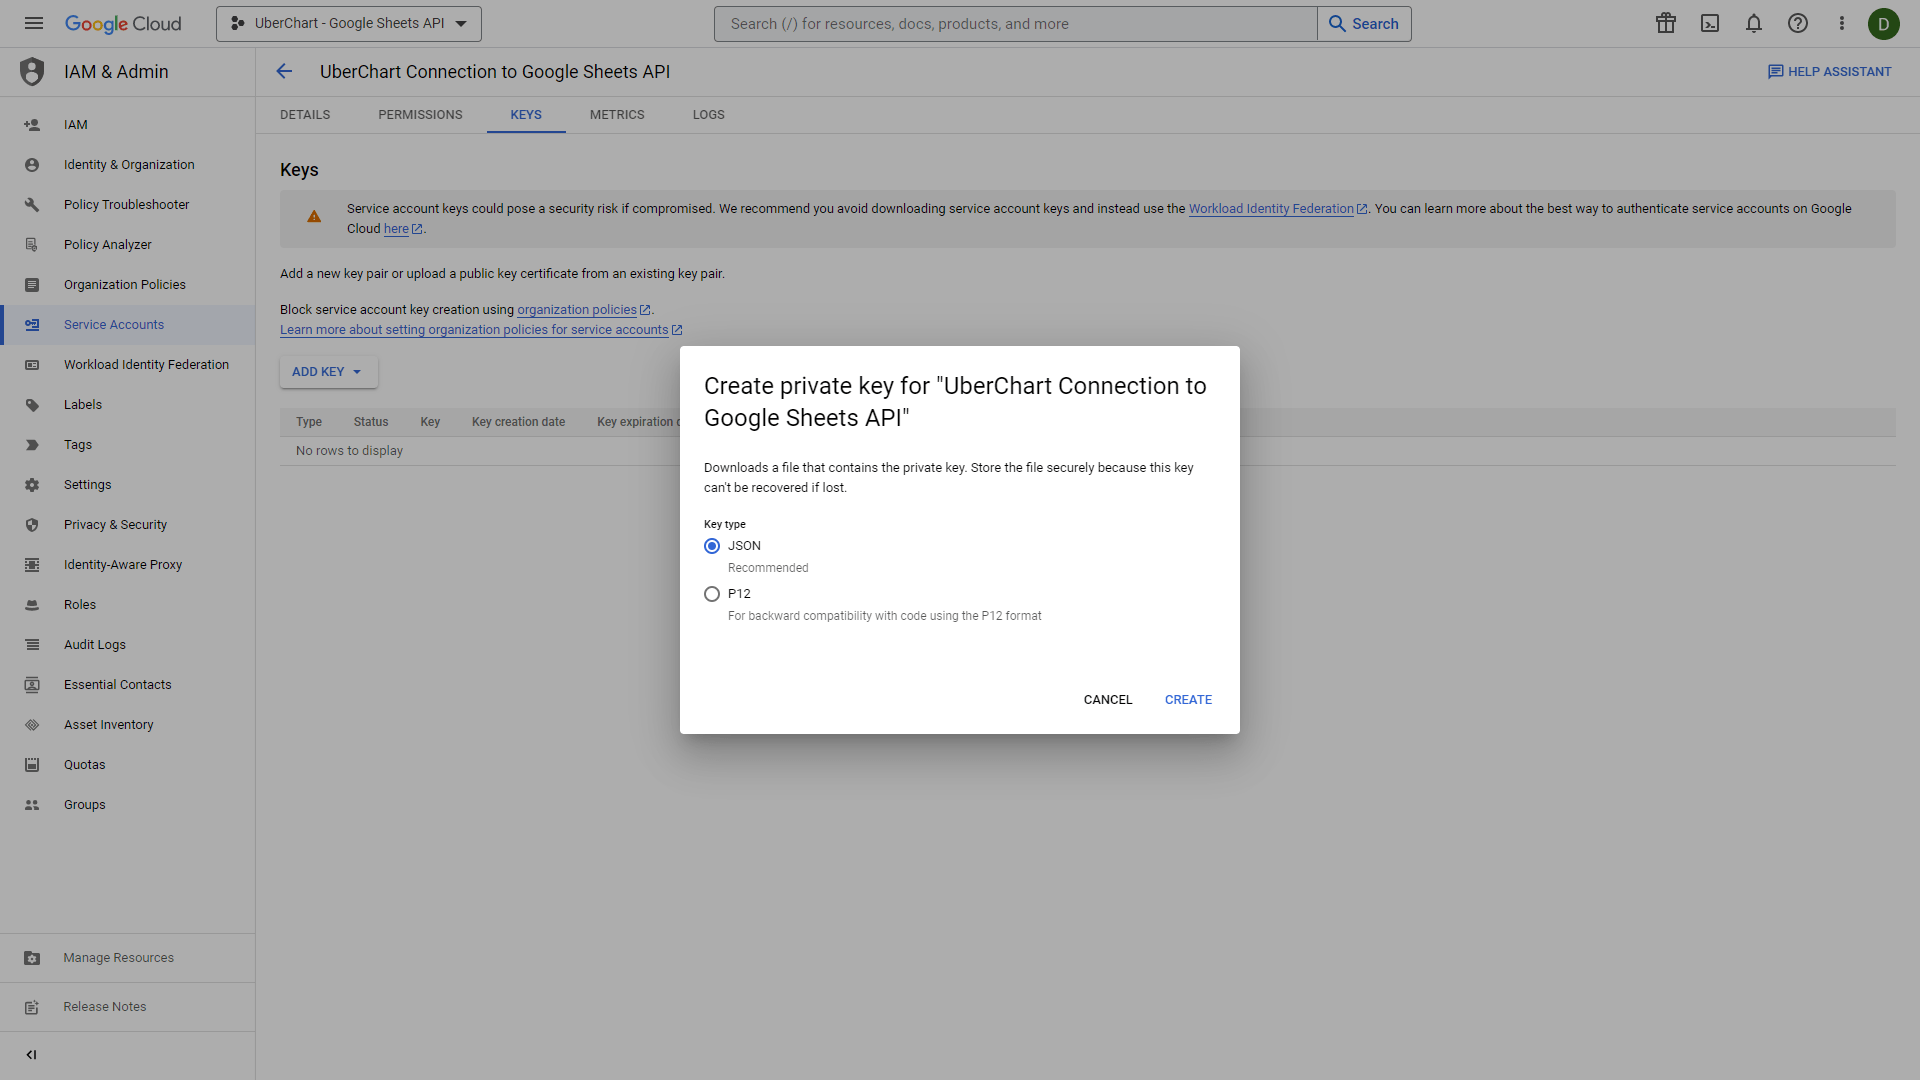
To create and download a key, select the Keys tab. Then click on the Add Key selector and choose the Create new key option.
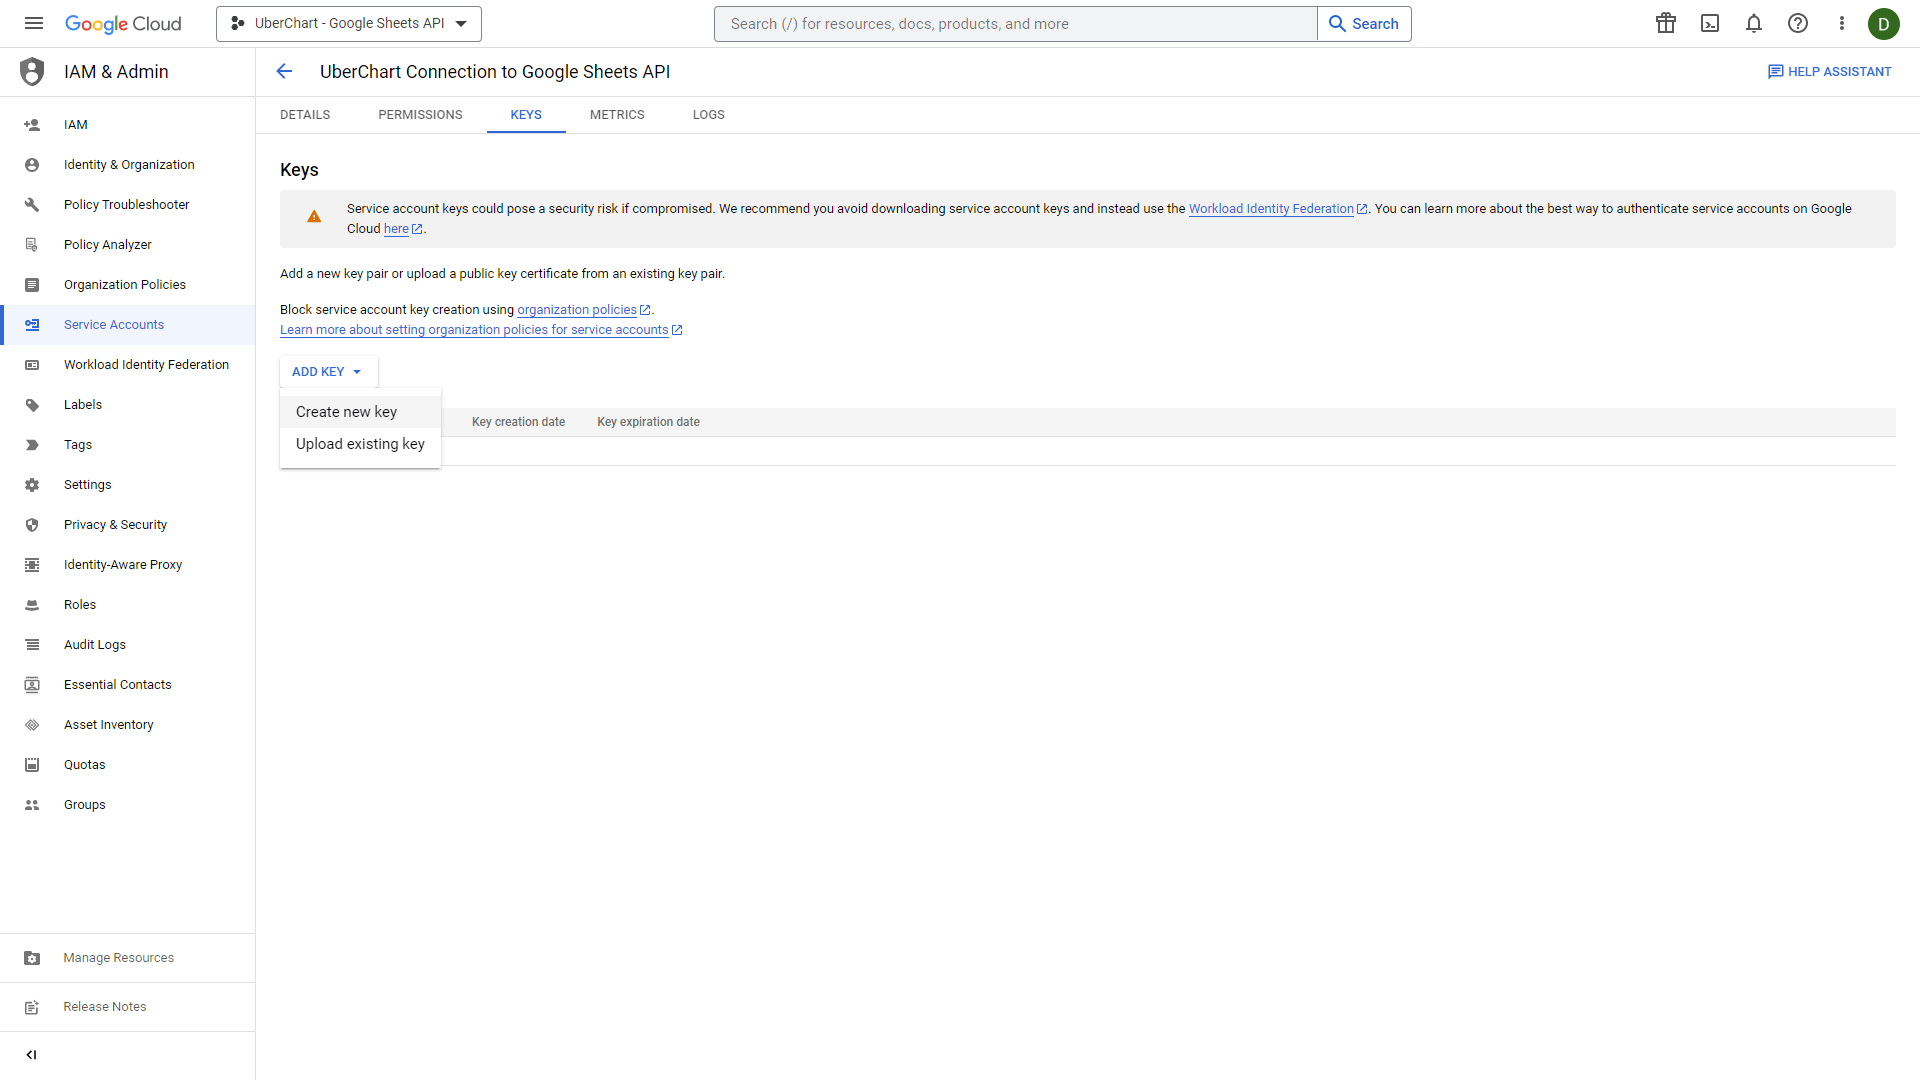
Here you can select the type of file that contains the private key. Select the “JSON” option and click Create.
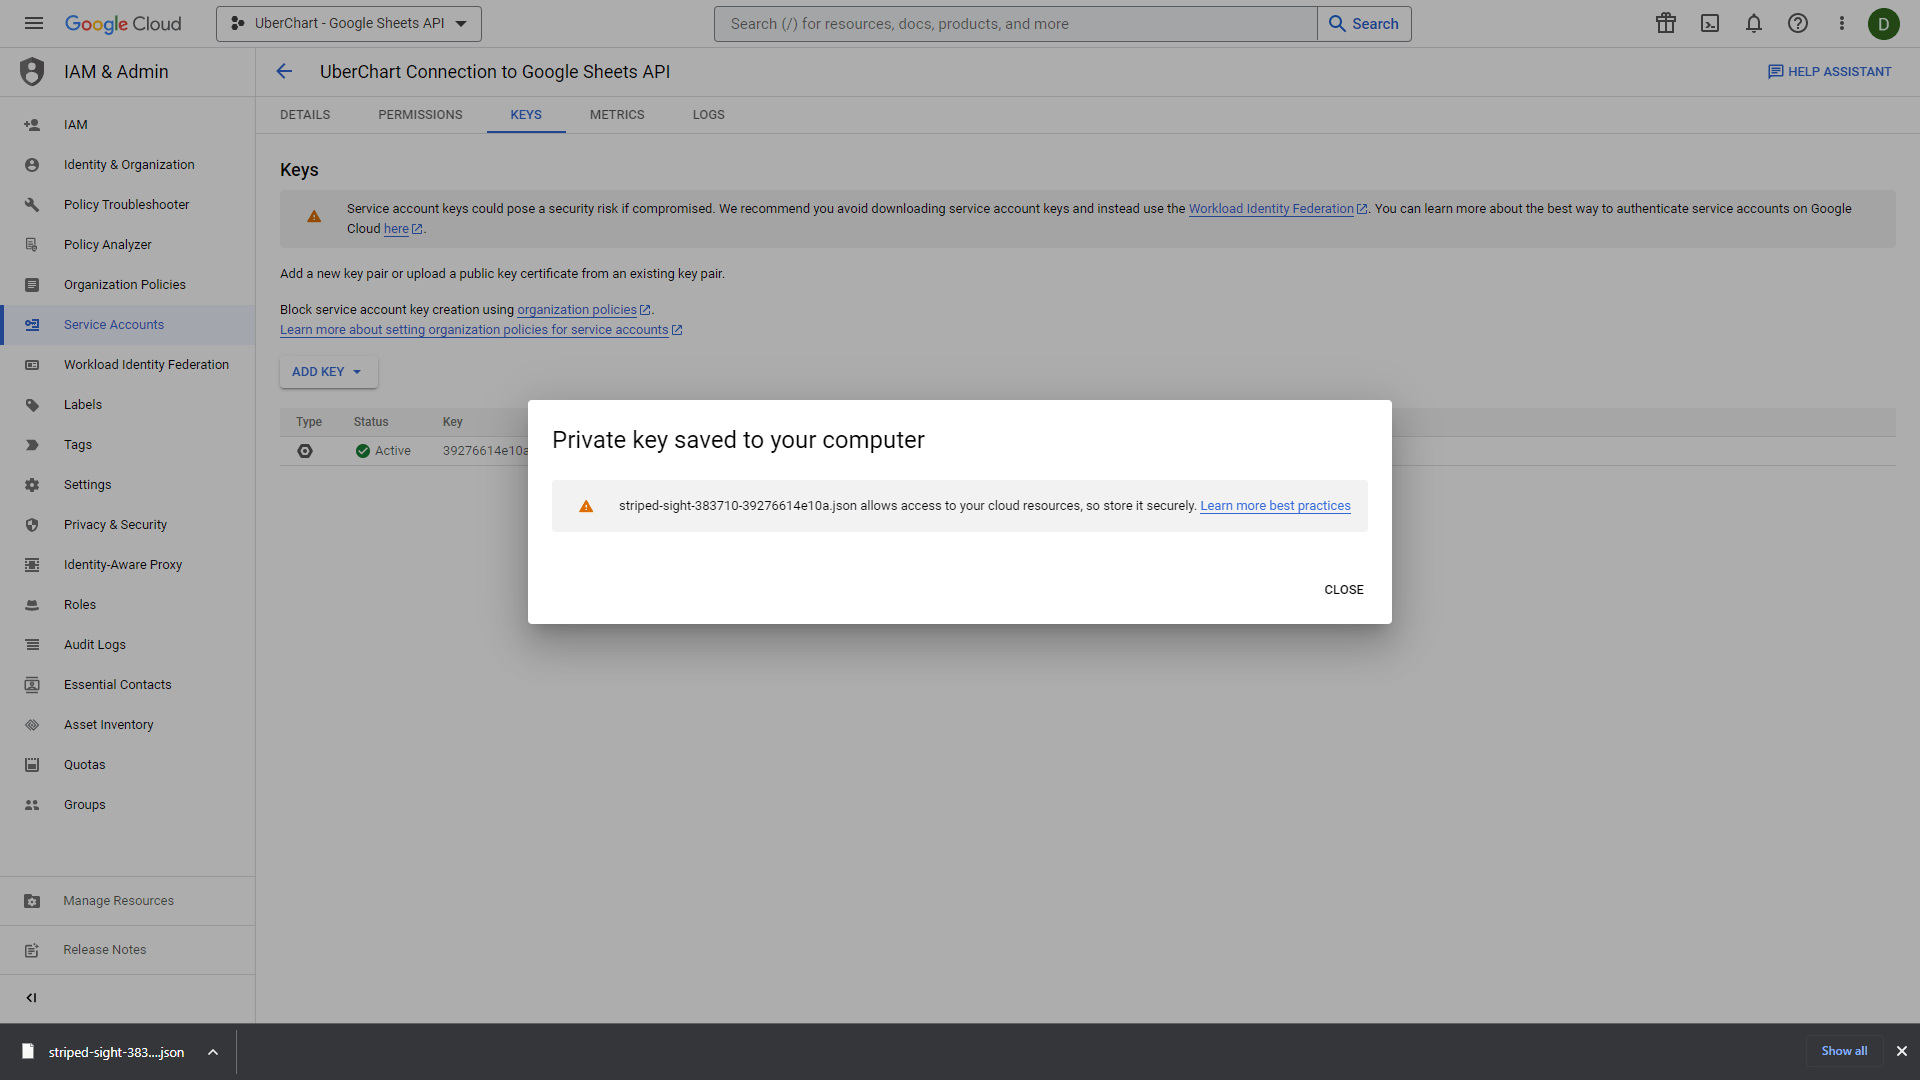
The private key will be downloaded to your computer as a JSON file.
2. Store the Google Sheets Private Key in the UberChart Plugin Settings
You now have a Google Sheets Private Key. It’s time to add it to the plugin settings.
The first step is to open the downloaded JSON file with your favorite code editor and copy its content to the clipboard.

Then visit the UberChart -> Options menu and paste the JSON data in the Google Sheets Private Key field.

You can now save the plugin settings by clicking the Save Changes button.
3. Configure the Specific Chart
The first step is to share the specific spreadsheet by clicking the Share button on the top right section of the screen and then selecting the General access -> Anyone with the link option.
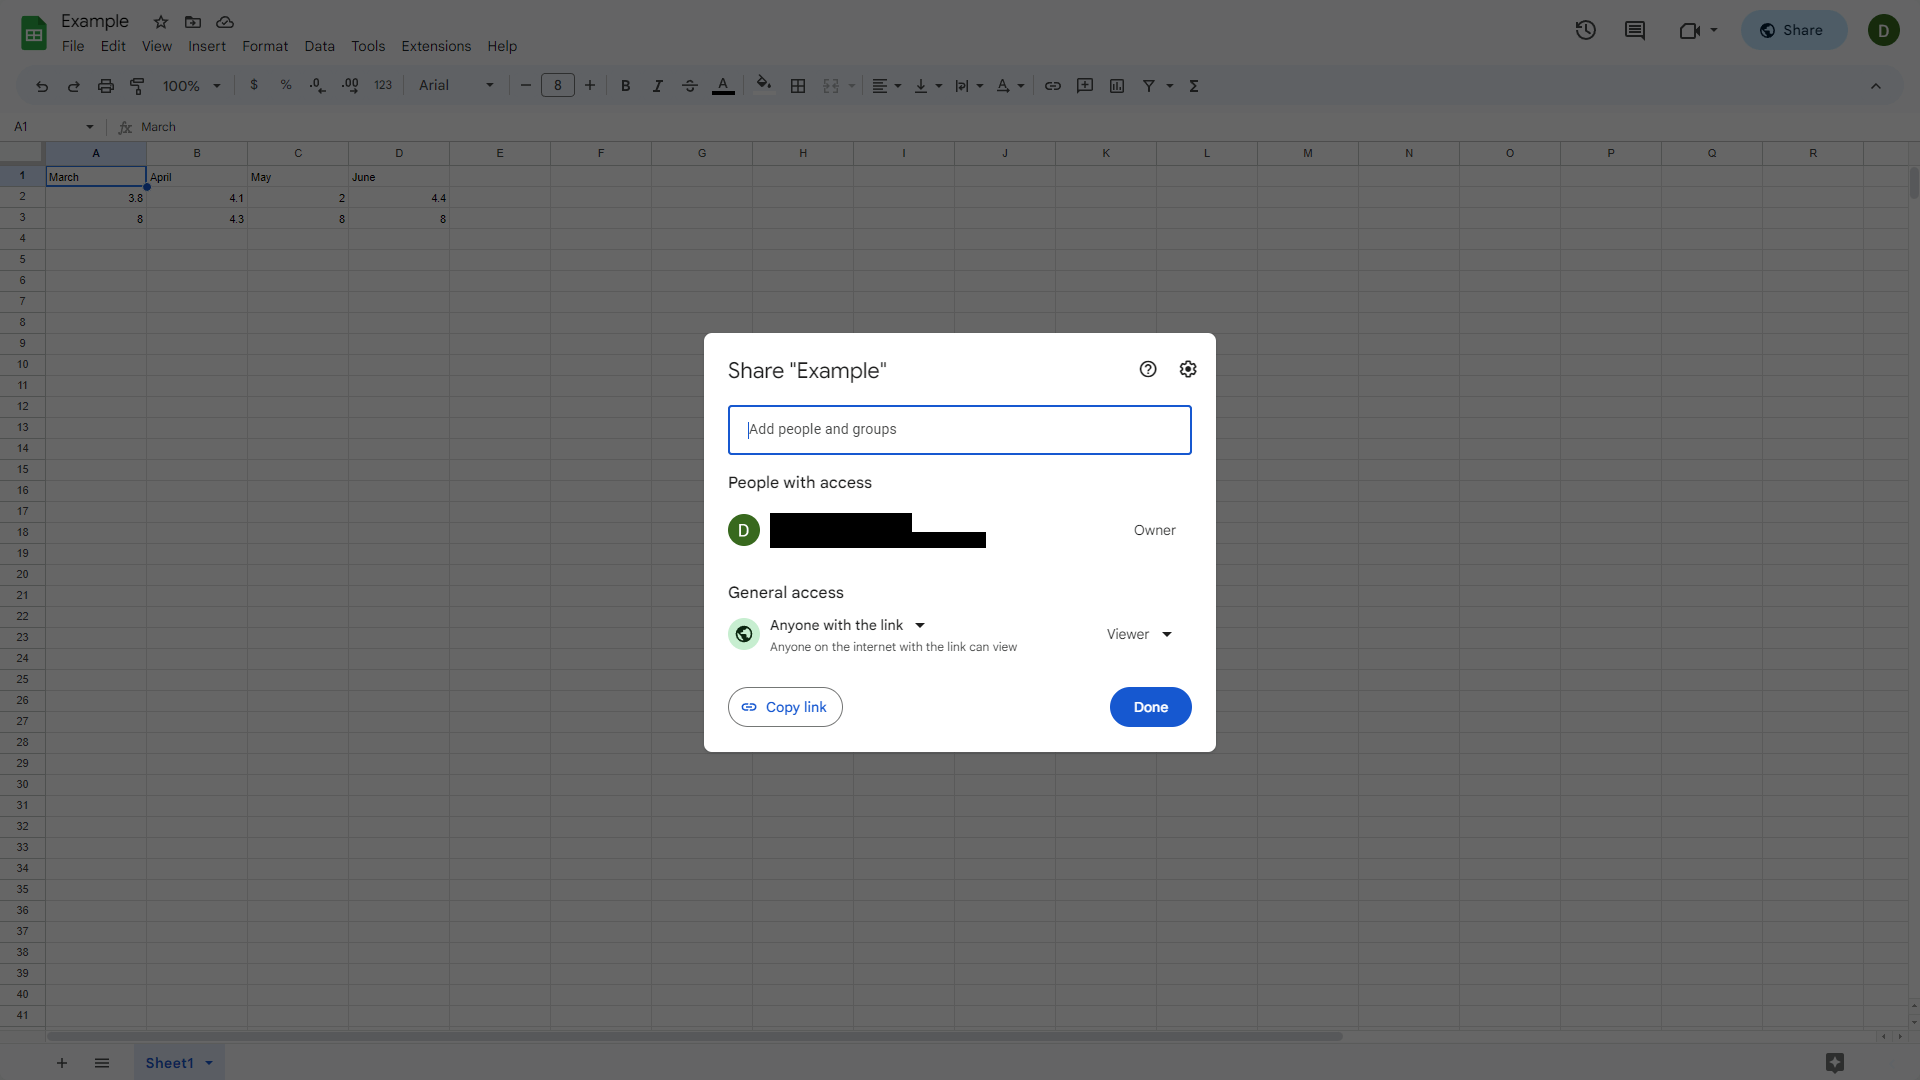
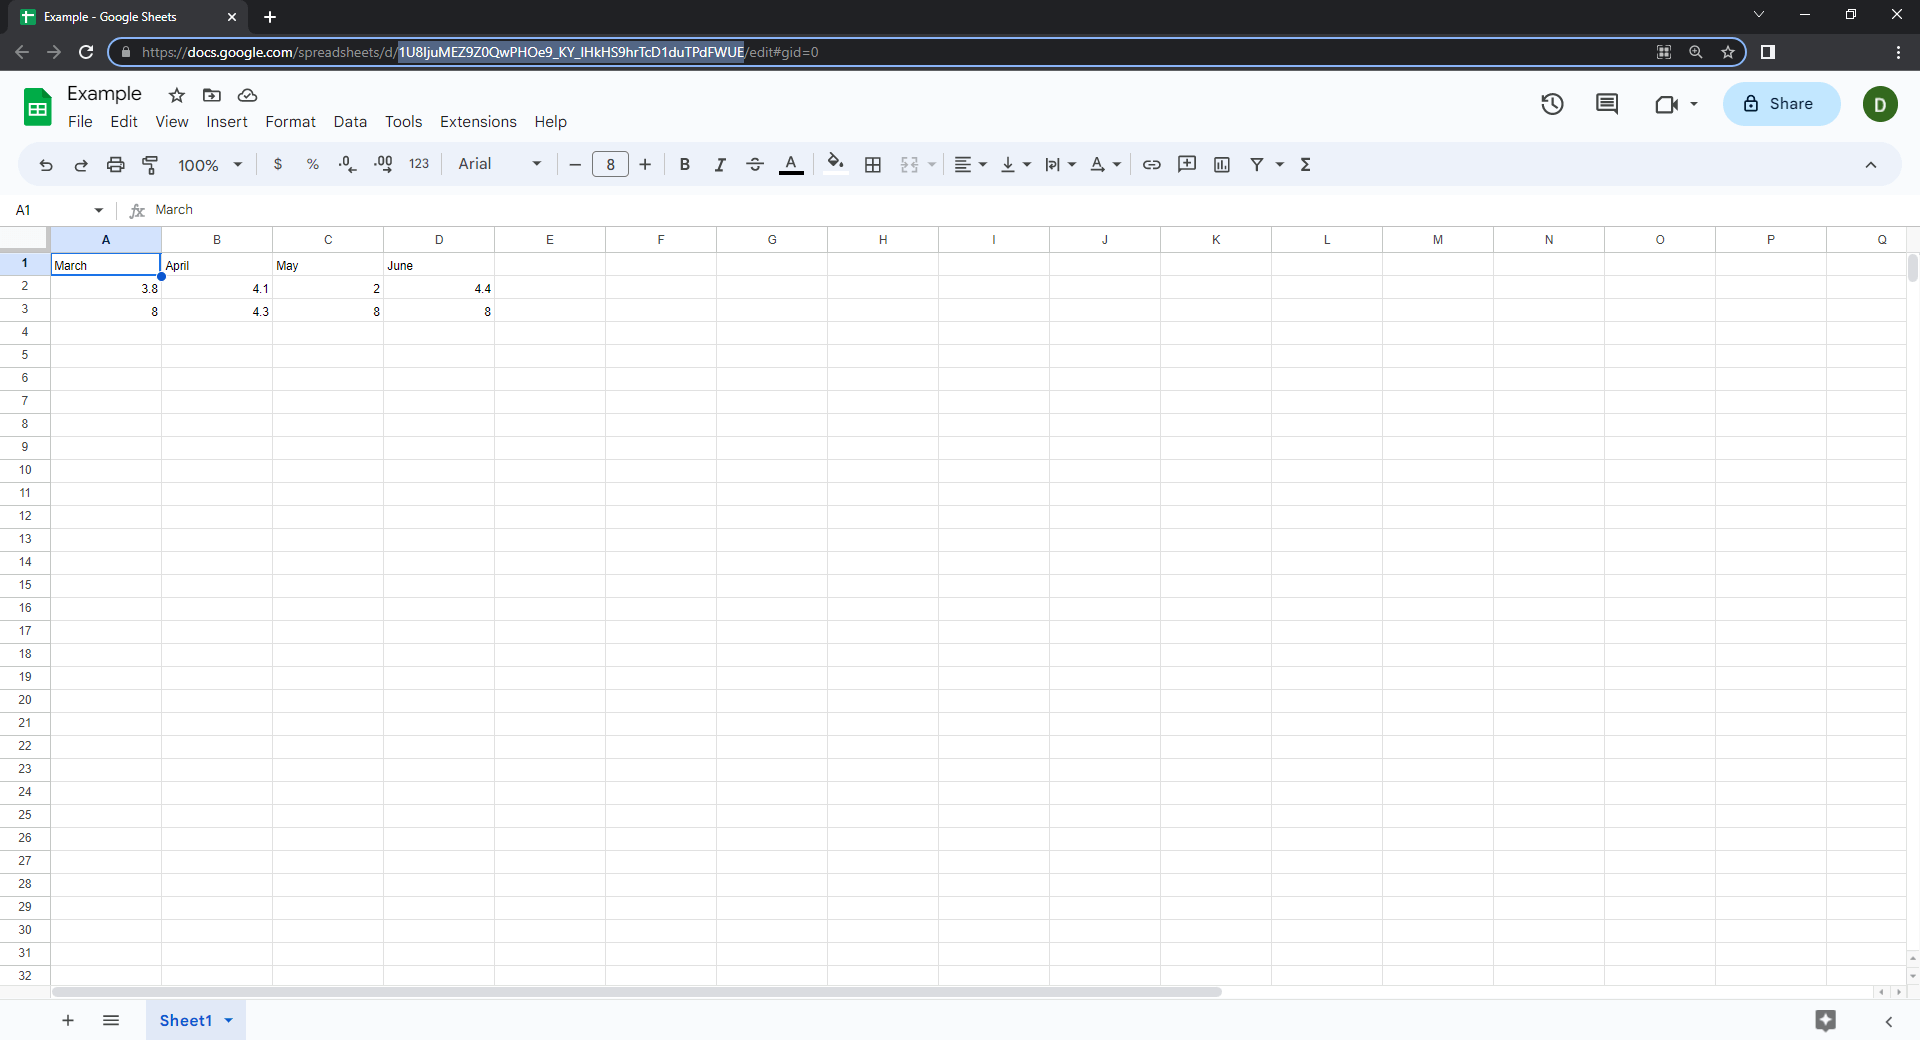
Then copy the Google Sheets Spreadsheet ID in your clipboard.
After that visit the UberChart -> Charts menu and edit the chart that you want to connect to a spreadsheet created with Google Sheets.
Here open the Source -> Type option and set “Google Sheets”. In the Source -> Google Sheets Spreadsheet ID option, set the Google Sheets Spreadsheet ID that you previously copied in your clipboard.

Click the Update Chart button to conclude the process.