Creating and Managing Auto Link Rules
This page walks through every field available when creating or editing an Auto Link Rule, organized by the four sections of the form: Main, Link Attributes, Apply To, and Advanced Matching.
Creating a New Rule
Open the Auto Link Rules menu and click Add New. This opens the rule creation form.
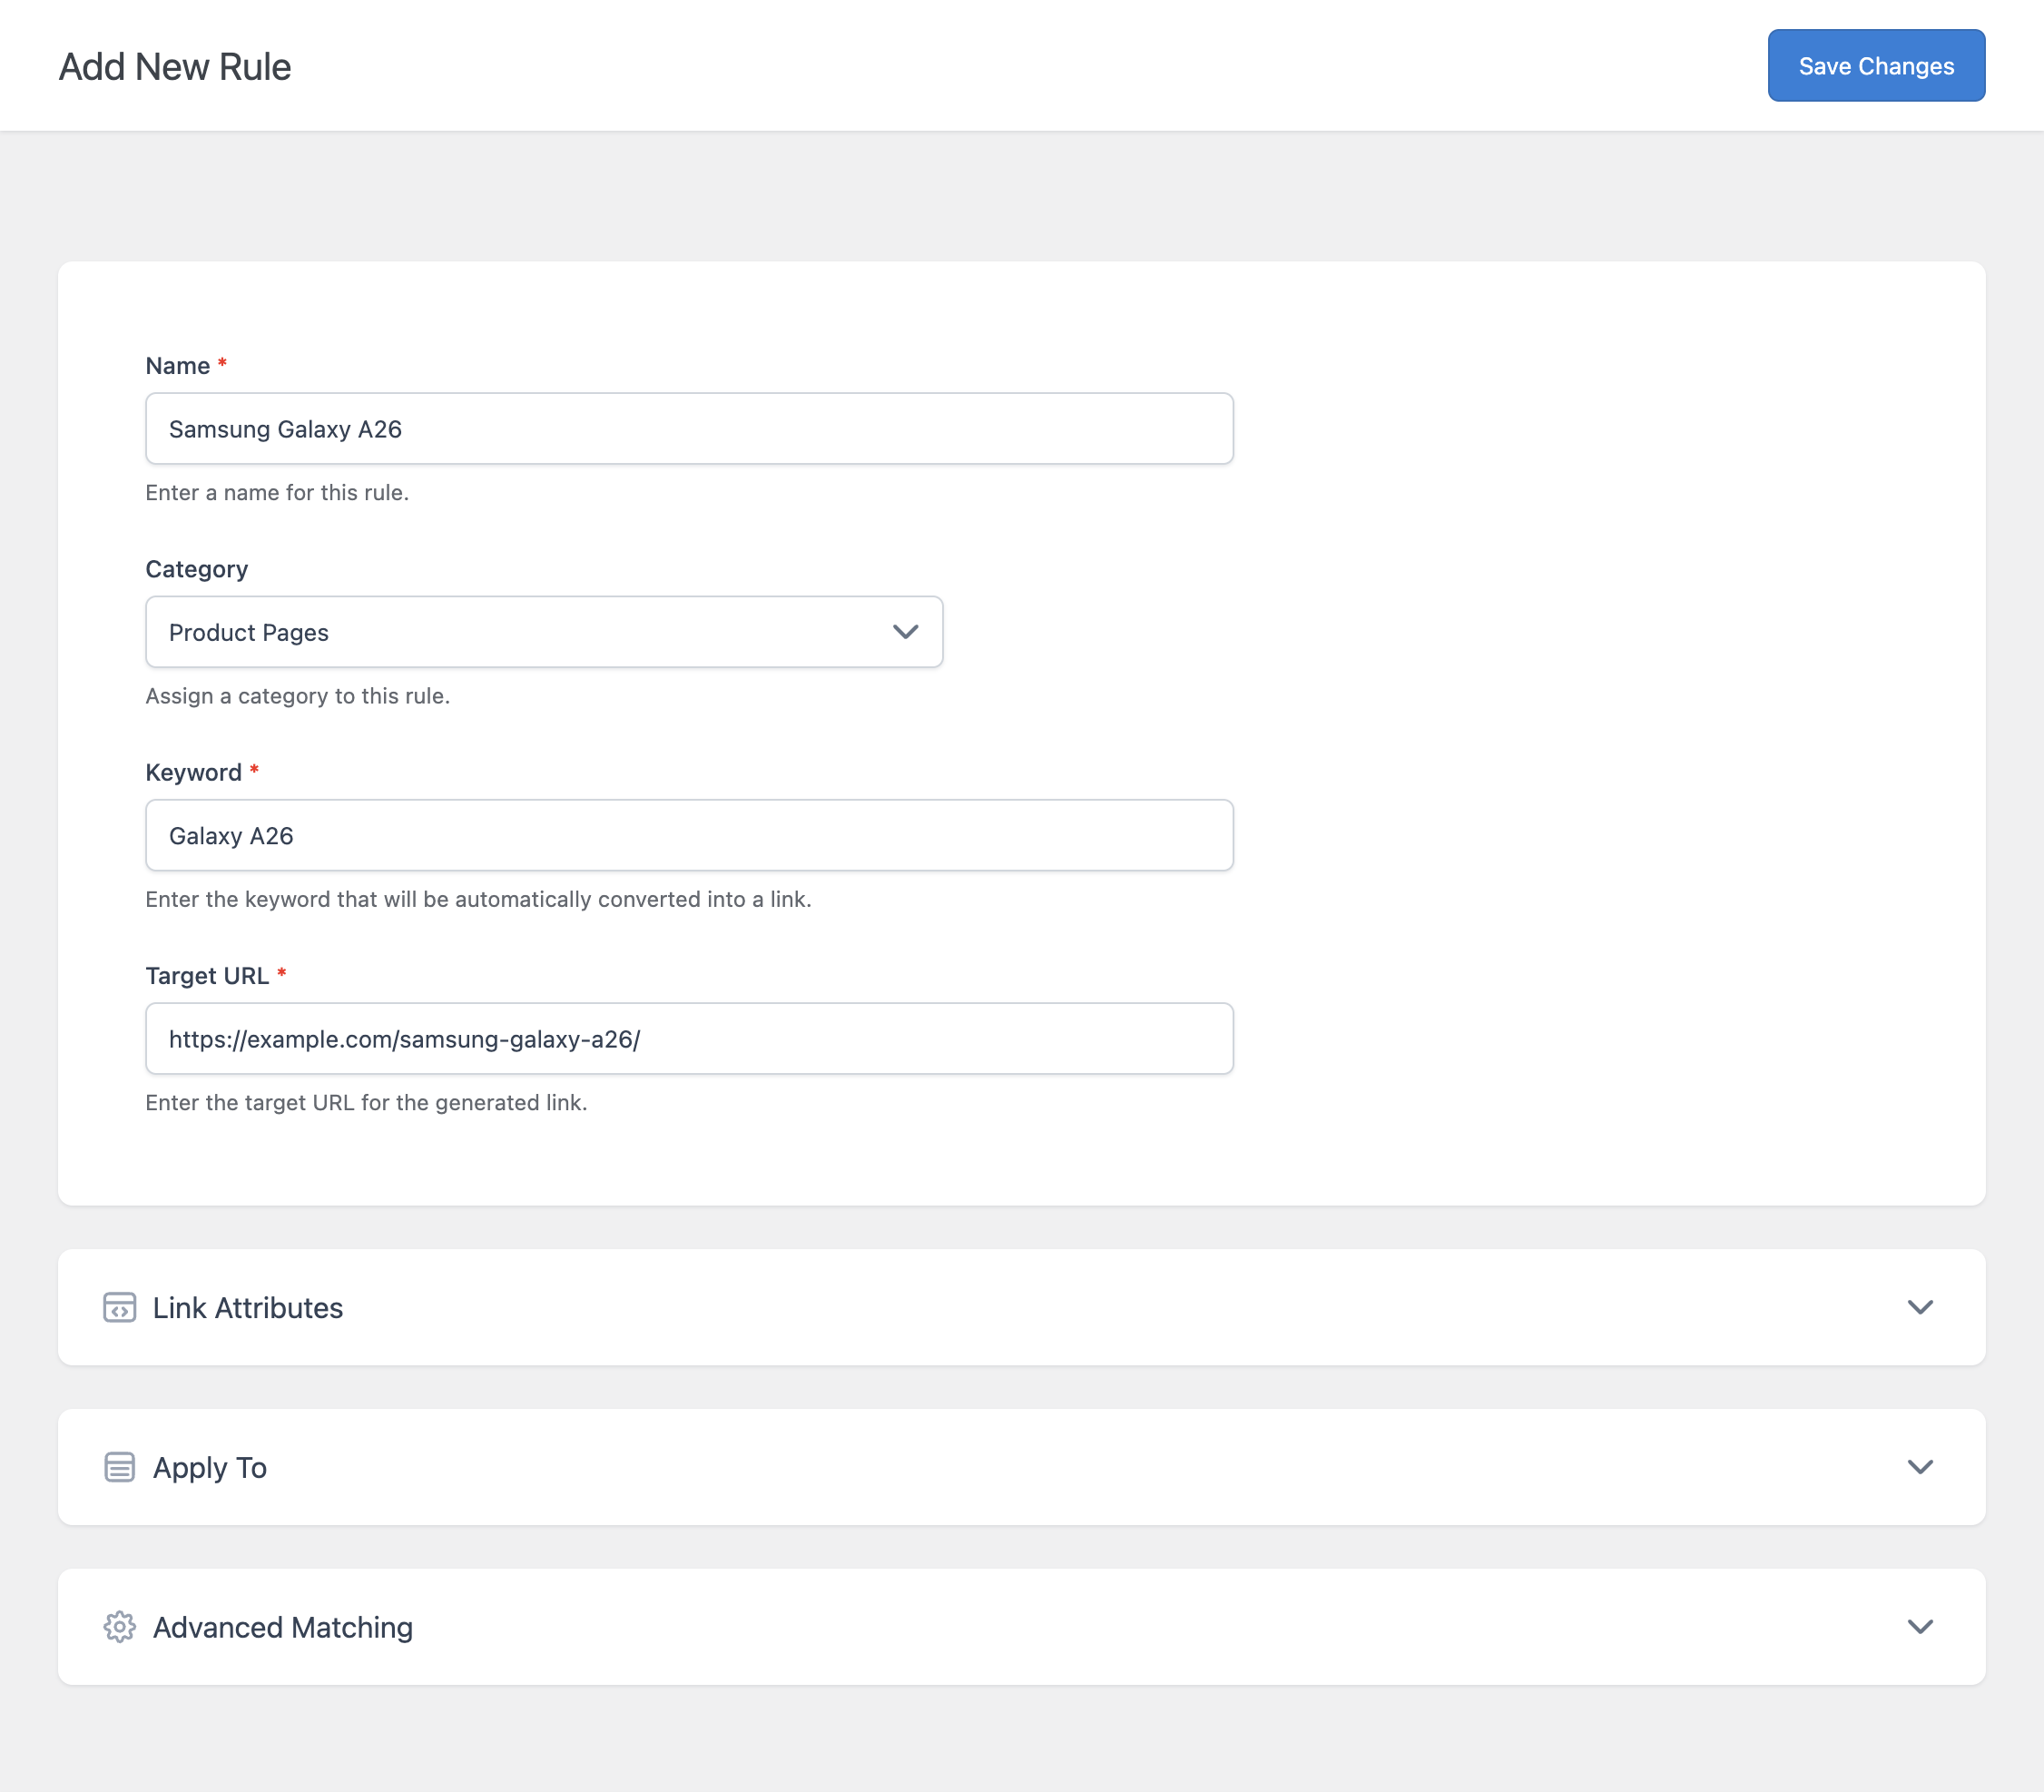
Main Section
- Name – A label used to identify this rule in the Auto Link Rules list. This is for your own reference and does not affect the generated link.
- Category – Optionally assign this rule to a Category, used to organize related rules together. Select None if you don’t need to categorize it.
- Keyword – The exact text the plugin looks for in your content. Every matching occurrence is converted into a link, subject to the conditions defined in the other sections.
- Target URL – The destination the generated link points to. This can be an internal page or an external URL.
Link Attributes Section
This section controls the HTML attributes applied to the generated link.
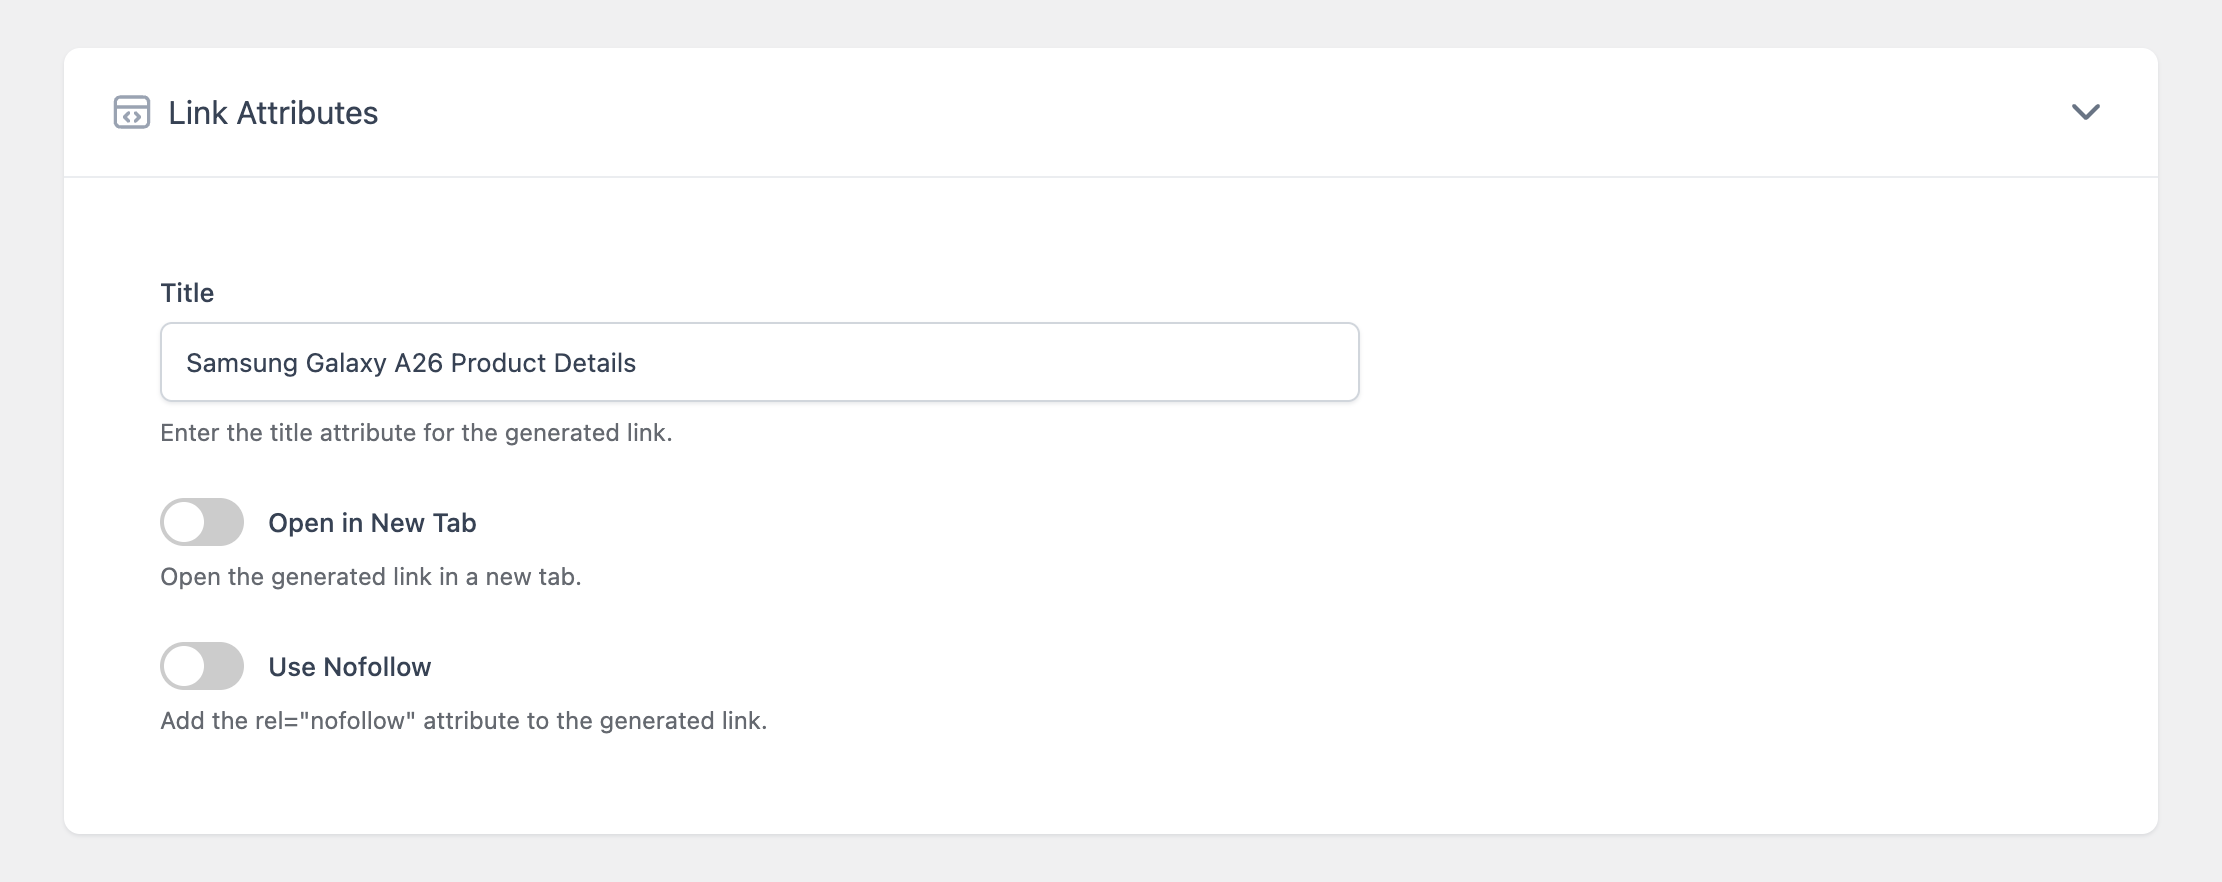
- Title – Sets the
titleattribute on the generated link, shown as a tooltip when visitors hover over it. Optional. - Open in New Tab – When enabled, adds
target="_blank"so the link opens in a new browser tab. - Use Nofollow – When enabled, adds
rel="nofollow"to the generated link. Commonly used for affiliate or sponsored links.
Apply To Section
This section restricts where the rule is allowed to apply. Leaving a field empty applies the rule everywhere that field could otherwise restrict.
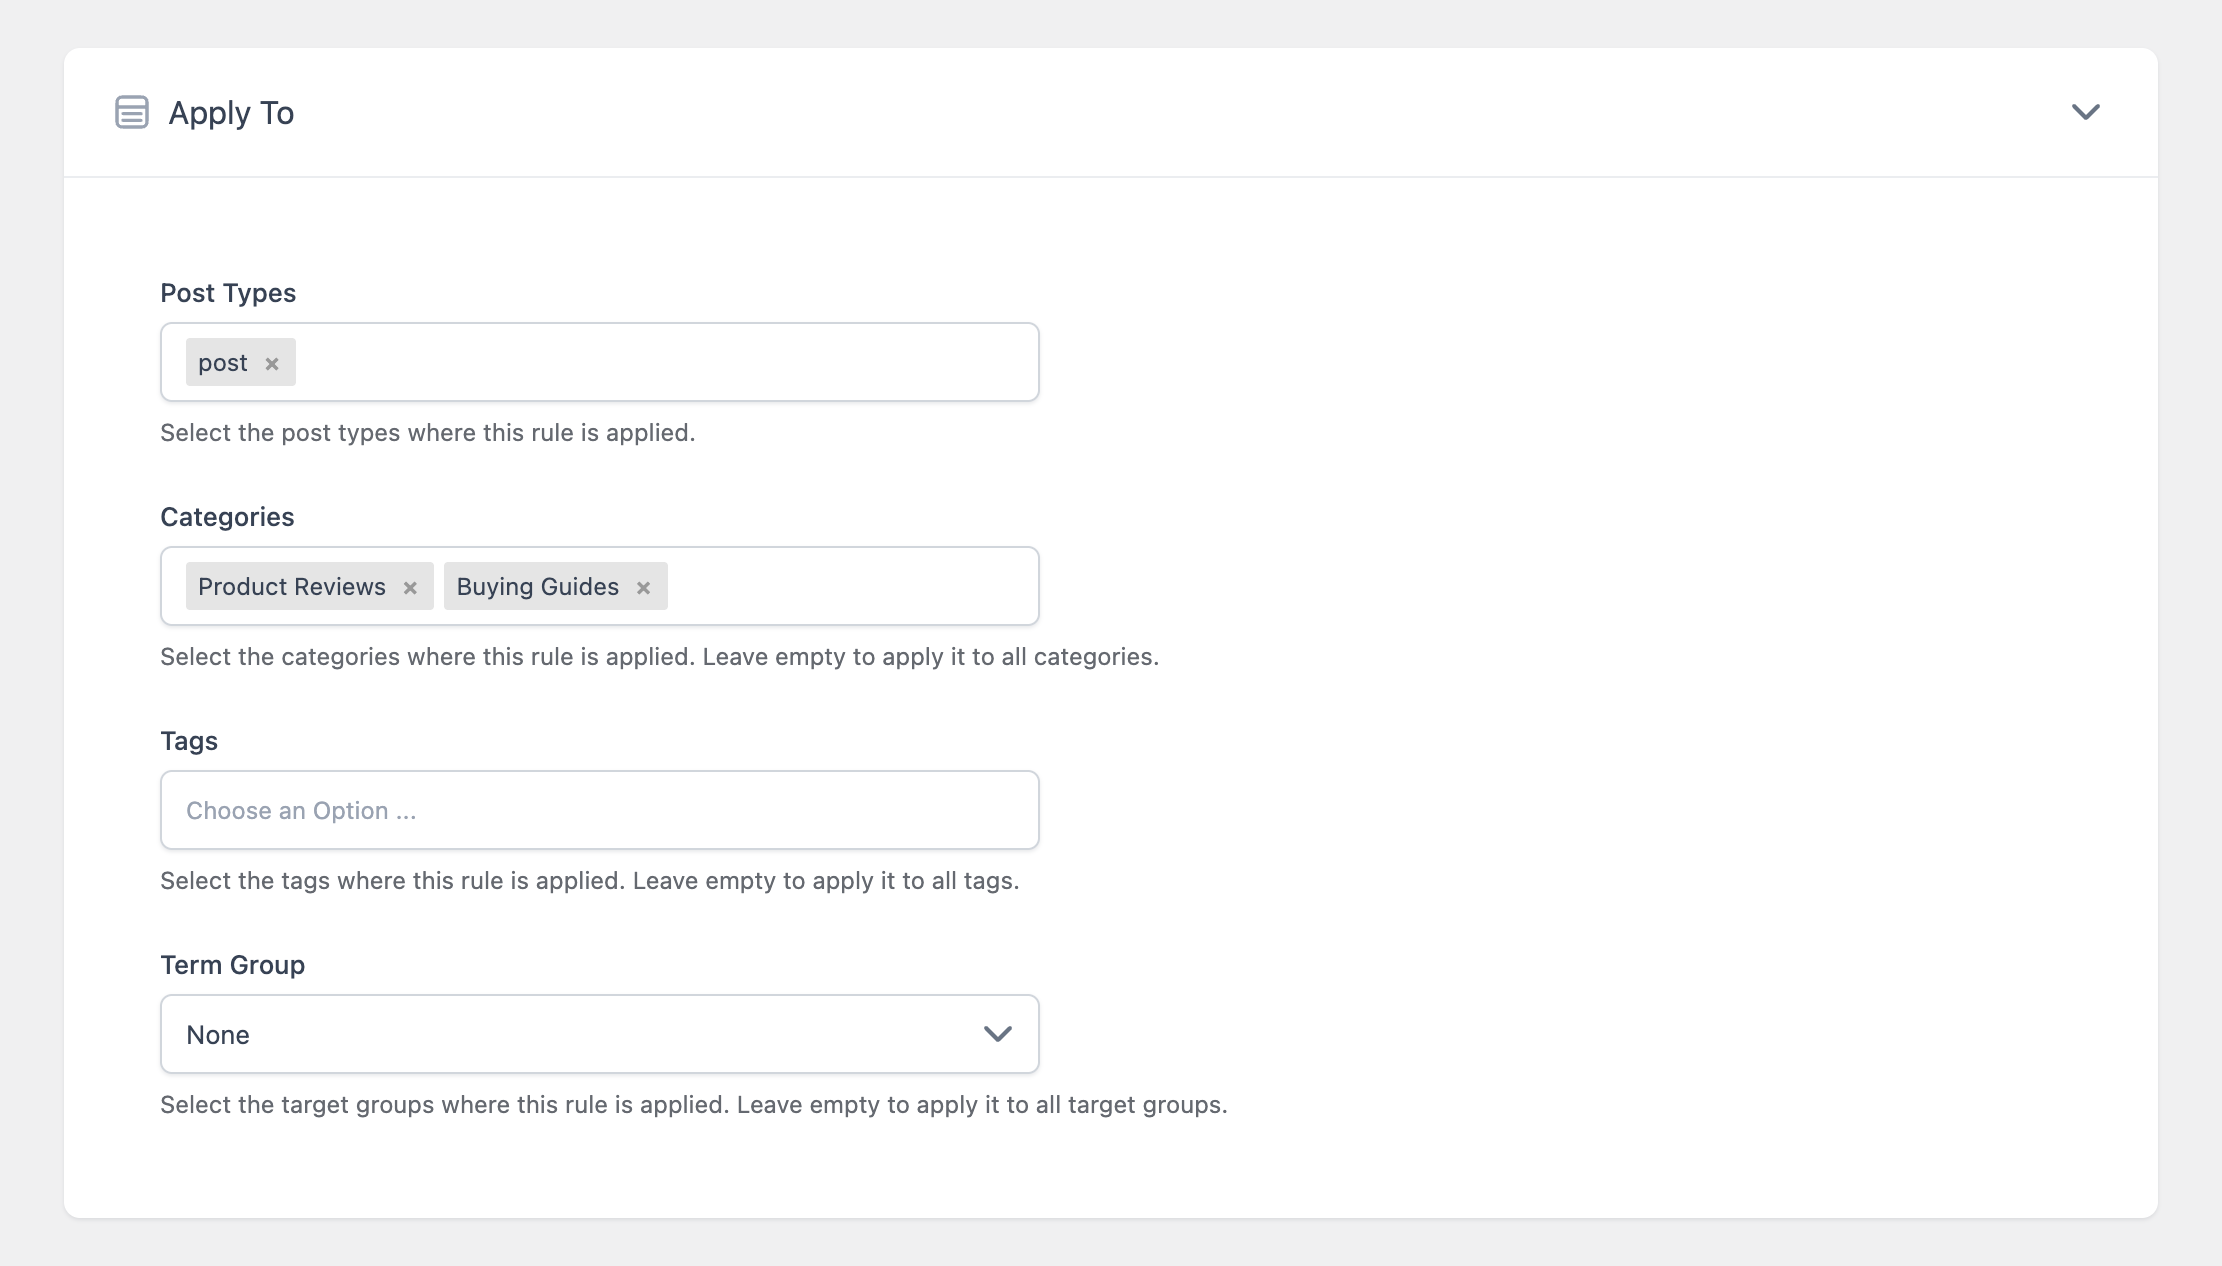
- Post Types – Restricts the rule to specific post types, for example only post or only page. Leave empty to apply the rule across all eligible post types.
- Categories – Restricts the rule to posts assigned to specific categories. Leave empty to apply it regardless of category.
- Tags – Restricts the rule to posts assigned to specific tags. Leave empty to apply it regardless of tags.
- Term Group – Instead of manually selecting categories and tags, you can select a previously created Target Group, which bundles multiple post type, taxonomy, and term conditions into a single reusable selection. Select None to skip this.
For more on creating reusable groups of conditions, refer to the dedicated documentation on Target Groups.
Advanced Matching Section
This section gives you fine-grained control over exactly which occurrences of the keyword are converted into links.
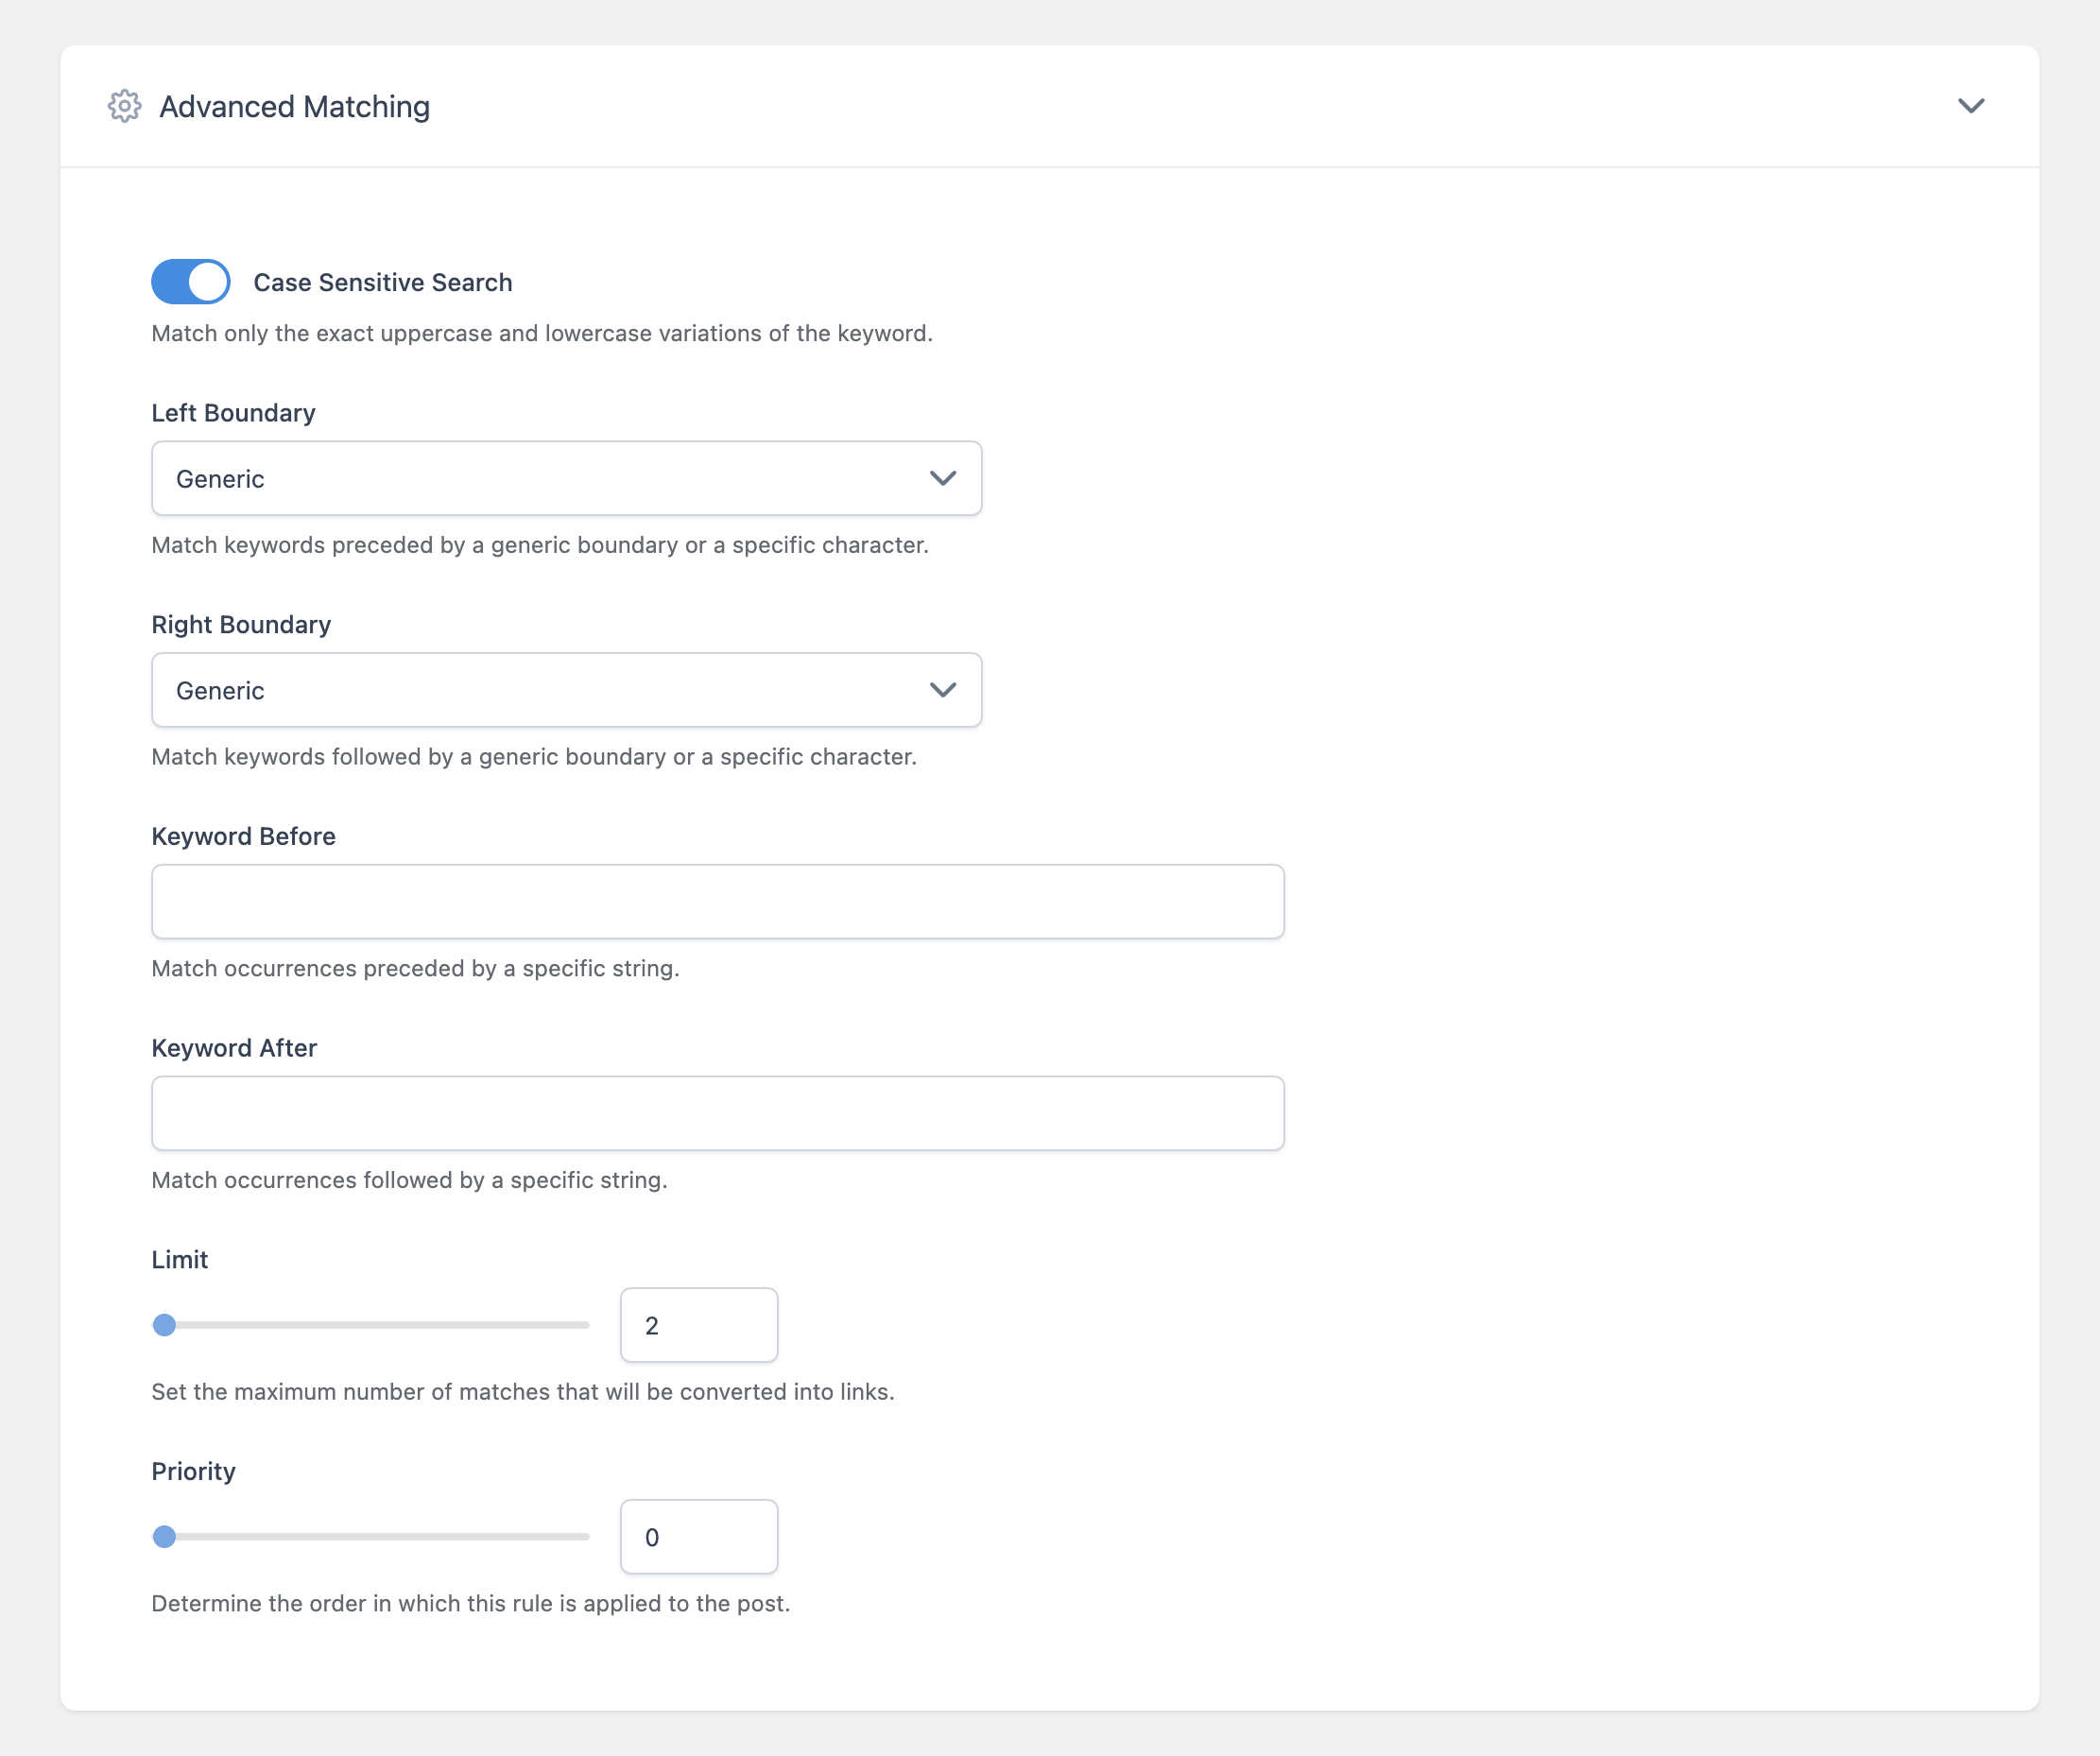
- Case Sensitive Search – When enabled, only exact uppercase and lowercase variations of the keyword are matched. When disabled, the keyword matches regardless of letter case.
- Left Boundary / Right Boundary – Controls what character is allowed to immediately precede or follow the keyword for it to be considered a match. Options are:
- Generic – Any standard word boundary (whitespace or punctuation)
- White Space – Only a literal space character
- Comma – Only a comma
- Point – Only a period
- None – No boundary restriction; the keyword can be matched even inside a larger word
- Keyword Before / Keyword After – Requires a specific string to appear immediately before or after the keyword for the match to count. This is useful for disambiguating a keyword that has multiple meanings depending on context.
- Limit – The maximum number of times this rule converts a match into a link within a single post. Range: 1 to 1,000.
- Priority – Determines the order in which this rule is applied relative to other rules when multiple rules could match the same content. A lower value is applied earlier.
Example: Using Boundaries to Avoid Partial Matches
If your keyword is “cat” and Left Boundary and Right Boundary are both set to Generic, the plugin will not convert “category” or “concatenate” into a link, since the letters immediately before and after “cat” in those words are not valid boundaries. Setting either boundary to None would allow partial-word matches, which is rarely what you want.
Managing Existing Rules
The Auto Link Rules list shows every rule you’ve created, along with its Category, Keyword, and Target URL. Click any rule’s name to open it for editing, where all of the same fields described above are available.
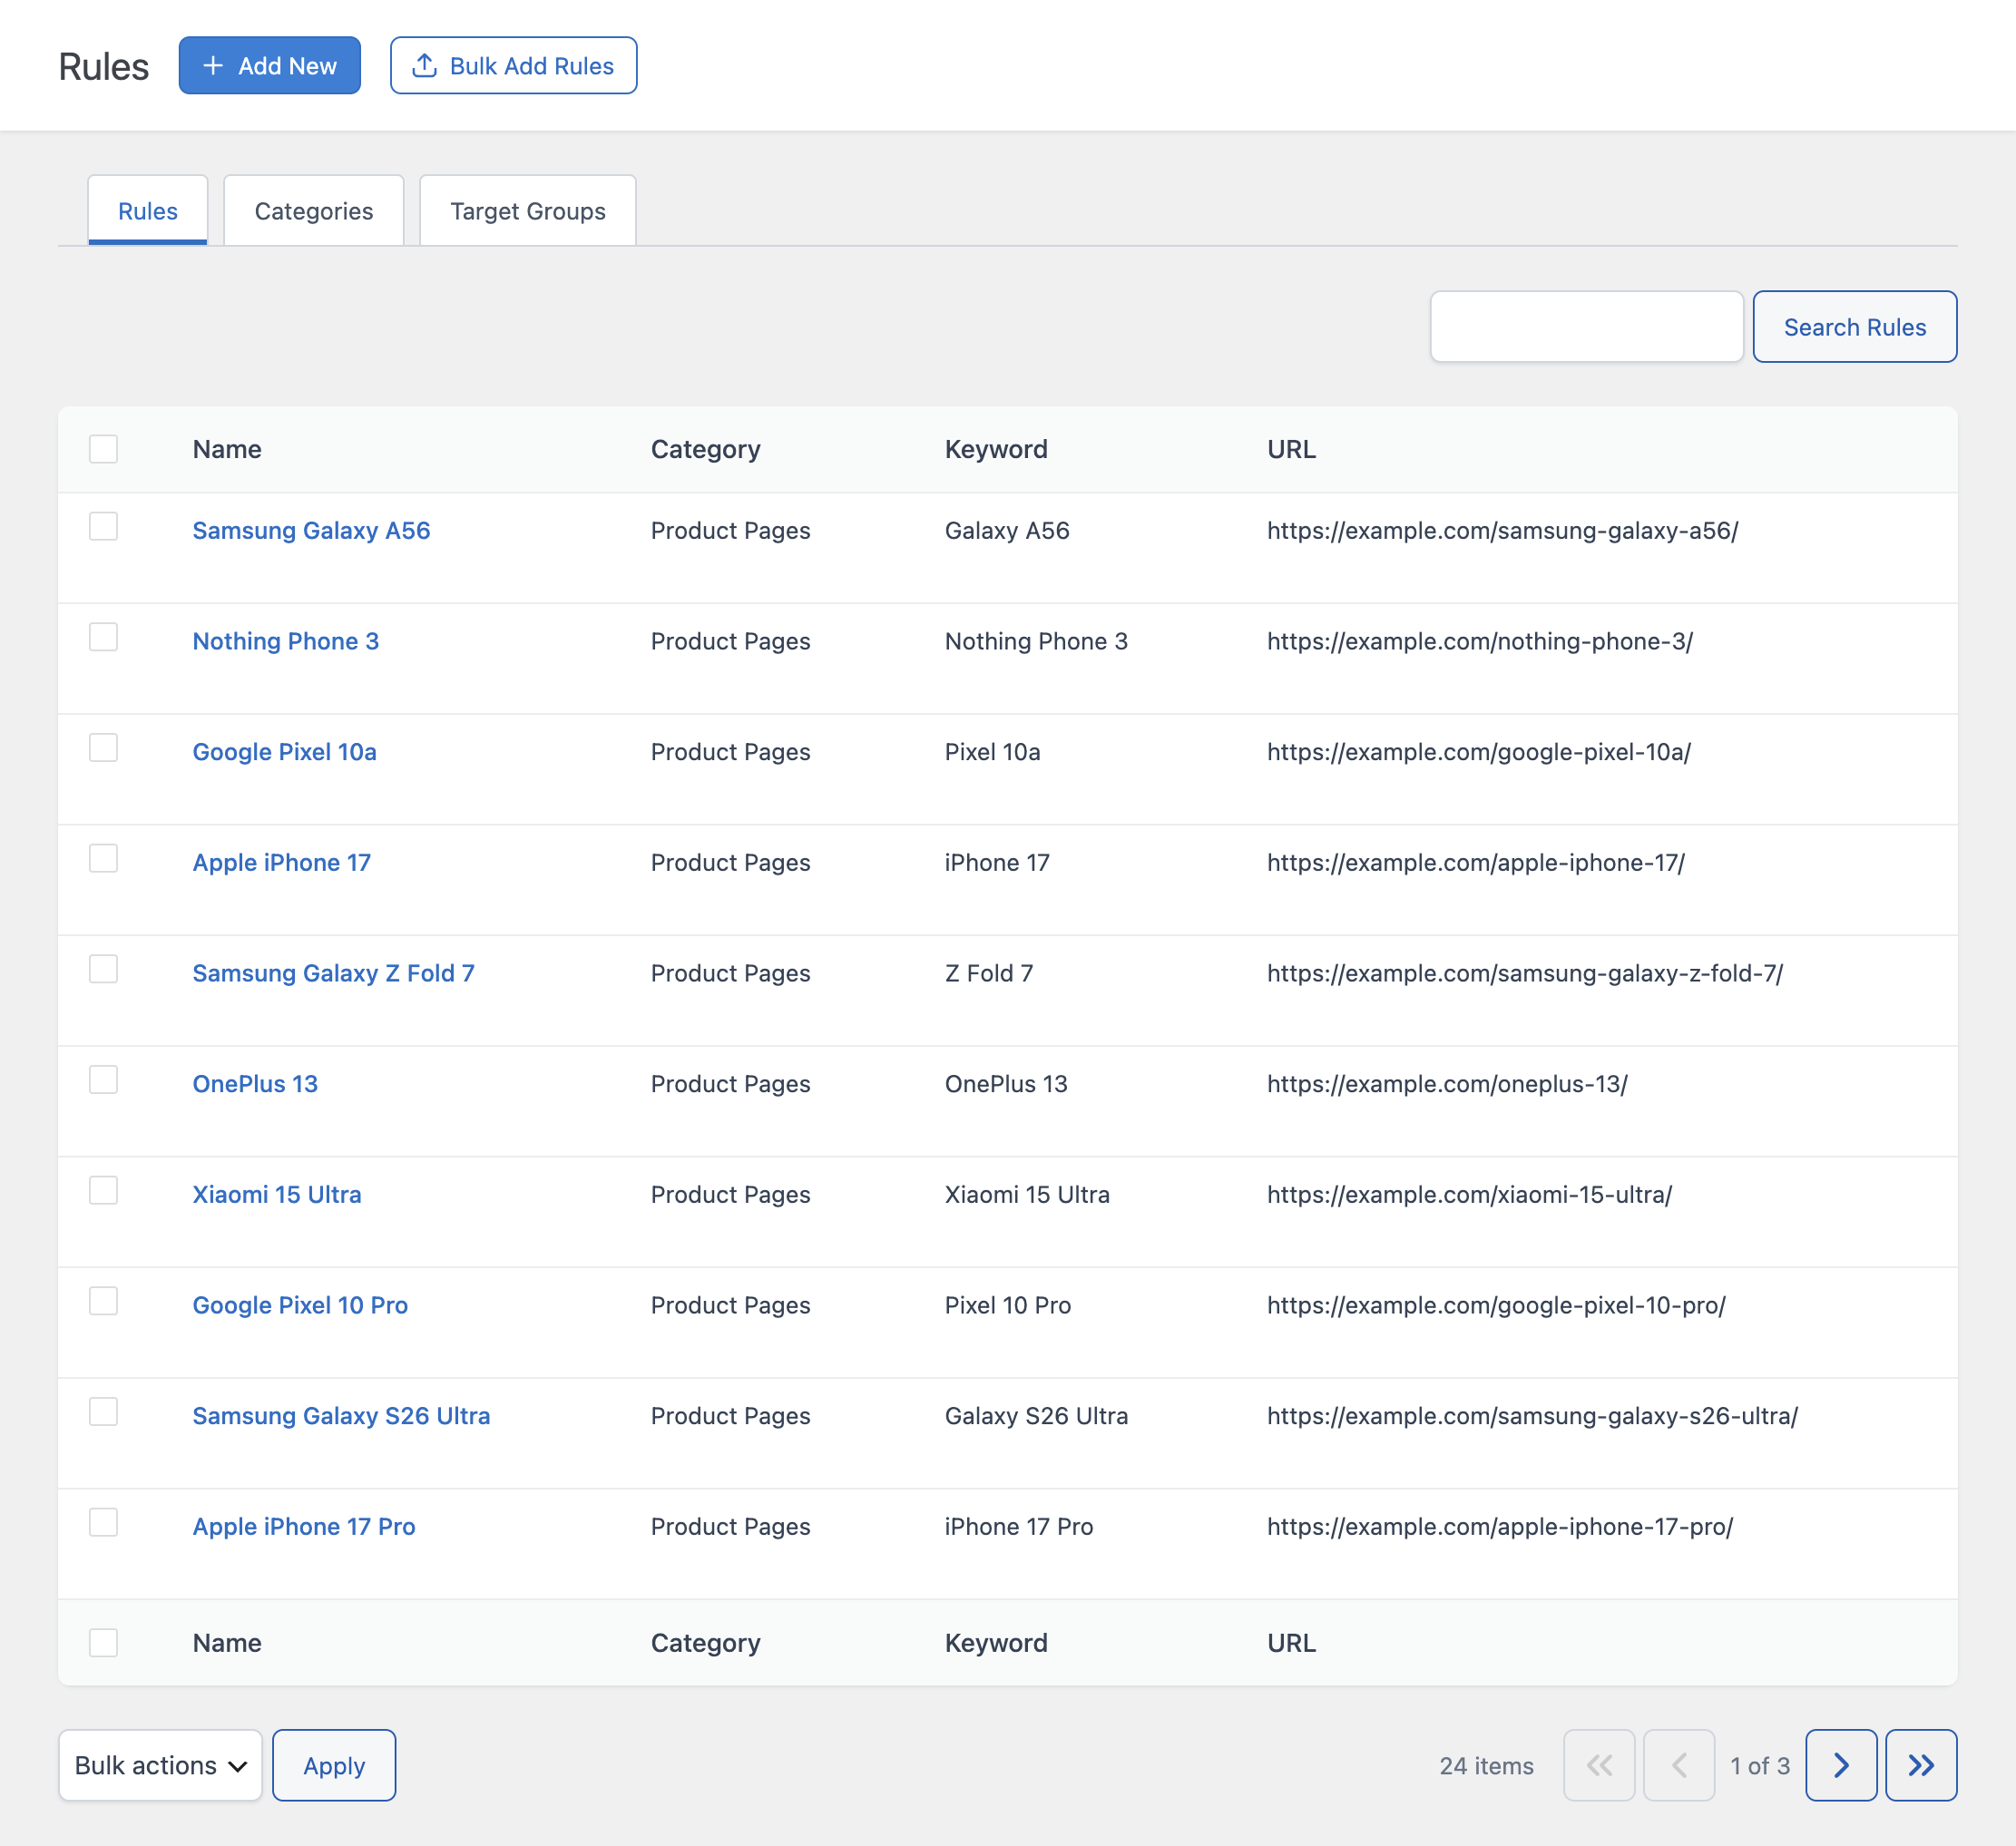
To delete one or more rules, select their checkboxes, choose Delete from the Bulk actions dropdown, and click Apply.
Disabling Automatic Links on a Specific Post
Even with Auto Link Rules configured and active, you can exclude a specific post from automatic linking entirely using the Enable option in the Automatic Links editor panel, available in the post editor sidebar. This is useful for the rare post where you don’t want any automatic links applied, regardless of your global rules.