

In this article, we explore methods for converting WordPress articles to audio files using Azure Text to Speech.
We will first cover how to set up Azure Text to Speech in WordPress with a plugin. The tutorial’s last part provides examples for developing a custom integration.
General information on Azure Text to Speech
Azure Text to Speech is a service available in Microsoft Azure that produces realistic voices in multiple languages. It can be used commercially for various applications, such as phone apps, for virtual assistants, to create web accessibility features, and more. In this tutorial, we will use this service to convert the content of WordPress posts to audio.
Pricing
For the most updated information on the pricing of the speech services, please see the Azure AI Speech pricing page.
Azure Limits and Quota
Before using Azure Text to Speech in your application, make sure that the limits and quotas meet your needs. The details on this subject are available on this page.
Available Voices
Azure TTS includes a multitude of voices that support multiple languages. In PHP, you can get a list of voices at any time using the Text to Speech REST API.
Configure Azure Text to Speech and Get the API Key
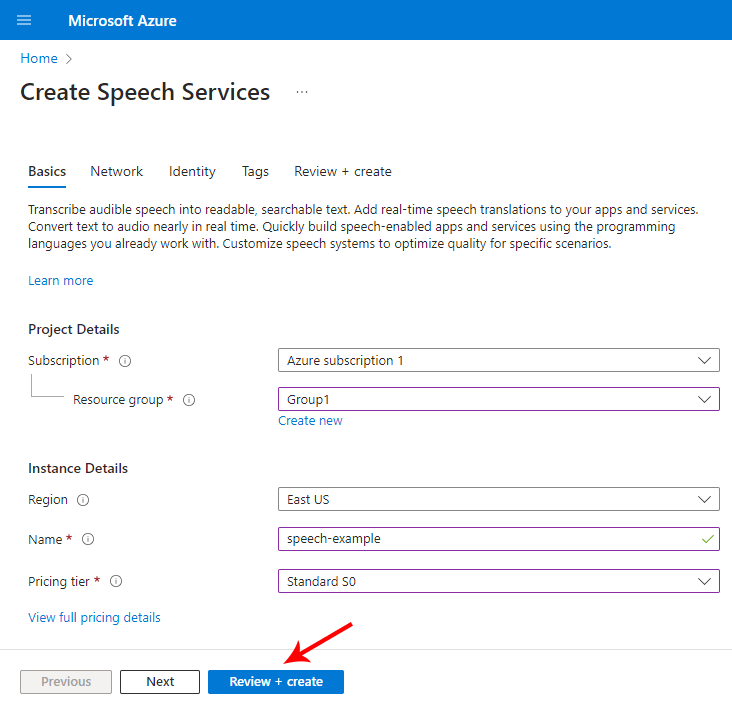
The first step in the process is to login into Microsoft Azure from the homepage of the platform. Here, hover the mouse over Speech Services and click the Create button.

Now configure the project details by selecting the Region, Resource Group, and the remaining configuration options. Then click Review + create.
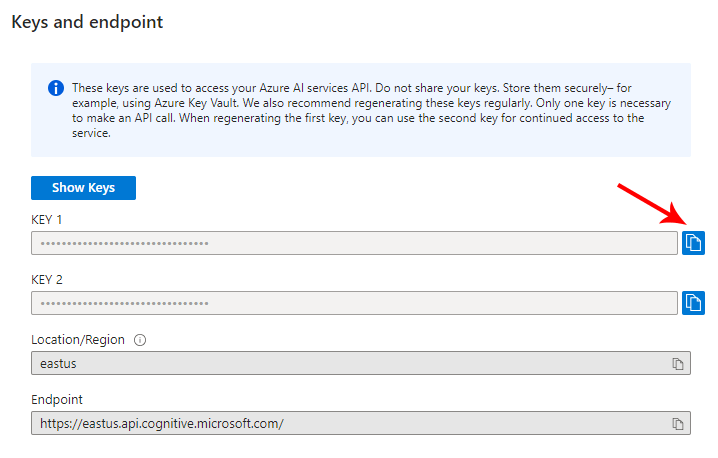
The resource deployment will take a few seconds. When the process is completed, proceed to the Keys and endpoint section, copy one of the two available keys and store it in a secure place. This key will be used to authenticate the HTTP requests made to the Azure API.
Add Azure Text to Speech to WordPress Using the Real Voice Plugin
This section will describe how to convert your WordPress articles to audio using the Microsoft Azure Text to Speech integration included in the Real Voice plugin for WordPress.
First Plugin Configuration
First, download the free version on wordpress.org or buy the Pro version from our site.
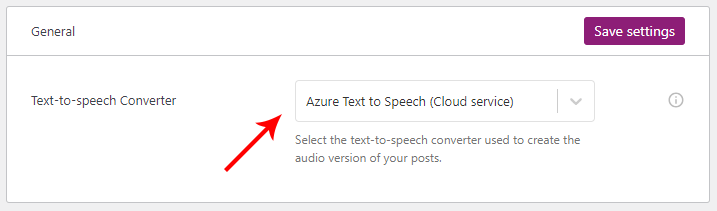
Once the plugin is installed and activated, proceed to its settings and select Azure Text to Speech as the text-to-speech converter.
Then, under the Azure Text-to-Speech section, enter the API key previously copied from the Azure platform.

To conclude, select the Azure region that best fits your needs. The region close to your WordPress site web server should usually be the most appropriate.
Additional options to customize your request to the Azure API are available. Specifically:
- User Agent – Add a custom user agent to identify your request. For example, you might set “yoursite.com” to register that these requests have been sent from your site.
- Output Format – Here, you set the output format of the generated audio file. This selection affects the generated audio quality and the space occupied by the files.
- Voice – This option selects the voice used to generate the audio version of the post. Note that beside each voice, you will see the language and locale associated with it. If, for example, you are interested in an English voice with a United States accent, select a voice with the suffix “en-us.”
To conclude the configuration process of the plugin, make sure that the post types for which you want to generate the audio are selected in the Post Types option. The plugin will add the text-to-speech-related tools used to perform text-to-speech conversion and list the audio files associated with the post only in the post types defined by this option.
Generate the Spoken Version of an Article
Now, edit the post that you want to convert to audio.
Then open the Audio File post editor sidebar section and click Generate File to convert the post to audio using the post content as the text to convert.
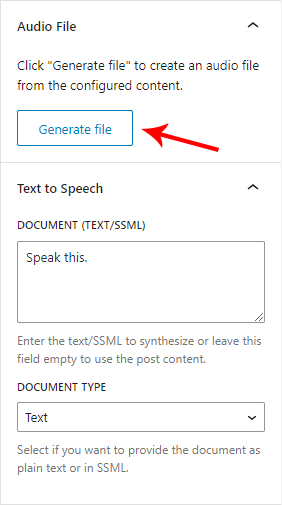
Note that for more precise results, it is recommended that you convert the exact text or SSML using the DOCUMENT (TEXT/SSML) field in the Text to Speech post editor sidebar.
Listen to the Generated Speech on the WordPress Front End
You can now verify if the audio produced meets your needs. To achieve this, simply visit the article for which you have generated the spoken version. Just below the article title, you will find an audio player. Click on the Play button of the audio player to listen to the audio version of the post.
Update the audio version of a post
The plugin will store indefinitely the mp3 files containing the audio versions of the articles. These files are stored in the WordPress upload folder.
If you update an article and want to re-generate the corresponding audio file, you can do it at any time by clicking the Generate File button again.
Developing an Integration of Azure TTS in WordPress
Set Up a Few Variables
First, set up a few variables to configure the API request.
// Set up a few variables.
$text                      = 'Speak this.';
$region                    = 'eastus';
$user_agent                = 'Default Agent';
$x_microsoft_output_format = 'audio-24khz-160kbitrate-mono-mp3';
$voice_short_name          = 'en-US-ChristopherNeural';
$api_url                   = 'https://' . $region
                             . '.tts.speech.microsoft.com/cognitiveservices/v1';
$key                       = 'YOUR_AZURE_SPEECH_RESOURCE_KEY';
Prepare the Content to Convert
Prepare the content to convert as SSML. Note that our example text is enclosed in SSML tags.
$cont = '<speak version="1.0" xmlns="http://www.w3.org/2001/10/synthesis" xml:lang="en-US">
<voice name="' . esc_attr( $voice_short_name ) . '">
    ' . $text . '
</voice>
</speak>';
Prepare HTTP Headers and the Related Arguments
To reliably get the proper response from the Azure Text to Speech API, you need to include specific values in the HTTP headers and the HTTP request arguments.
// Request headers.
$headers = array(
	'Ocp-Apim-Subscription-Key' => $key,
	'Content-Type'              => 'application/ssml+xml',
	'Host'                      => $region . '.tts.speech.microsoft.com',
	'Content-Length'            => strlen( $cont ),
	'User-Agent'                => $user_agent,
	'X-Microsoft-OutputFormat'  => $x_microsoft_output_format,
);

// HTTP request arguments.
$args = array(
	'method'      => 'POST',
	'headers'     => $headers,
	'body'        => $cont,
	'data_format' => 'body',
	'timeout'     => 60,
);
Performing a Request to the API With wp_remote_request()
Submit the request using wp_remote_request(), a WordPress function that allows us to easily perform an HTTP request and receive the related response. Note that this function is an alternative to using cURL.
// Send the HTTP request.
$response = wp_remote_request( $api_url, $args );
Handle the Response
Finally, we can handle the response and save the error message or the audio data in a PHP variable.
In detail, if the HTTP request fails or includes an error message, we save the error in a PHP variable. If there are no errors, the returned audio data is saved to an mp3 file in a custom server location using file_put_contents().
// Check for errors.
if ( is_wp_error( $response ) ) {

	$result = array(
		'error'   => true,
		'message' => $response->get_error_message(),
	);

} elseif ( 200 !== $response['response']['code'] ) {

	$result = array(
		'error'   => true,
		'message' => $response['response']['message'],
	);

} else {

	// Get the audio data.
	$audio_data = wp_remote_retrieve_body( $response );

	// Set the location where the mp3 file will be stored.
	$file_path = '/home/yoursite/public_html/mp3/example.mp3';

	// Create the audio file in a custom directory of your server.
	$result = file_put_contents( $file_path, $audio_data );

}
Integrating an Audio Player With the HTML AUDIO Element
The most basic method of adding an audio player capable of playing an audio file is to use the audio HTML element.
By using the the_content filter, you can prepend the HTML audio player to a post and reference the related audio file:
// Add the audio player at the end of the post content.
add_filter( 'the_content', 'add_player_html' );

function add_player_html() {

	// Return an HTML audio player that references the file with the audio version of the post.
	return '<audio controls>
			<source src="https://example.com/wp-content/uploads/2024/03/example.mp3" type="audio/mpeg">
			Your browser does not support the audio element.
		</audio>';

}
Perform Conversions With a Dedicated Button on a Meta Box
To conclude the implementation you may consider adding a “Convert to audio” button with a dedicated meta box. When the button is clicked, the PHP integration used to send the API request and generate the audio file described in the previous section will run.
You can activate the script, for example, by sending an AJAX request, placing the request in a REST API endpoint, or simply reloading the page and checking for a specific query parameter.