

This tutorial will show you how to create a simple contact form in WordPress form without using a dedicated plugin.
Create the contact form
Add the contact form HTML
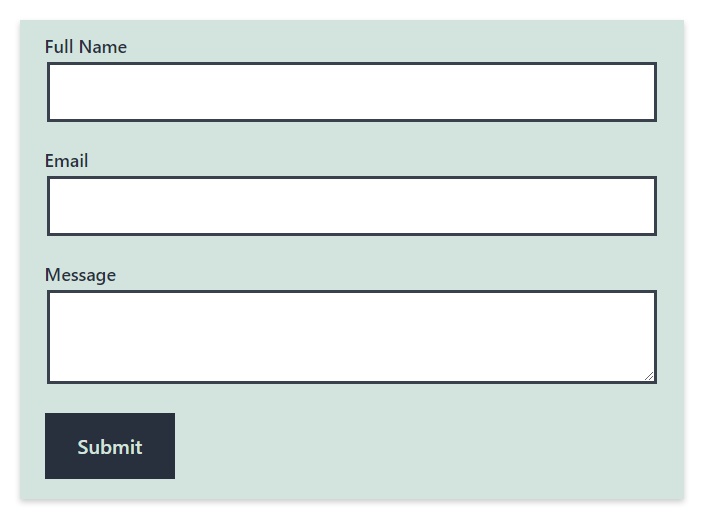
The contact form used in our example includes a limited set of fields, specifically two input fields for the Full Name and Email of the user and a textarea for the Message of the user. You can, however, add or remove additional controls based on your specific needs.
I’ve also added custom HTML IDs and classes to the HTML elements. I will use these attributes to style the form and select the elements in the JavaScript validation.
<form id="contact-form" action="<?php echo esc_url( get_permalink() ); ?>"
    method="post">

    <input type="hidden" name="contact_form">

    <div class="form-section">
        <label for="full-name"><?php echo esc_html( 'Full Name', 'twentytwentyone' ); ?></label>
        <input type="text" id="full-name" name="full_name">
    </div>

    <div class="form-section">
        <label for="email"><?php echo esc_html( 'Email', 'twentytwentyone' ); ?></label>
        <input type="text" id="email" name="email">
    </div>

    <div class="form-section">
        <label for="message"><?php echo esc_html( 'Message', 'twentytwentyone' ); ?></label>
        <textarea id="message" name="message"></textarea>
    </div>

    <input type="submit" id="contact-form-submit" value="<?php echo esc_attr( 'Submit', 'twentytwentyone' ); ?>">

</form>
Sanitize the contact form data
WordPress provides ready-to-use sanitization functions for this specific context. Specifically, the sanitize_text_field() for data from input elements and sanitize_texarea() for data from textarea elements.
These two sanitization functions are similar. The only difference is that sanitize_text_area() preserves new lines.
//Sanitize the data
$full_name = isset( $_POST['full_name'] ) ? sanitize_text_field( $_POST['full_name'] ) : '';
$email     = isset( $_POST['email'] ) ? sanitize_text_field( $_POST['email'] ) : '';
$message   = isset( $_POST['message'] ) ? sanitize_textarea_field( $_POST['message'] ) : '';
Validate the contact form data
This basic validation consists in verifying that the submitted fields are not empty. In addition, I also check the validity of the email with the is_email() function.
Note that if a field value doesn’t pass the check, a validation message is added to an array:
//Validate the data
if ( strlen( $full_name ) === 0 ) {
    $validation_messages[] = esc_html__( 'Please enter a valid name.', 'twentytwentyone' );
}

if ( strlen( $email ) === 0 or
    ! is_email( $email ) ) {
    $validation_messages[] = esc_html__( 'Please enter a valid email address.', 'twentytwentyone' );
}

if ( strlen( $message ) === 0 ) {
    $validation_messages[] = esc_html__( 'Please enter a valid message.', 'twentytwentyone' );
}
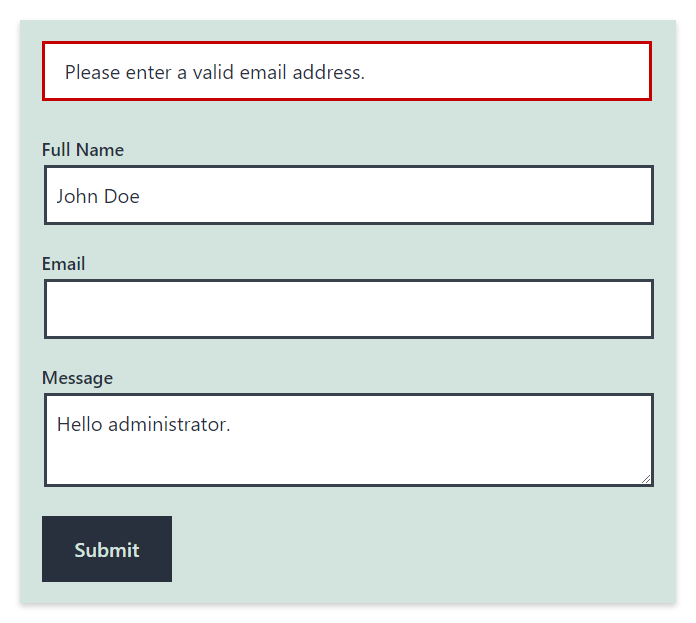
Display the validation messages
Validation messages, precisely a success message or validation errors, are displayed just before the contact form to inform the user about the submission status.
if ( ! empty( $validation_messages ) ) {
    foreach ( $validation_messages as $validation_message ) {
        echo '<div class="validation-message">' . esc_html( $validation_message ) . '</div>';
    }
}

//Display the success message
global $success_message;
if ( strlen( $success_message ) > 0 ) {
    echo '<div class="success-message">' . esc_html( $success_message ) . '</div>';
}

?>

<!-- Echo a container used that will be used for the JavaScript validation -->
<div id="validation-messages-container"></div>
Send an email to the WordPress administrator
If the contact form submission has passed the validation, specifically if the $validation_messages array is empty, the script will email the website administrator with the contact form data.
//Send an email to the WordPress administrator if there are no validation errors
if ( empty( $validation_messages ) ) {

    $mail    = get_option( 'admin_email' );
    $subject = 'New message from ' . $full_name;
    $message = $message . ' - The email address of the customer is: ' . $mail;

    wp_mail( $mail, $subject, $message );

    $success_message = esc_html__( 'Your message has been successfully sent.', 'twentytwentyone' );

}
Wrap up the code in a shortcode callback
At this point, I’m going to include all the code explained in the previous sections in a single PHP function that will be used as the callback function of a shortcode.
Start by adding the new [contact-form] shortcode.
//Add the shortcode
add_shortcode( 'contact-form', 'display_contact_form' );
Then create display_contact_form(), the callback function of the shortcode.
/**
 * This function displays the validation messages, the success message, the container of the validation messages, and the
 * contact form.
 */
function display_contact_form() {

	$validation_messages = [];
	$success_message = '';

	if ( isset( $_POST['contact_form'] ) ) {

		//Sanitize the data
		$full_name = isset( $_POST['full_name'] ) ? sanitize_text_field( $_POST['full_name'] ) : '';
		$email     = isset( $_POST['email'] ) ? sanitize_text_field( $_POST['email'] ) : '';
		$message   = isset( $_POST['message'] ) ? sanitize_textarea_field( $_POST['message'] ) : '';

		//Validate the data
		if ( strlen( $full_name ) === 0 ) {
			$validation_messages[] = esc_html__( 'Please enter a valid name.', 'twentytwentyone' );
		}

		if ( strlen( $email ) === 0 or
		     ! is_email( $email ) ) {
			$validation_messages[] = esc_html__( 'Please enter a valid email address.', 'twentytwentyone' );
		}

		if ( strlen( $message ) === 0 ) {
			$validation_messages[] = esc_html__( 'Please enter a valid message.', 'twentytwentyone' );
		}

		//Send an email to the WordPress administrator if there are no validation errors
		if ( empty( $validation_messages ) ) {

			$mail    = get_option( 'admin_email' );
			$subject = 'New message from ' . $full_name;
			$message = $message . ' - The email address of the customer is: ' . $mail;

			wp_mail( $mail, $subject, $message );

			$success_message = esc_html__( 'Your message has been successfully sent.', 'twentytwentyone' );

		}

	}

	//Display the validation errors
	if ( ! empty( $validation_messages ) ) {
		foreach ( $validation_messages as $validation_message ) {
			echo '<div class="validation-message">' . esc_html( $validation_message ) . '</div>';
		}
	}

	//Display the success message
	if ( strlen( $success_message ) > 0 ) {
		echo '<div class="success-message">' . esc_html( $success_message ) . '</div>';
	}

	?>

    <!-- Echo a container used that will be used for the JavaScript validation -->
    <div id="validation-messages-container"></div>

    <form id="contact-form" action="<?php echo esc_url( get_permalink() ); ?>"
          method="post">

        <input type="hidden" name="contact_form">

        <div class="form-section">
            <label for="full-name"><?php echo esc_html( 'Full Name', 'twentytwentyone' ); ?></label>
            <input type="text" id="full-name" name="full_name">
        </div>

        <div class="form-section">
            <label for="email"><?php echo esc_html( 'Email', 'twentytwentyone' ); ?></label>
            <input type="text" id="email" name="email">
        </div>

        <div class="form-section">
            <label for="message"><?php echo esc_html( 'Message', 'twentytwentyone' ); ?></label>
            <textarea id="message" name="message"></textarea>
        </div>

        <input type="submit" id="contact-form-submit" value="<?php echo esc_attr( 'Submit', 'twentytwentyone' ); ?>">

    </form>

	<?php

}
I now have a completely functional contact form that can receive the user data, perform the proper sanitization and validation, and email the website administrator.
One aspect of the contact form is still not ideal. In detail, if the user enters invalid information, the validation system is executed only on the reloaded page, and as a consequence, the submitted data is lost.
We can augment our implementation and solve this issue by replicating the existing PHP validation with JavaScript. I will cover this aspect in the next section.
Implement a JavaScript validation
Let’s see how to validate the contact form with JavaScript.
Add a dedicated JavaScript file
I perform the JavaScript validation in a new dedicated file named contact-form.js. WordPress will add this new file at the end of the body with the instructions below.
/**
 * Enqueue the JavaScript scripts associated with our contact form.
 */
function contact_form_scripts() {

    wp_enqueue_script( 'contact-form',
        get_template_directory_uri() . '/assets/js/contact-form.js',
        array(), '', true );

}

add_action( 'wp_enqueue_scripts', 'contact_form_scripts' );
Validate the contact form
With the current implementation, when the user clicks the “Submit” button, the contact form page is reloaded, and the POST parameters are passed to the page.
To perform the JavaScript validation of the contact form, I have first to create an event listener associated with the clicks performed on the “Submit” button. Then, associate with the event listener a callback function that validates the data.
The callback function will perform the following tasks:
- Stops the default behavior of the “Submit” button (which is loading the same page with the collected form data)
- Validates the form data and displays the validation messages when needed
- Submits the form if the form data are valid
Let’s see in detail the various part of the script.
Add an event listener to the submit button
Add the click event listener to the submit button. The event listener will run the validateForm() JavaScript function, used to actually validate the contact form.
const contactFormSubmit = document.getElementById('contact-form-submit');
contactFormSubmit.addEventListener('click', validateForm);
The validation function
The first action to perform in the validation function is to disable the default behavior of the “Submit” button, which is to perform the submission of the form.
I can do this with the following two functions:
event.preventDefault();
event.stopPropagation();
I can now read the values of the fields from the value property of the form elements. Note that I used getElementById to generate the Object element from the selectors.
//Full name
const fullName = document.getElementById('full-name') !== null ?
  document.getElementById('full-name').value :
  '';

//Email
const email = document.getElementById('email') !== null ?
  document.getElementById('email').value :
  '';

//Message
const message = document.getElementById('message') !== null ?
  document.getElementById('message').value :
  '';
We can now generate validation messages if the submitted values are not valid:
if (fullName.length === 0) {
    validationMessages.push('Please enter a valid name.');
}

if (email.length === 0 || !emailIsValid(email)) {
    validationMessages.push('Please enter a valid email address.');
}

if (message.length === 0) {
    validationMessages.push('Please enter a valid message.');
}
If there are no validation errors, the script submits the form. If there are validation errors, the script adds the validation messages to the DOM.
  if (validationMessages.length === 0) {

    //Submit the form
    document.getElementById('contact-form').submit();

  } else {

    //Delete all the existing validation messages from the DOM
    const parent = document.getElementById('validation-messages-container');
    while (parent.firstChild) {
      parent.removeChild(parent.firstChild);
    }

    //Add the new validation messages to the DOM
    validationMessages.forEach(function(validationMessage, index) {

      //add message to the DOM
      const divElement = document.createElement('div');
      divElement.classList.add('validation-message');
      const node = document.createTextNode(validationMessage);
      divElement.appendChild(node);

      const element = document.getElementById('validation-messages-container');
      element.appendChild(divElement);

    });

  }
Below you can find the complete code of the contact-form.js file. Note that after the validateForm() function, I’ve also included the emailIsValid() utility function used to validate the provided email address.
/**
 * Validate the contact form displayed with the [contact-form] shortcode.
 */
const contactFormSubmit = document.getElementById('contact-form-submit');
contactFormSubmit.addEventListener('click', validateForm);

function validateForm(event) {

  event.preventDefault();
  event.stopPropagation();

  //Full name
  const fullName = document.getElementById('full-name') !== null ?
      document.getElementById('full-name').value :
      '';

  //Email
  const email = document.getElementById('email') !== null ?
      document.getElementById('email').value :
      '';

  //Message
  const message = document.getElementById('message') !== null ?
      document.getElementById('message').value :
      '';

  const validationMessages = [];
  if (fullName.length === 0) {
    validationMessages.push('Please enter a valid name.');
  }

  if (email.length === 0 || !emailIsValid(email)) {
    validationMessages.push('Please enter a valid email address.');
  }

  if (message.length === 0) {
    validationMessages.push('Please enter a valid message.');
  }

  if (validationMessages.length === 0) {

    //Submit the form
    document.getElementById('contact-form').submit();

  } else {

    //Delete all the existing validation messages from the DOM
    const parent = document.getElementById('validation-messages-container');
    while (parent.firstChild) {
      parent.removeChild(parent.firstChild);
    }

    //Add the new validation messages to the DOM
    validationMessages.forEach(function(validationMessage, index) {

      //add message to the DOM
      const divElement = document.createElement('div');
      divElement.classList.add('validation-message');
      const node = document.createTextNode(validationMessage);
      divElement.appendChild(node);

      const element = document.getElementById('validation-messages-container');
      element.appendChild(divElement);

    });

  }

}

/**
 * A simple function that verify the email with a regular expression.
 *
 * @param email
 * @returns {boolean}
 */
function emailIsValid(email) {

  const regex = /\S+@\S+\.\S+/;
  return regex.test(email);

}
Customize the contact form style
The contact form created in the previous sections will follow the style defined by the active theme. However, you can customize the style based on your preferences if needed.
Technically you have two options to do this. You can add a new CSS file in the front-end or add new CSS rules in an existing CSS file (or, if available, in the Custom CSS option of the theme).
If you select the first solution, use the instructions below:
function contact_form_styles() {

    wp_enqueue_style( 'contact-form', get_template_directory_uri() . '/assets/css/contact-form.css',
        array(), '1.00', 'all' );

}

add_action( 'wp_enqueue_scripts', 'contact_form_styles' );
In this tutorial, I developed the contact form while using the TwentyTwentyOne theme. In this specific environment, the contact form needs only a few style changes. Specifically, I adapted the dimensions and margins of the form elements and customized the look of the validation messages.
/* Add margins between the rows of the contact form. */
#contact-form .form-section{
	margin: 20px 0;
}

/* Make the input field large as the form container. */
#contact-form input[type="text"]{
	width: 100%;
}

/* Style the validation errors */
.validation-message{
	margin: 20px 0;
	padding: 10px 20px;
	background: #fff;
	border: 3px solid #cc0000;
}

/* Style the success message */
.success-message{
	margin: 20px 0;
	padding: 10px 20px;
	background: #fff;
	border: 3px solid #00cc00;
}
An alternative method to include a contact form in WordPress without a plugin
An alternative method to include a contact form in WordPress without a plugin is to create a template file for the contact form page.
For example, you can create a template file for a page named “Contact Form” by adding the page-contact-form.php template file in the main theme folder. The WordPress template hierarchy documentation provides more information on this technique.