

This article will discuss how to add a collapsible text area in WordPress.
Understanding Collapsible Text Area
A collapsible text area is a user interface element that allows you to create expandable content on your website. This component is usually displayed as a heading and, when clicked on, expands to reveal the content beneath it. This feature is commonly used for frequently asked questions (FAQs), long product descriptions and reviews, or to organize a large amount of text on a page.
Why Add a Collapsible Text Area in WordPress
Adding a collapsible text area in WordPress can provide many benefits. Some of them include:
- Improved User Experience: Collapsible text areas make it easier for users to navigate and read content on your website, improving the overall user experience.
- Better Organization: Using collapsible text areas can help you organize your content, making it easier for users to find what they are looking for.
- Space Optimization: Collapsible text areas help to optimize space on your website by only displaying content when it is needed. This can be especially useful for mobile users who have limited screen space.
How to Add a Collapsible Text Area With a WordPress Plugin
Now that we have discussed the benefits of adding a collapsible text area, let’s take a look at how to add one with a WordPress plugin.
Step 1: Install and Activate a Plugin
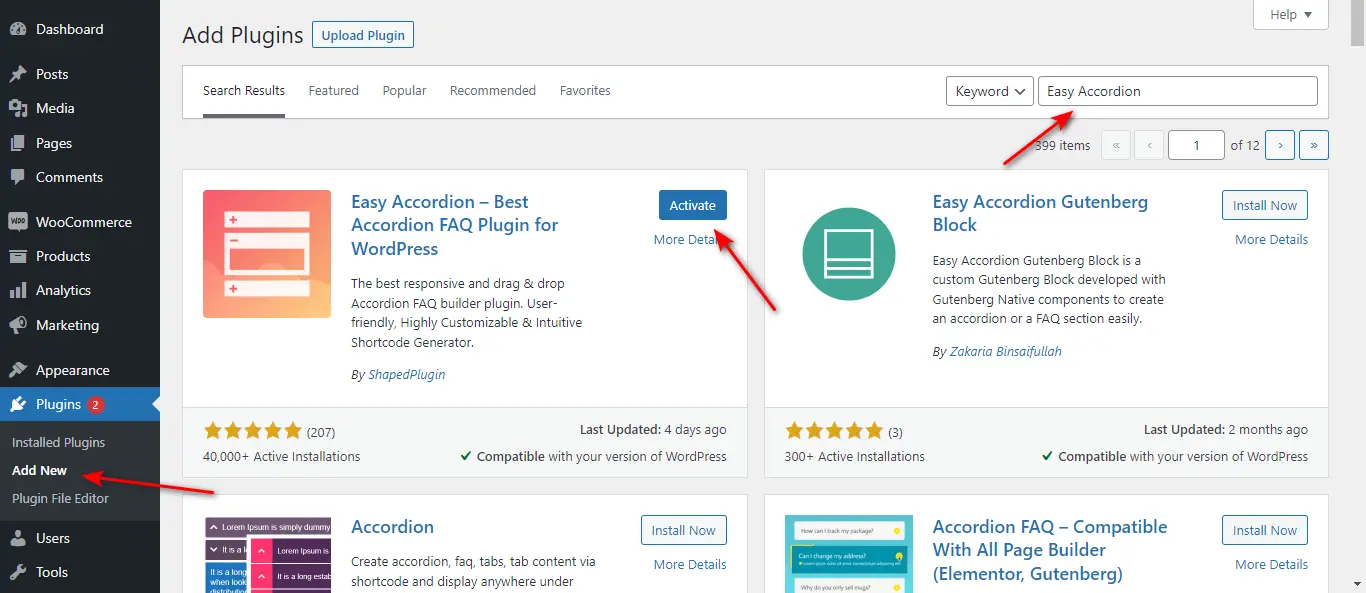
The first step to adding a collapsible text area in WordPress is to install and activate a plugin. Many plugins can help you add a collapsible text area to your website, but we will be using the Easy Accordion plugin for this tutorial.
To install the Easy Accordion plugin, follow these steps:
- Log in to your WordPress dashboard.
- Click on Plugins and then Add New.
- In the search bar, type “Easy Accordion” and click Search Plugins.
- Click on Install Now and then Activate.
Step 2: Create a Collapsible Text Area
Now that you have installed and activated the plugin, it’s time to create a collapsible text area.
To create a collapsible text area using Easy Accordion, follow these steps:
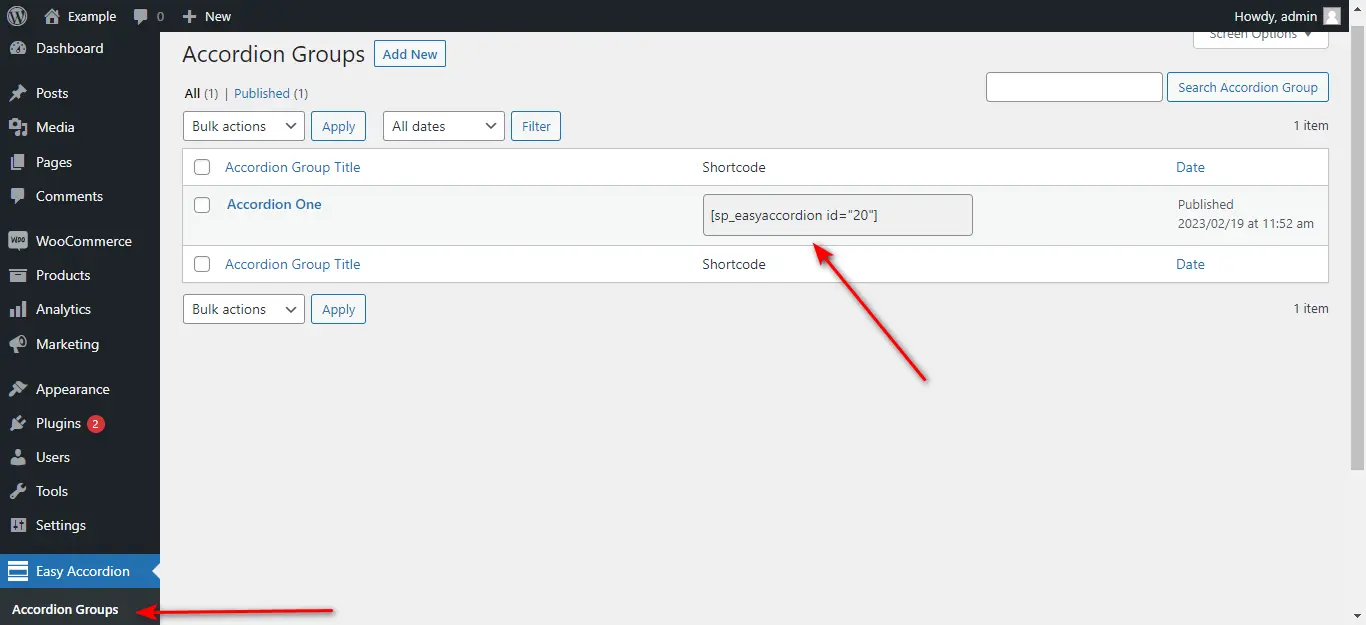
- Click on Easy Accordion in the left-hand menu of your WordPress dashboard.
- Click on Add New Accordion.
- Enter a title for your accordion.
- Add content to the Content box.
- Click on Publish.

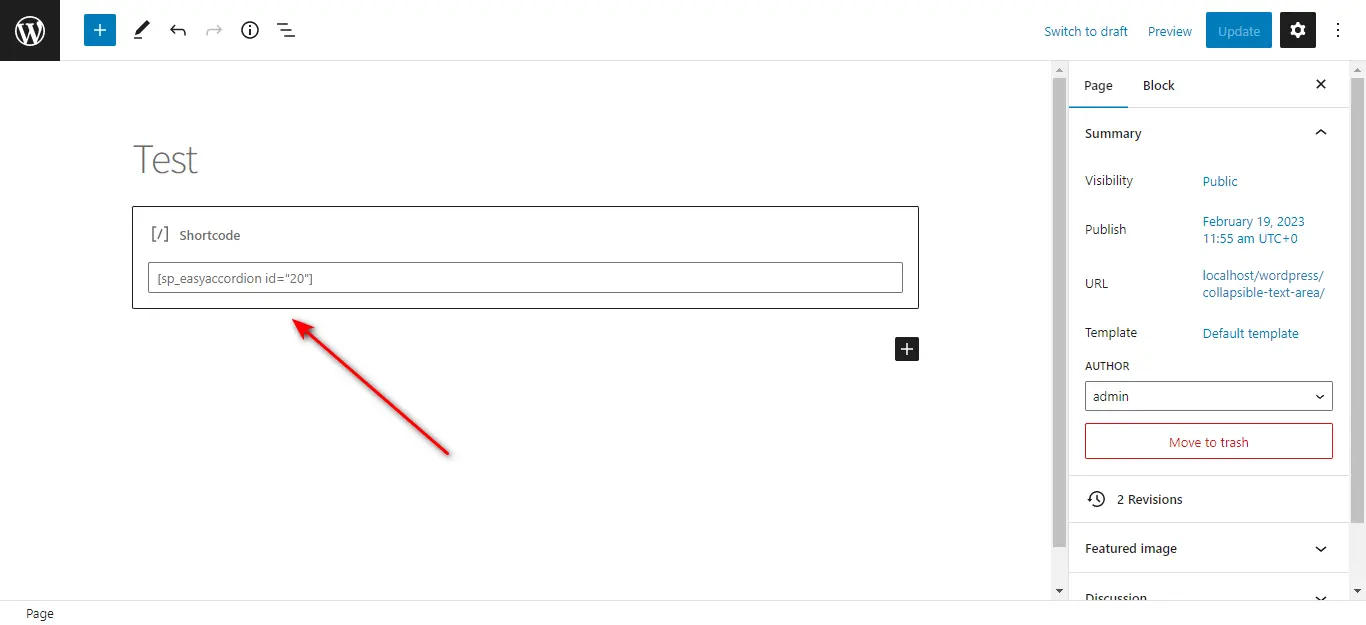
You can now copy the Easy Accordion shortcode from the Accordion Groups menu and use it on any post or page.
Step 3: Customize the Collapsible Text Area
The Easy Accordion plugin allows you to customize the look and feel of your collapsible text area. To customize your accordion, follow these steps:
- Click on Easy Accordion in the left-hand menu of your WordPress dashboard.
- Click on All Accordions to view a list of all your accordions.
- Hover over the accordion you want to customize and click on Edit.
- Click on the Settings tab to customize the settings
Add a Collapsible Text With the Elementor Page Builder
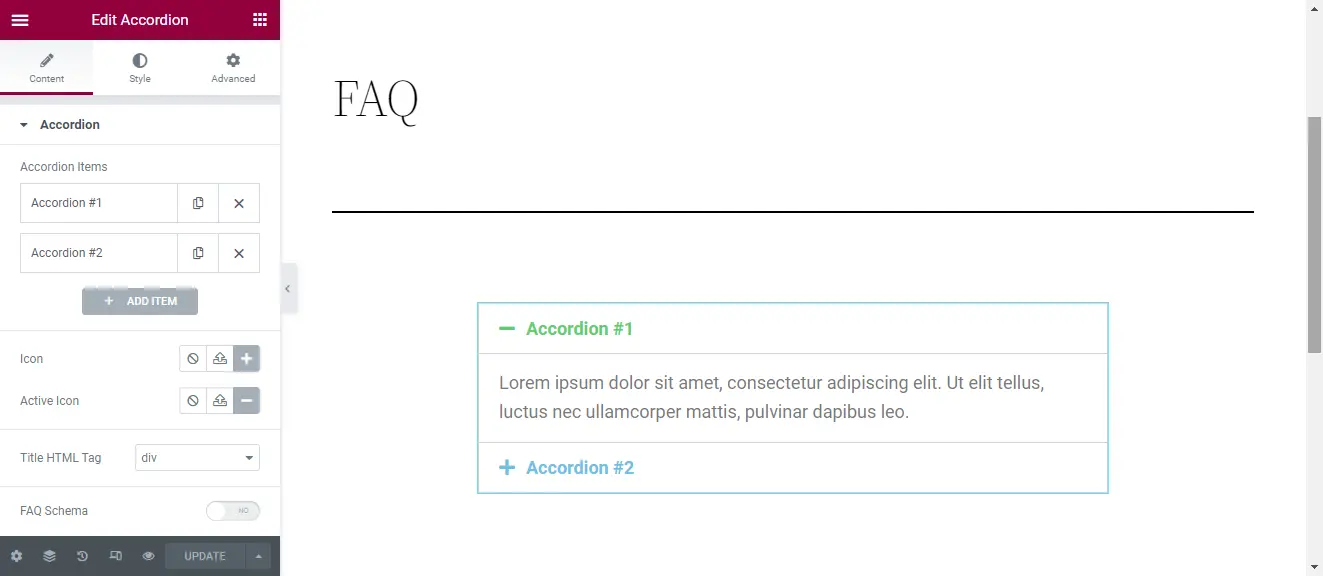
The most popular page builder for WordPress has a dedicated element to create collapsible text areas, the Accordion Widget.
To start, search “Accordion” in the Elementor left sidebar. Then drag & drop this element in your layout and customize the textual content. To conclude, define the headers in the Accordion Items section.
To use all the potential of this widget, consider also using these features:
- Custom Accordion Icons. Select your favorite collapsible text area “open” and “close” icons from the Elementor icon library or upload your icons.
- Title HTML Tag. Select the HTML element used in the collapsible text area header from a dedicated selector.
- FAQ Schema. Since collapsible text areas are often used for FAQ sections, Elementor also includes a toggle to enable the FAQPage Schema. Using this Schema makes your pages with FAQs eligible to have Rich Results on Google Search. Check out this documentation page for more information.
How to Create a Collapsible Text Area in WordPress Without Using a Plugin
In this section, we will walk you through the process of creating a collapsible text area using HTML, CSS, and JavaScript.
1. Create a New Page in WordPress
First, create a new page in WordPress where you want to add the collapsible text area.
2. Add the HTML Code
In the page editor, switch to the text mode and add the following HTML code:
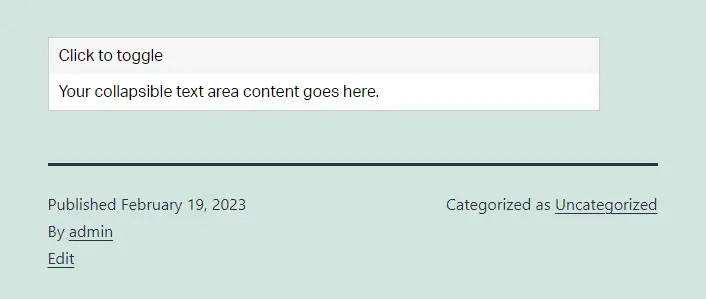
<div class="accordion">
  <div class="accordion-header">Click to toggle</div>
  <div class="accordion-content">
    Your collapsible text area content goes here.
  </div>
</div>
Here, we have created a container div with the class accordion that will hold our collapsible text area. Inside this container, we have added two divs – one with the class accordion-header that will act as a toggle button and another with the class accordion-content that will hold the conditionally displayed content.
3. Add the CSS Code
Next, we need to add some CSS code to style our collapsible text area. Add the following CSS code to your WordPress theme’s style.css file:
.accordion {
  border: 1px solid #ccc;
  margin-bottom: 20px;
}

.accordion-header {
  padding: 10px;
  background-color: #f5f5f5;
  cursor: pointer;
}

.accordion-content {
  display: none;
  padding: 10px;
}
With these rules we have set a border and margin for the container div with the class accordion. We have also styled the toggle button div with the class accordion-header with a background color and pointer cursor. Finally, we have hidden the content div with the class accordion-content.
4. Add the JavaScript Code
To make our collapsible text area work, we need to add some JavaScript code that will handle the toggling of the content when the toggle button is clicked. Add the following JavaScript code to your WordPress theme’s script.js file:
var acc = document.getElementsByClassName("accordion-header");

for (var i = 0; i < acc.length; i++) {
  acc[i].addEventListener("click", function() {
    this.classList.toggle("active");
    var content = this.nextElementSibling;
    if (content.style.display === "block") {
      content.style.display = "none";
    } else {
      content.style.display = "block";
    }
  });
}
In this code, we have first selected all elements with the class accordion-header and added a click event listener to each of them. When the header is clicked, we toggle the class active on the toggle button element and get the next sibling element, which is the content div. We then check the current display style of the content div and toggle it between block and none to show or hide the content.
5. Preview and Test
Save the changes to your WordPress theme files and preview the page where you added the collapsible text area. Click on the toggle button to see the content of the collapsible text area expand and collapse.
Enqueuing Scripts
It’s worth noting that to add the CSS and JavaScript scripts in the context of a custom plugin or theme, you should use the wp_enqueue_style() and wp_enqueue_script() functions associated with the proper hook, which for the front-end is wp_enqueue_scripts.
Conclusions
Adding a collapsible text area in WordPress can be a useful feature for displaying long pieces of content in a more compact and user-friendly way.
While there are many plugins available for this purpose, it is also possible to create a collapsible text area using HTML, CSS, and JavaScript without the need for a plugin. This approach offers a lightweight and customizable solution that can be easily integrated into any WordPress theme.