
This article will provide you with multiple solutions to conditionally display the content generated by a WordPress shortcode.
Implement your WordPress conditional shortcode
Create a custom shortcode
Before diving into methods used to run a shortcode conditionally, let’s see how to create a custom shortcode in WordPress.
To create a shortcode, use the add_shortcode() function and configure the related callback function, in this case, named shortcode_callback.
function shortcode_callback() {
	return 'content';
}

add_shortcode('my-shortcode', 'shortcode_callback');
Add a condition in the shortcode callback
A conditional shortcode is usually created by verifying WordPress conditional tags or other custom conditions inside the shortcode callback function.
In the following example, I’ll use the is_page() conditional tag to verify if we are on a page. The result will be a shortcode that returns different content based on the context where it’s executed.
function shortcode_callback() {

	if ( is_page() ) {
		return 'This is a page';
	} else {
		return 'This is not a page';
	}

}

add_shortcode( 'my-shortcode', 'shortcode_callback' );
A common need among WordPress administrators is to create conditional shortcodes to display or hide content based on the user role. The next example checks a custom capability named read_premium_content to conditionally display specific content only to the users with a premium plan.
function shortcode_callback( $atts ) {

	if ( current_user_can( 'read_premium_content' ) ) {
		return 'Content';
	}

}

add_shortcode( 'my-shortcode', 'shortcode_callback' );
Conditionally display content with shortcode parameters
Shortcodes can optionally support parameters. By using this feature, you can conditionally display the shortcode content based on the values provided to the single shortcode instances.
The example below displays the shortcode content only if the enabled shortcode parameter is present and has a value.
function shortcode_callback( $atts ) {

	if ( isset( $atts['enabled'] ) ) {
		return 'Content';
	}

}

add_shortcode( 'my-shortcode', 'shortcode_callback' );
The shortcode without the enabled parameter doesn’t generate content:
[my-shortcode]
This shortcode with the enabled parameter generates content:
[my-shortcode enabled="1"]
Using parameters opens up a lot of new possibilities. For instance, you can create a shortcode with parameters to conditionally display the content only in a specific range of dates.
With a start-date and an end-date parameter, the user can specify when to display the shortcode content. A condition in the shortcode will verify the submitted dates against the current date.
function shortcode_callback( $atts ) {

	$start_date   = $atts['start-date'];
	$end_date     = $atts['end-date'];
	$current_date = date( "Y-m-d" );

	if ( $current_date > $start_date and
	     $current_date < $end_date ) {
		return 'Content';
	}

}

add_shortcode( 'my-shortcode', 'shortcode_callback' );
The user can provide the start and end date by using the shortcode like this:
[my-shortcode start-date="2022-05-07" end-date="2022-05-08"]
This plugin, for example, available in the WordPress.org repository, does similar work by using shortcode parameters and shortcode content.
Conditionally run the add_shortcode() function
Note that you can alternatively run the add_shortcode() function based on a specific condition.
function shortcode_callback() {
	return 'content';
}

if ( $custom_condition ) {
	add_shortcode( 'my-shortcode', 'shortcode_callback' );
}
Conditionally execute do_shortcode()
The do_shortcode() function, if used as the callback of the add_filter() function, gives you the ability to run the shortcode in custom contexts.
In the example below, I used do_shortcode() to enable the use of shortcodes in text widgets. This change is applied conditionally based on the value of a custom WordPress option.
//Enable shortcodes in the text widgets content if the related option is enabled
if ( get_option( 'enable_shortcode_in_text_widget' ) === "1" ) {
	add_filter( 'widget_text', 'do_shortcode' );
}
Conditionally display a shortcode with a plugin
This section provides user-friendly solutions to conditionally display shortcodes using plugins.
Restricted blocks
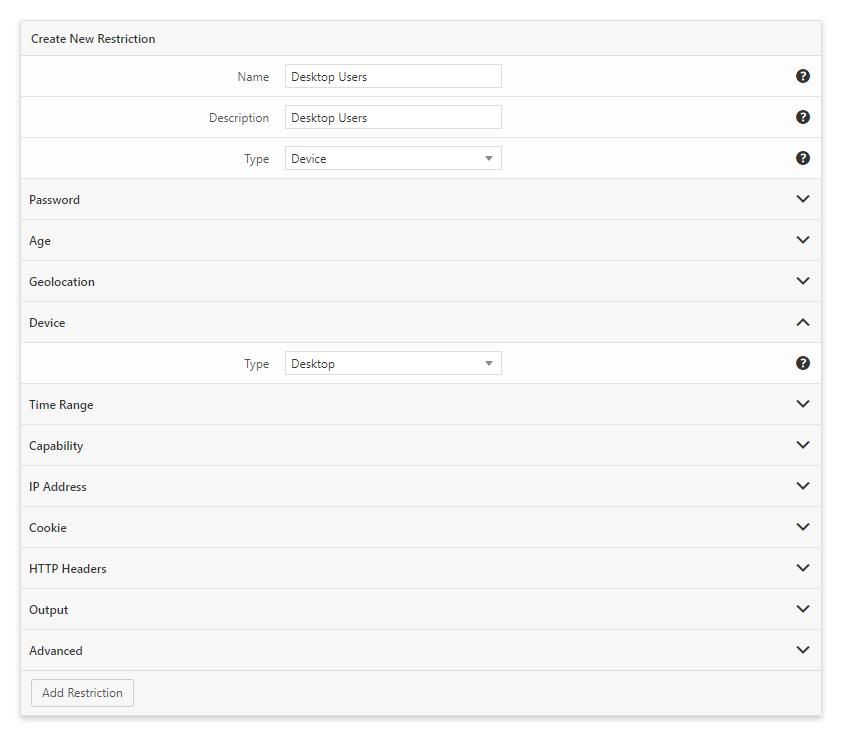
The Restricted Blocks plugin allows you to display specific editor blocks based on custom conditions. Specifically, with this plugin, you can decide to show or hide a shortcode based on the following factors: password, age, geolocation, device, time range, capability, IP address, cookie, HTTP header.
In the following example, I will create a conditional shortcode displayed only to users who visit the articles from desktop devices. This procedure requires three steps:
I first set up a restriction to limit the block visibility only to users who visit the page from desktop devices.
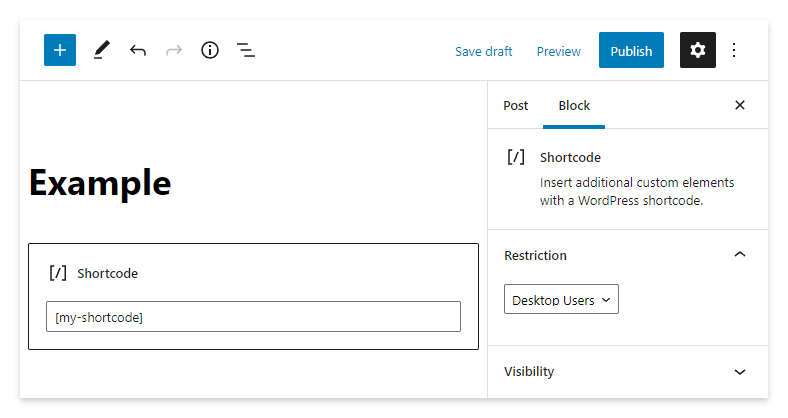
Then, I create a post and use the Shortcode block to add our shortcode.
Finally, I open the editor sidebar associated with this block and select the restriction to display the shortcode only to desktop device users.
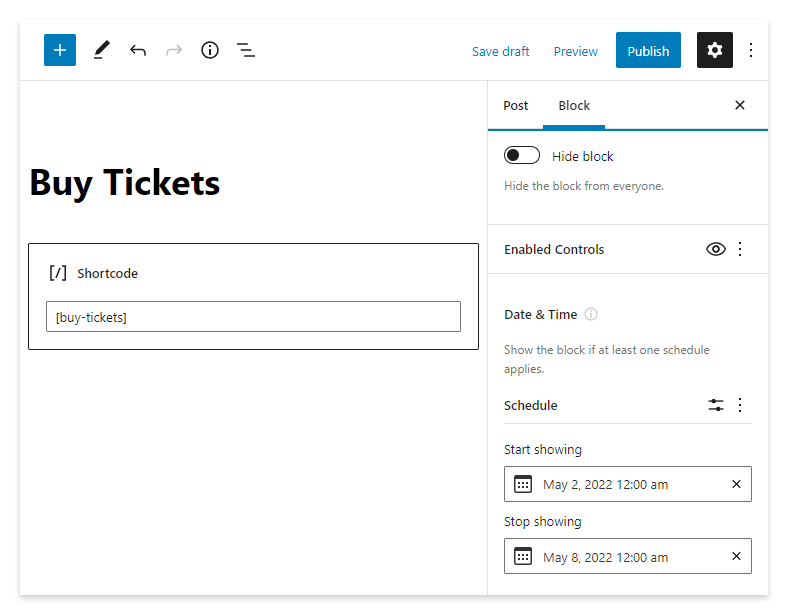
Block Visibility
Block Visibility is a WordPress plugin similar to Restricted Block. To create a conditional shortcode with this plugin, create a Shortcode block and then apply the display conditions with the options in the block sidebar.
In the example below, a shortcode used to sell tickets is displayed only in the time range specified with the Start showing and Stop showing options of the plugin.