

While using React for a settings menu is not necessary, it certainly helps in creating settings pages that are modern and able to handle a high number of options.
The purpose of this tutorial is to build a React-based WordPress settings page that allows us to display and update WordPress options.
The following examples can be used as a starting point for creating settings pages for custom plugins and themes.
Create a New Admin Menu
Register the Menu
Let’s start by registering a new admin menu for our settings page.
You can achieve this using the admin_menu hook and the add_menu_page() function.
function me_add_admin_menu() {

	add_menu_page(
		esc_html__( 'UT', 'react-settings-page' ),
		esc_html__( 'UI Test', 'react-settings-page' ),
		'manage_options',
		'react-settings-page-options',
		'me_display_menu_options'
	);

	global $screen_id_options;
	$screen_id_options = add_submenu_page(
		'react-settings-page-options',
		esc_html__( 'UT - Options', 'react-settings-page' ),
		esc_html__( 'Options', 'react-settings-page' ),
		'manage_options',
		'react-settings-page-options',
		'me_display_menu_options'
	);

}

add_action( 'admin_menu', 'me_add_admin_menu');
Next, add the function used to generate the settings menu output. Note that the implementation below includes a separate file with the options page HTML.
function me_display_menu_options() {
	include_once( 'options.php' );
}
In the options.php file create a div with a unique id attribute. The my-react-app id will be later used in React to render the main component of the app.
<?php

if ( ! current_user_can( 'manage_options' ) ) {
   wp_die( esc_html__( 'You do not have sufficient capabilities to access this page.', 'react-settings-page' ) );
}

?>

<div class="wrap">

    <div id="my-react-app"></div>

</div>
Enqueue the React Build JS File in the WordPress Settings Page
Use the admin_enqueue_scripts hook and wp_enqueue_script() with a conditional to enqueue the React build only on our settings page.
function enqueue_admin_scripts(){

	global $screen_id_options;
	if ( $screen_id_options == $screen_id_options ) {

		$plugin_url  = plugin_dir_url( __FILE__ );

		wp_enqueue_script('react-settings-page-menu-options',
			$plugin_url . '/build/index.js',
			array('wp-element', 'wp-api-fetch'),
			'1.00',
			true);

	}

}

add_action( 'admin_enqueue_scripts', 'enqueue_admin_scripts' );
Note that we also added two dependencies to the build file:
wp-element– This is the abstraction layer for React created by WordPress. If we use this dependency, we don’t need to load the React library directly.wp-api-fetch– This dependency will be used to perform fetch operations. @wordpress/api-fetch is a wrapper for the native fetch with additional WordPress-related features.
Set Up the React Environment
Now we have to install @wordpress/scripts to convert the React JSX to vanilla JavaScript.
A JSON file like the one below should be enough for our needs:
{
  "name": "react-settings-page",
  "version": "1.0.0",
  "description": "",
  "main": "index.js",
  "scripts": {
    "build": "wp-scripts build",
    "start": "wp-scripts start"
  },
  "keywords": [],
  "author": "",
  "license": "ISC",
  "devDependencies": {
    "@wordpress/scripts": "^25.4.0"
  }
}
To install the package run the instruction below. It’s worth mentioning that Node.js is necessary to properly complete this task.
npm install
Then run this command to execute the development script that automatically updates the build file when changes to the React-related JavaScript files are applied:
npm start
Alternatively, you can generate the production build with this command:
npm build
Create a Simple React App in the Settings Menu
The npm script that is running creates the build from the referenced index.js file.
So, let’s create the index.js content:
const {render} = wp.element;
import App from './App';

if (document.getElementById('my-react-app')) {
  render(<App/>, document.getElementById('my-react-app'));
}
And an App.js file that stores the main App component.
const App = () => {

  return (
      <div>

        <h1>React Settings Page</h1>
        <p>Our react settings page is now ready.</p>

      </div>

  );

};
export default App;
By visiting the settings page, you should now see the simple component created for testing purposes displayed.
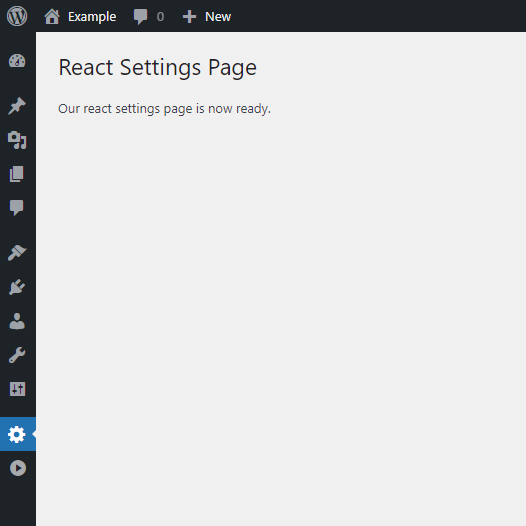
If, at this point, you see the “React Settings Page” menu displayed, this means that both our npm packages and our WordPress implementation are both correct.
Add Two Plugin Options
These two plugin options will be used to test the settings menu functionalities.
//Add two plugin options
add_option('plugin_option_1', 'default_value_1');
add_option('plugin_option_2', 'default_value_2');
Create the REST API endpoints
Our project requires two new REST API endpoints, one to read the plugin options during the menu initialization and another to update the plugin options when the user clicks on the save button.
If you are new to the WordPress REST API, you might want to study the following resources before proceeding with this tutorial:
- https://developer.wordpress.org/rest-api/
- https://developer.wordpress.org/rest-api/extending-the-rest-api/adding-custom-endpoints/
A WP REST API Endpoint to Make the Plugin Options Readable From the Settings Menu
With the rest_api_init hook, we define a callback function used to register the new REST API endpoints.
add_action( 'rest_api_init', 'rest_api_register_route');
The first route that we define is used to read data. This route is accessible from the https://example.com/react-settings-page/v1/options URL by sending requests with the GET method.
/*
 * Add custom routes to the Rest API
 */
function rest_api_register_route(){

	//Add the GET 'react-settings-page/v1/options' endpoint to the Rest API
	register_rest_route(
		'react-settings-page/v1', '/options', array(
			'methods'  => 'GET',
			'callback' => 'rest_api_react_settings_page_read_options_callback',
			'permission_callback' => '__return_true'
		)
	);


}
Now we have to write the rest_api_react_settings_page_read_options_callback() callback function that generates the response.
 /*
 * Callback for the GET 'react-settings-page/v1/options' endpoint of the Rest API
 */
function rest_api_react_settings_page_read_options_callback( $data ) {

	//Check the capability
	if (!current_user_can('manage_options')) {
		return new WP_Error(
			'rest_read_error',
			'Sorry, you are not allowed to view the options.',
			array('status' => 403)
		);
	}

	//Generate the response
	$response = [];
	$response['plugin_option_1'] = get_option('plugin_option_1');
	$response['plugin_option_2'] = get_option('plugin_option_2');


	//Prepare the response
	$response = new WP_REST_Response($response);

	return $response;

}
This callback function does what follows:
- It checks the capability of the user. Only the user with the
manage_optionscapability should have access to the endpoint response. - The script then stores the options values in a PHP array.
- The response is then generated with
WP_REST_Response().
A REST API Endpoint to Update the Options
This endpoint will be used when the user saves the options by clicking the “Save Changes” button.
To begin, add a new route inside the rest_api_register_route() function that we created in the previous step:
//Add the POST 'react_settings_page/v1/options' endpoint to the Rest API
register_rest_route(
	'react-settings-page/v1', '/options', array(
		'methods'             => 'POST',
		'callback'            => 'rest_api_react_settings_page_update_options_callback',
		'permission_callback' => '__return_true'
	)
);
Then create the callback function that generates the response:
function rest_api_react_settings_page_update_options_callback( $request ) {

	if ( ! current_user_can( 'manage_options' ) ) {
		return new WP_Error(
			'rest_update_error',
			'Sorry, you are not allowed to update the DAEXT UI Test options.',
			array( 'status' => 403 )
		);
	}

	//Get the data and sanitize
	//Note: In a real-world scenario, the sanitization function should be based on the option type.
	$plugin_option_1 = sanitize_text_field( $request->get_param( 'plugin_option_1' ) );
	$plugin_option_2 = sanitize_text_field( $request->get_param( 'plugin_option_2' ) );

	//Update the options
	update_option( 'plugin_option_1', $plugin_option_1 );
	update_option( 'plugin_option_2', $plugin_option_2 );

	$response = new WP_REST_Response( 'Data successfully added.', '200' );

	return $response;

}
This callback function does what follows:
- It checks the capability of the user. Only the user with the
manage_optionscapability should be able to update the options. - The submitted form data are retrieved using
get_param(). - The data are sanitized using WordPress sanitization functions.
- The single options are updated using
update_option(). - A response is generated to confirm the success of the update operation.
Build the Menu With React
In this part of the tutorial, we will use React to add the form fields to the settings page, initialize the options, and handle the options updates.
Start by adding two input fields and manage their states:
const useState = wp.element.useState;

const App = () => {

  const [option1, setOption1] = useState('');
  const [option2, setOption2] = useState('');

  return (
      <div>

        <h1>React Settings Page</h1>

        <div>
          <label>Options 1</label>
          <input
              value={option1}
              onChange={(event) => {
                setOption1(event.target.value);
              }}
          />
        </div>

        <div>
          <label>Options 2</label>
          <input
              value={option2}
              onChange={(event) => {
                setOption2(event.target.value);
              }}
          />
        </div>

      </div>

  );

};
export default App;
The two input fields are now available on the settings page.
Options Initialization
In your React file, initialize the options values using @wordpress/api-fetch on the endpoint that we previously created.
Note that this requests run on the useEffect React hook. This task is executed only on the first render of the component.
useEffect(() => {

  /**
   * Initialize the options fields with the data received from the REST API
   * endpoint provided by the plugin.
   */
  wp.apiFetch({path: '/react-settings-page/v1/options'}).
      then(data => {

            let options = {};

            //Set the new values of the options in the state
            setOption1(data['plugin_option_1'])
            setOption2(data['plugin_option_2'])

          },
      );

}, []);
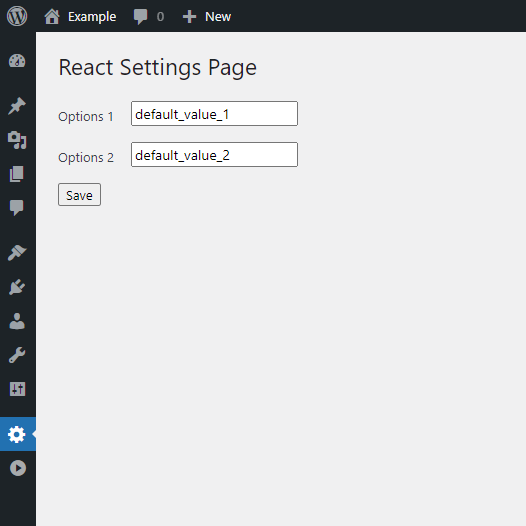
The settings page now displays the real options values.
Options Update
Using again api-fetch we can now send the options values to the POST endpoint we previously created.
To achieve this, add the “Save Changes” button and run api-fetch in the onClick event callback.
Note that this requests runs after we save the plugin options by clicking on the “Save Changes” button.
<button onClick={() => {
wp.apiFetch({
path: '/react-settings-page/v1/options',
method: 'POST',
data: {
'plugin_option_1': option1,
'plugin_option_2': option2,
},
}).then(data => {
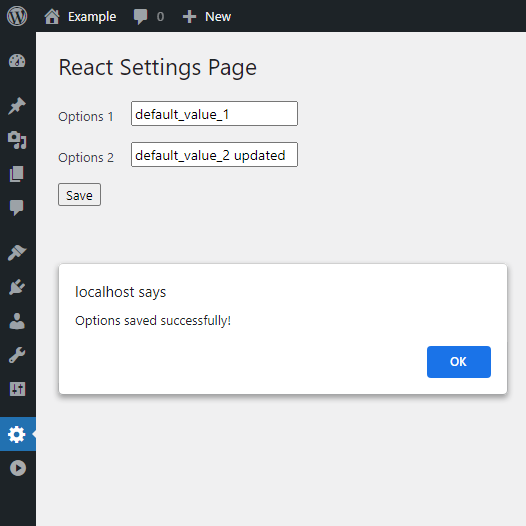
alert('Options saved successfully!');
});
}}>Save
</button>
The options can now be saved. Below is the alert message generated in the promise of the request.
The Complete React Script
Here is the complete react script that handle our options.
const useEffect = wp.element.useState;
const useState = wp.element.useState;

const App = () => {

  const [option1, setOption1] = useState('');
  const [option2, setOption2] = useState('');

  useEffect(() => {

    /**
     * Initialize the options fields with the data received from the REST API
     * endpoint provided by the plugin.
     */
    wp.apiFetch({path: '/react-settings-page/v1/options'}).
        then(data => {

              let options = {};

              //Set the new values of the options in the state
              setOption1(data['plugin_option_1'])
              setOption2(data['plugin_option_2'])

            },
        );

  });

  return (
      <div>

        <h1>React Settings Page</h1>

        <div>
          <label>Options 1</label>
          <input
              value={option1}
              onChange={(event) => {
                setOption1(event.target.value);
              }}
          />
        </div>

        <div>
          <label>Options 2</label>
          <input
              value={option2}
              onChange={(event) => {
                setOption2(event.target.value);
              }}
          />
        </div>

        <button onClick={() => {

          wp.apiFetch({
            path: '/react-settings-page/v1/options',
            method: 'POST',
            data: {
              'plugin_option_1': option1,
              'plugin_option_2': option2,
            },
          }).then(data => {
            alert('Options saved successfully!');
          });

        }}>Save
        </button>

      </div>

  );

};
export default App;
Augment the Settings Page With More Features
In this tutorial, we only covered some of the aspects of a real-world WordPress settings page that use React. This has been done to keep the tutorial easy to follow, even for beginners.
If you are working on a premium plugin or theme or if you are planning to deliver to your client a settings page with high-quality standard, you might also have to consider what follows.
Add CSS Styles
With a CSS file, you can apply the proper styles to the settings menu page.
Add Translation Functions
Make the displayed text translatable by embedding the wp-i18n dependency when the build file is enqueued and by adding translation functions in the React code.
The build below, for example, includes wp-i18n as a dependency:
wp_enqueue_script( 'react-settings-page-menu-options',
	$plugin_url . '/build/index.js',
	array( 'wp-element', 'wp-api-fetch', 'wp-i18n' ),
	'1.00',
	true );
You can then use the available functions to create translatable text in your React code:
<button>{__('Save settings', 'react-settings-page')}
Add a Nonce
Use a nonce to check if the REST API requests come from our settings menu.
In this scenario, nonce should be sent as a payload of api-fetch:
const nonce = document.getElementById('nonce-field');

wp.apiFetch({
  path: '/react-settings-page/v1/options',
  method: 'POST',
  data: {
    'plugin_option_1': option1,
    'plugin_option_2': option2,
    nonce: nonce,
  },
}).then(data => {
  alert('Options saved successfully!');
});
And then checked in the REST API endpoints callback.
// Check if the nonce is valid
$nonce = $request->get_param( 'nonce' );
if ( ! wp_verify_nonce( $nonce, 'react-settings-page' ) ) {
	return new WP_Error( 'invalid_nonce', 'Invalid nonce.', array( 'status' => 403 ) );
}
Looking for more information on using nonces on WordPress? Then check out the nonces documentation page on WordPress.org or this basic tutorial on the ElegantThemes site.
Use Modern React Components for the UI Elements
To handle toggle, select elements, multiple select elements, etc. you might want to use dedicated React components. Examples of these components are:
Create a Header That Allows You to Switch Between Settings Page Tabs
For large plugins that include dozens of options, you might consider handling multiple categories of options using tabs.
With React, you can easily handle the tabs functionality by using a state that stores the active tab and then using this state to render the category of options conditionally.
Split the Options in Cards
If using tabs isn’t enough, consider using cards to split the options into sub-categories.
Plugins like Jetpack use this technique to improve the user experience.
Add a Footer With Footer Links and More
Add a settings menu footer if you want to link important resources related to the plugin, like documentation pages, the developer site, and more.