

As a website owner or administrator, you may need to restrict access to certain parts of your site to maintain security or protect sensitive information. For this, WordPress provides a helpful feature called Roles and Capabilities, which allows you to control what different users can and cannot do on your site.
You can use user roles to hide menu items from unauthorized users. For example, you may want to hide a “Dashboard” link from non-administrative users or hide premium content from users who haven’t paid for access.
In this blog post, we will show you how to hide menu items based on different user roles in WordPress by using a free plugin and with custom php code.
First method: Use a WordPress Plugin
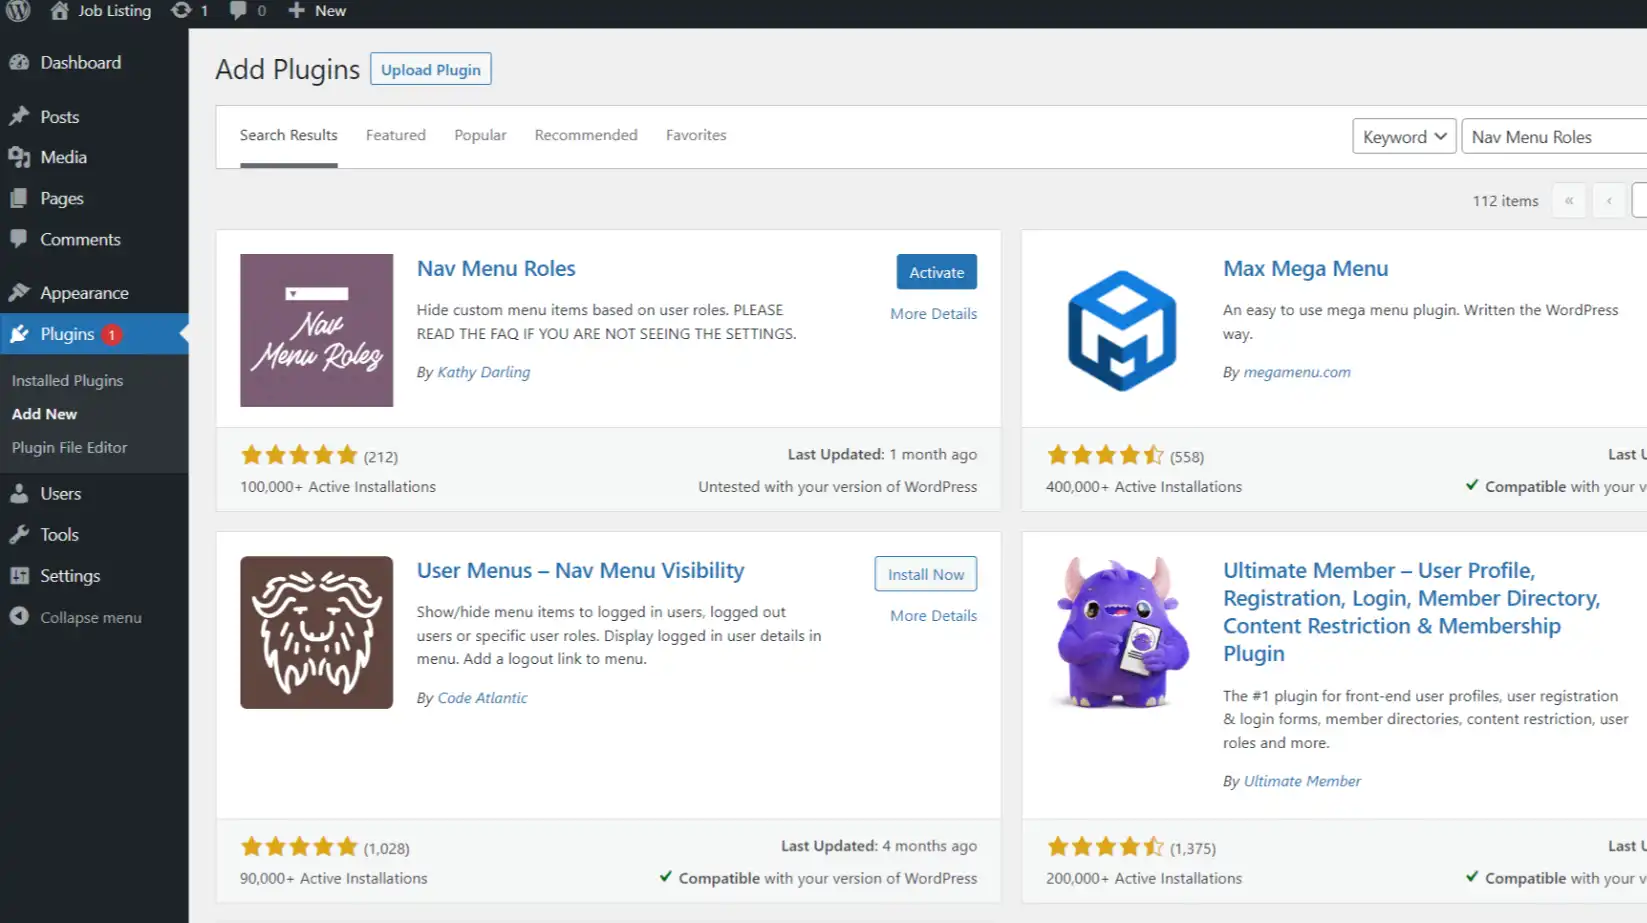
We are going to use the plugin named Nav Menu Roles by Kathy Darling. This is a free plugin. You can download the plugin from the WordPress Plugin repository or install it from your plugin dashboard.
Step-1: Install the Free WordPress Nav Menu Role Plugin
In order to install it from your dashboard, go to Plugins and click on the Add New menu. After that, you will see the plugins dashboard. Now search the plugin “Nav Menu Roles”, it will be the first plugin. Install and activate it.
Step-2: Select the Specific Menu Item that You Want to Hide
Next, head to the WordPress menus. Select a specific menu item that you want to use/hide.
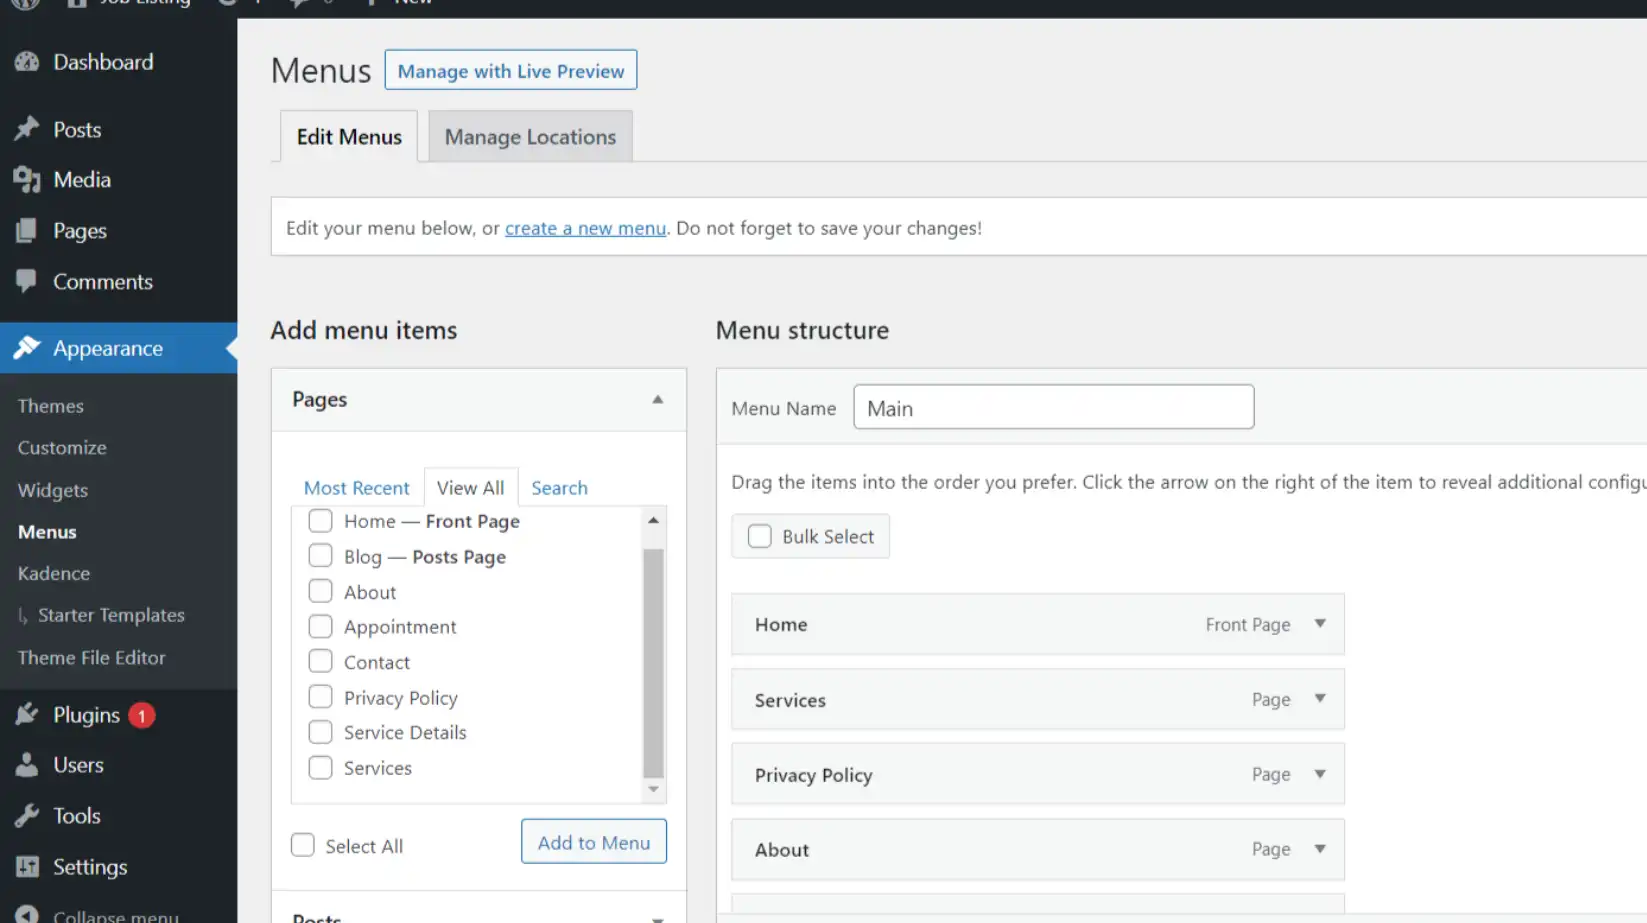
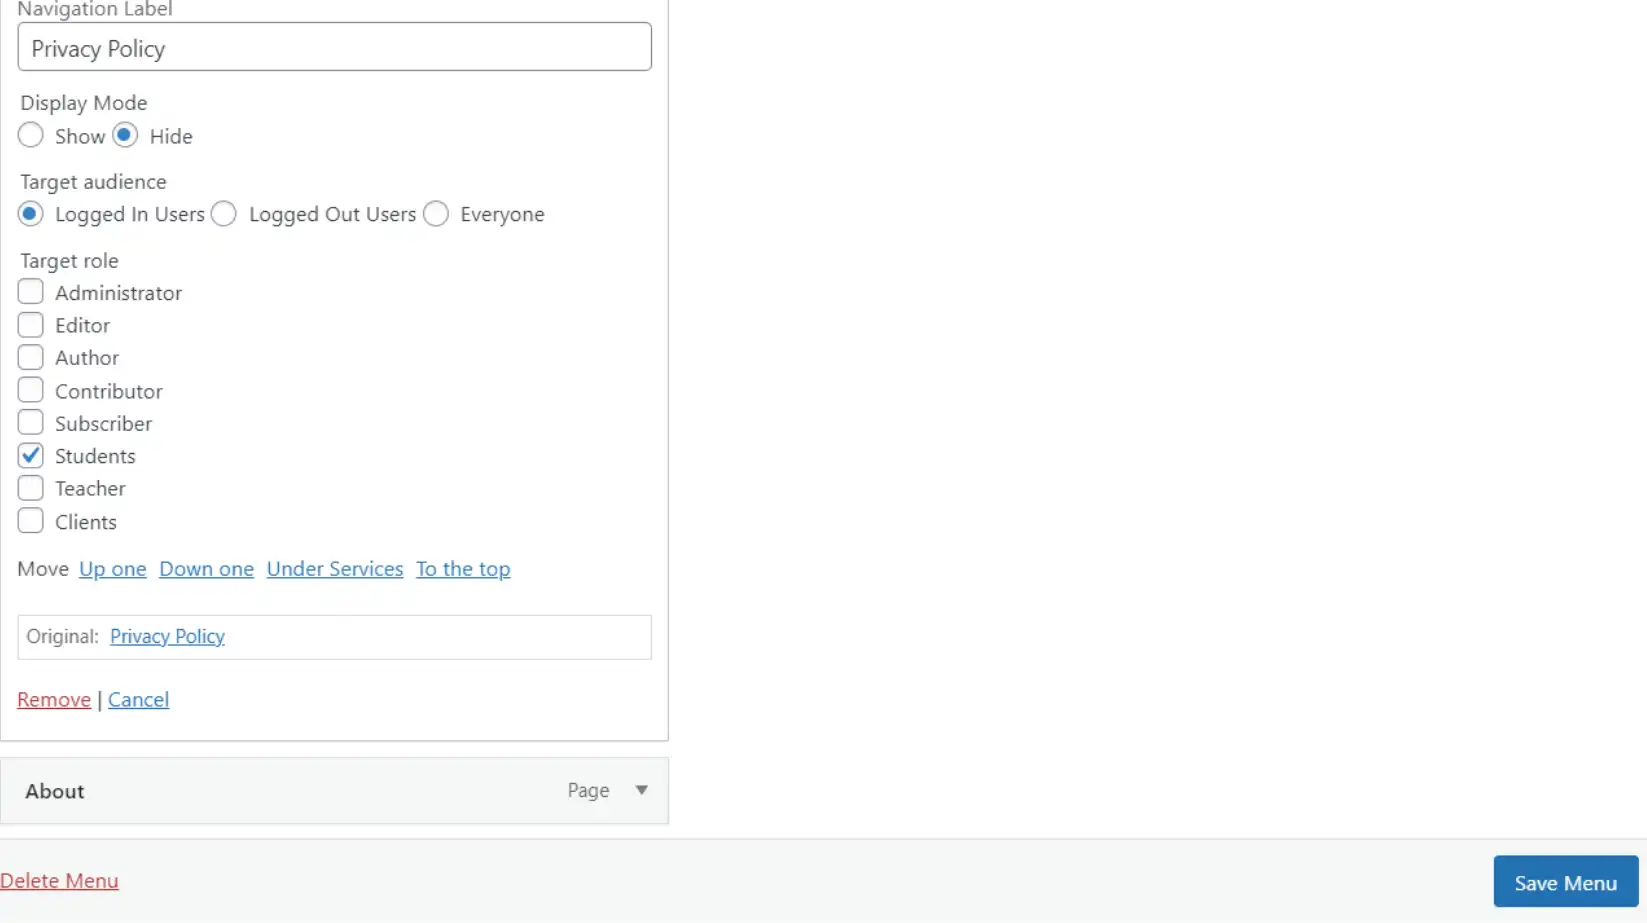
For example, you want to hide the privacy policy menu item. So go to the privacy policy menu item and click on the drop-down.
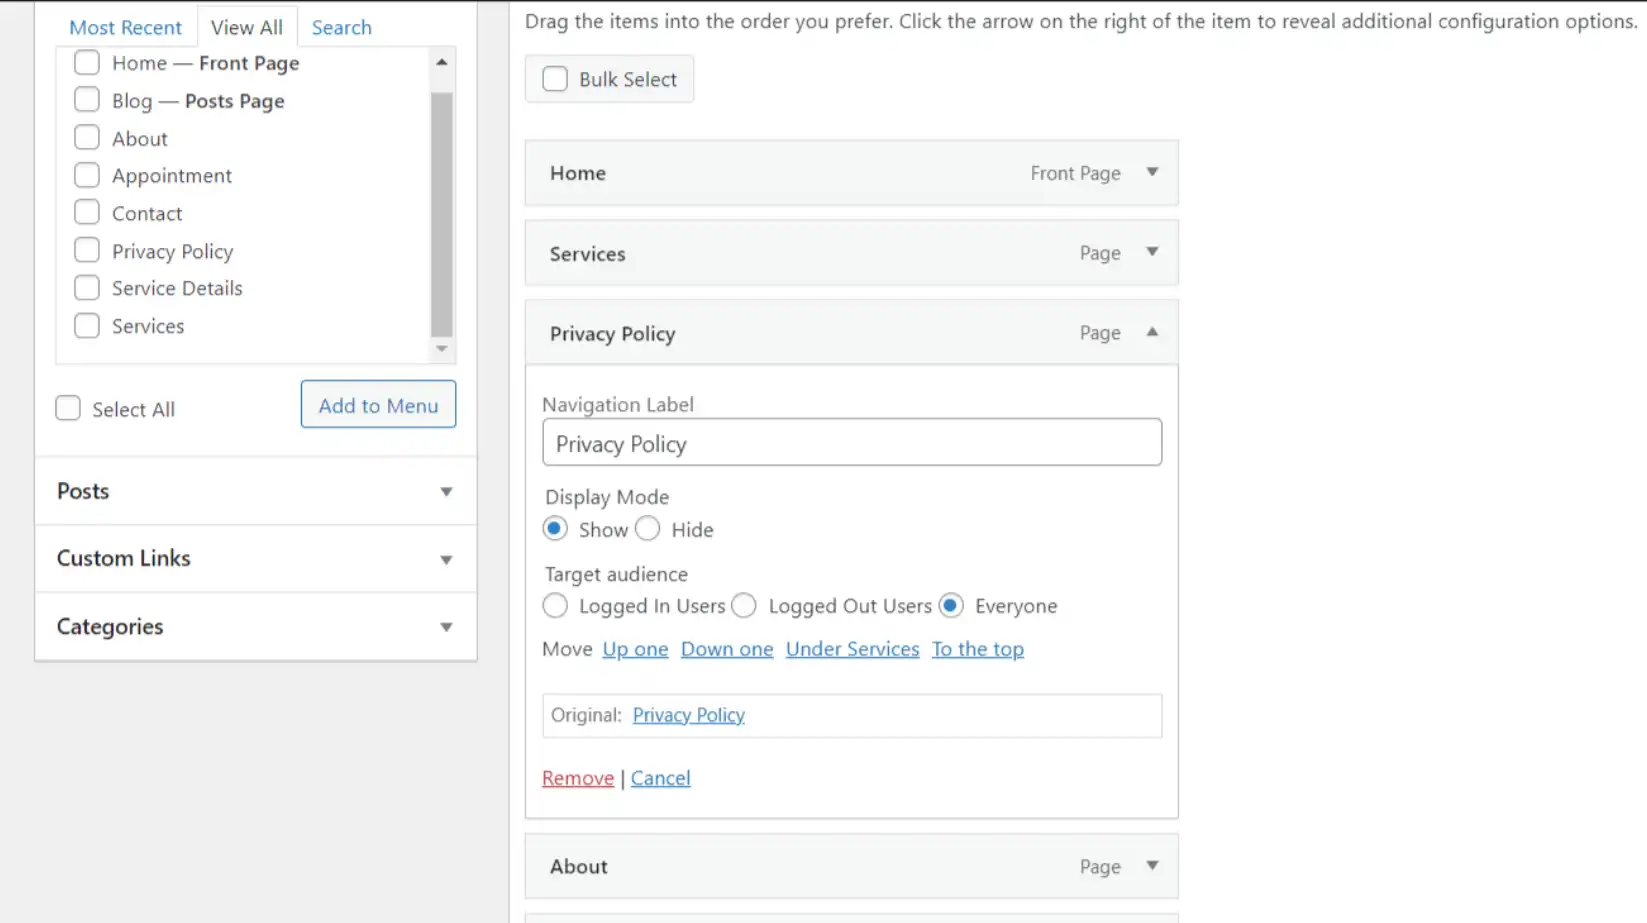
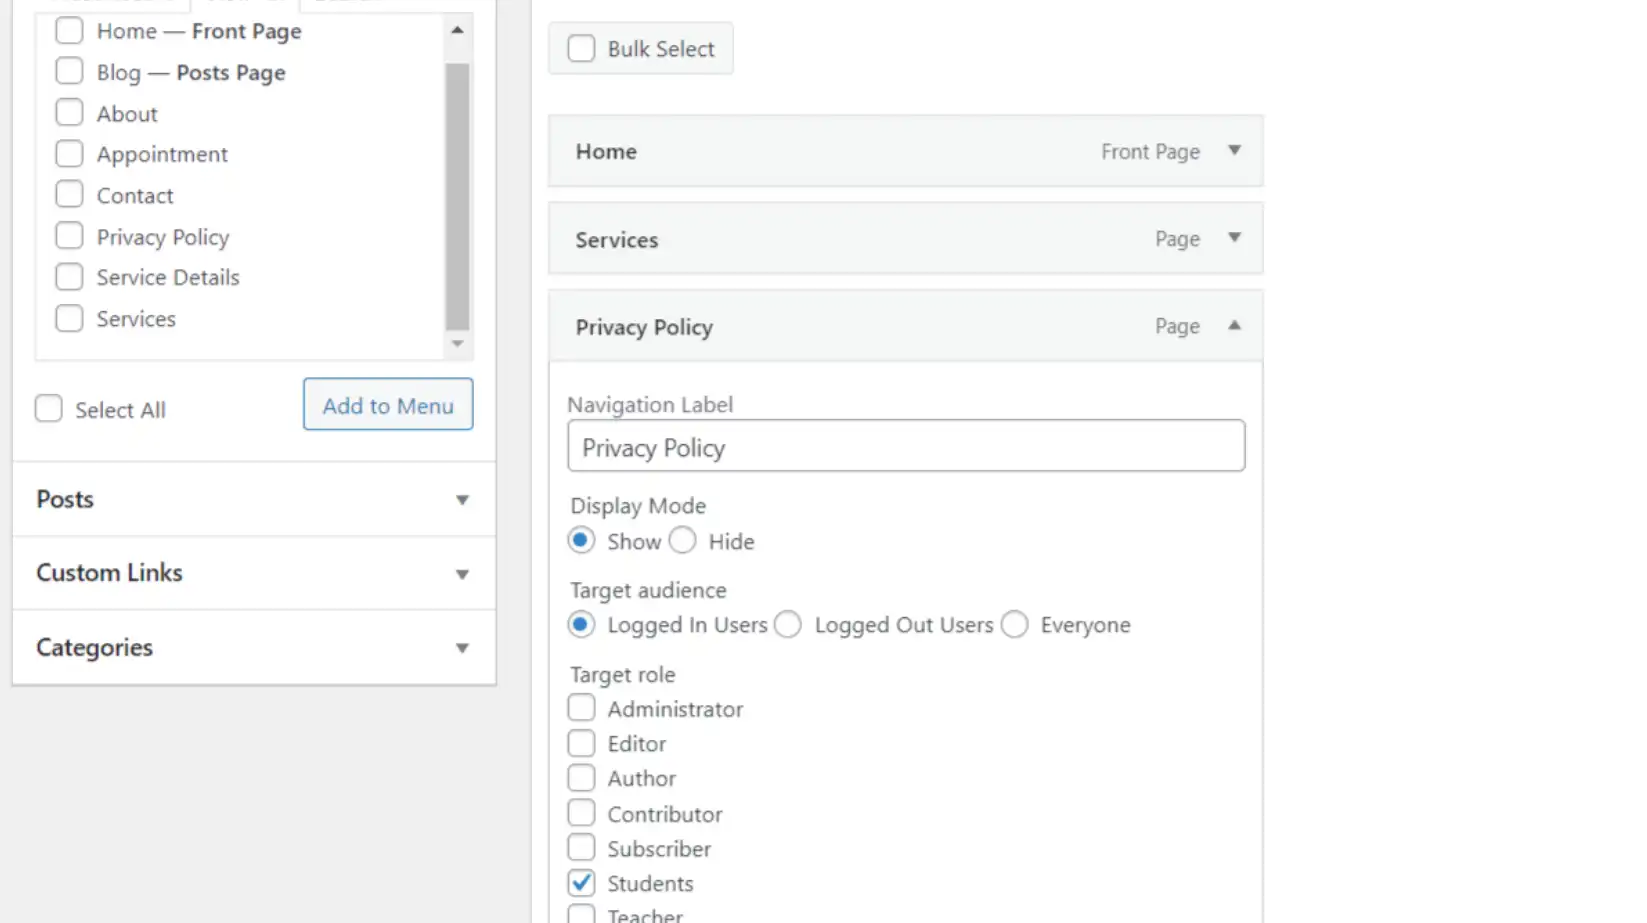
Step-3: Select User Roles from Which you Want to Hide the Specific Menu Item
Selecting user roles is the most important part of this blog. Though, it is super easy. Let’s follow the instruction below.
Firstly, go to the specific menu items that you want to hide. Next, click the drop-down option that I mentioned in step-2. Under Target Audience, select the Logged in Users option. Selecting this option will display various user roles. Lastly, pick the user role that you want to hide specific menu items from.
For example, I want to hide the privacy policy menu item from the student’s role. So, I select the Privacy Policy menu Item’s drop-down and click Logged In Users. Under logged-in user, I choose the Students role.
Step-4: Select the Display Mode as Hide and Save Menu
We have reached the final step. In this step, we need just two clicks. Under the menu item that you want to hide, you can find Display Mode. Click on the Hide option and Save Menu.
For instance, go to the privacy policy menu item. Now click on the hide option and save menu.
Now, navigate the website and see the changes.
You can use other plugins, in addition to the Nav Menu Roles plugin, to accomplish the same task. Below is a list of plugins that you can use to hide specific menu items based on different user roles.
We’ve finished the first phase of this tutorial, so let’s dive into the second. Here, you’ll discover how to use custom code to hide menu items based on user roles.
Second Method: Use Custom Code
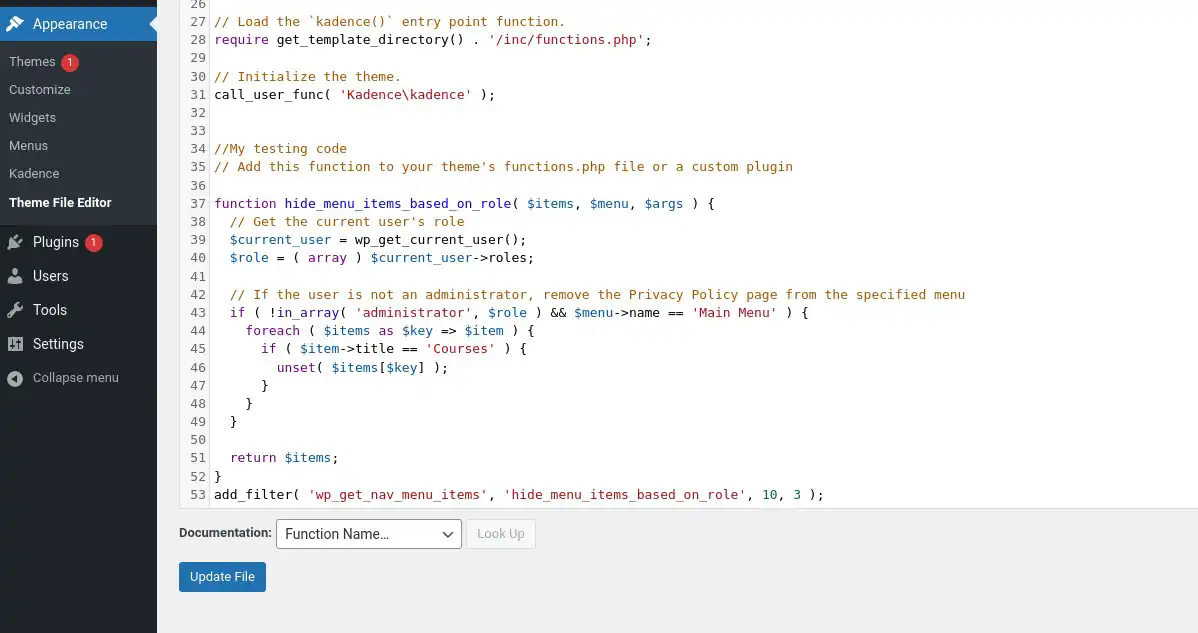
Add this function to your theme’s functions.php file. This code snippet hides the “Privacy Policy” page from the navigation menu called “Main Menu” for all users except administrators.
// Add this function to your theme's functions.php file or a custom plugin

function hide_menu_items_based_on_role( $items, $menu, $args ) {
  // Get the current user's role
  $current_user = wp_get_current_user();
  $role = ( array ) $current_user->roles;

  // If the user is not an administrator, remove the Privacy Policy page from the specified menu
  if ( !in_array( 'administrator', $role ) && $menu->name == 'Main Menu' ) {
    foreach ( $items as $key => $item ) {
      if ( $item->title == 'Privacy Policy' ) {
        unset( $items[$key] );
      }
    }
  }

  return $items;
}
add_filter( 'wp_get_nav_menu_items', 'hide_menu_items_based_on_role', 10, 3 );
Here’s how this code works:
- The
hide_menu_items_based_on_role()function is hooked to thewp_get_nav_menu_itemsfilter, which is called when WordPress generates a navigation menu. - The function first gets the current user’s role using the
wp_get_current_user()function. - If the user is not an administrator (i.e. if their role does not include the “administrator” capability) and if the menu being generated is the specified menu you want to modify. In this example, the menu name is “Main Menu”. You can replace this with the name of the menu you want to modify. The function loops through the navigation menu items and removes any that have the title “Privacy Policy”.
- Finally, the function returns the modified menu items array.
Note that you can modify this code to hide other pages or menu items based on different user roles. In that case just replace “Privacy Policy” with the title of the page or menu item you want to hide, and adjust the role check as needed.
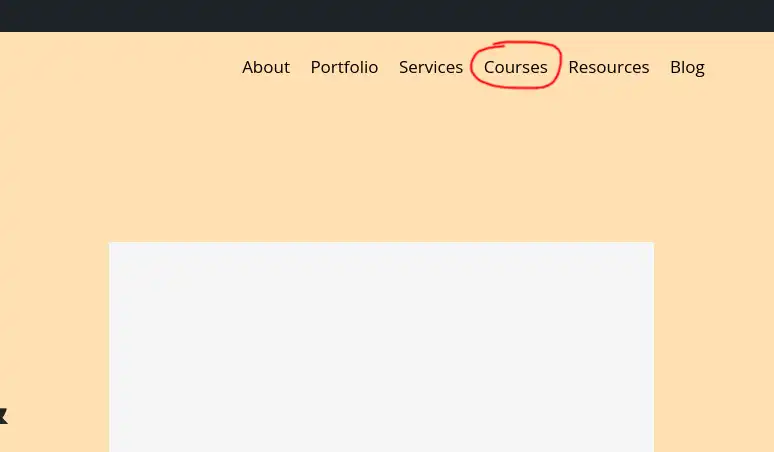
Here is the proof that the code works!
Here I put the code in my functions.php file of the active theme. The menu name is “Main Menu” and the item is “Courses”.
Now, here is my menu when I’m logged in as admin.
And here, I’m not logged in as admin.
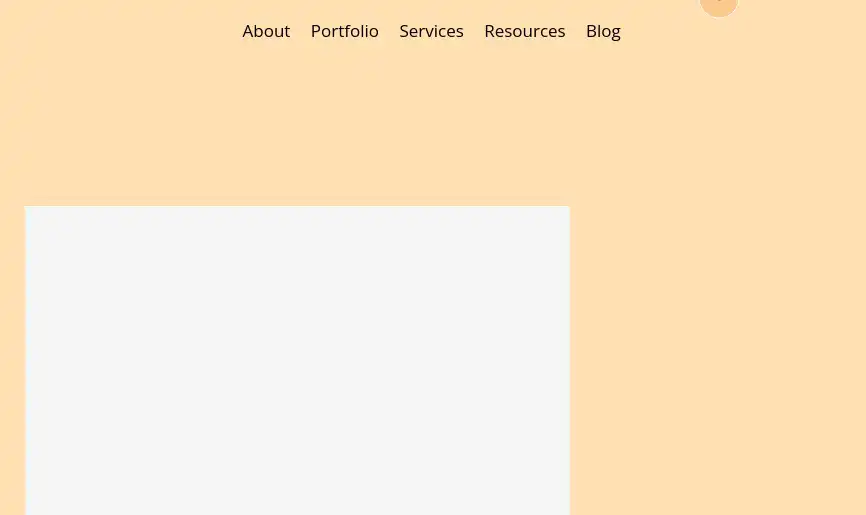
Hurraaa!! The code works!!