Running Scripts Based on Visitor Consent
The plugin loads a tracking script only for the visitors who accepted the category that contains it. This article explains how to put a script under consent, when the script is added to the page, and how to verify the result.
How it works
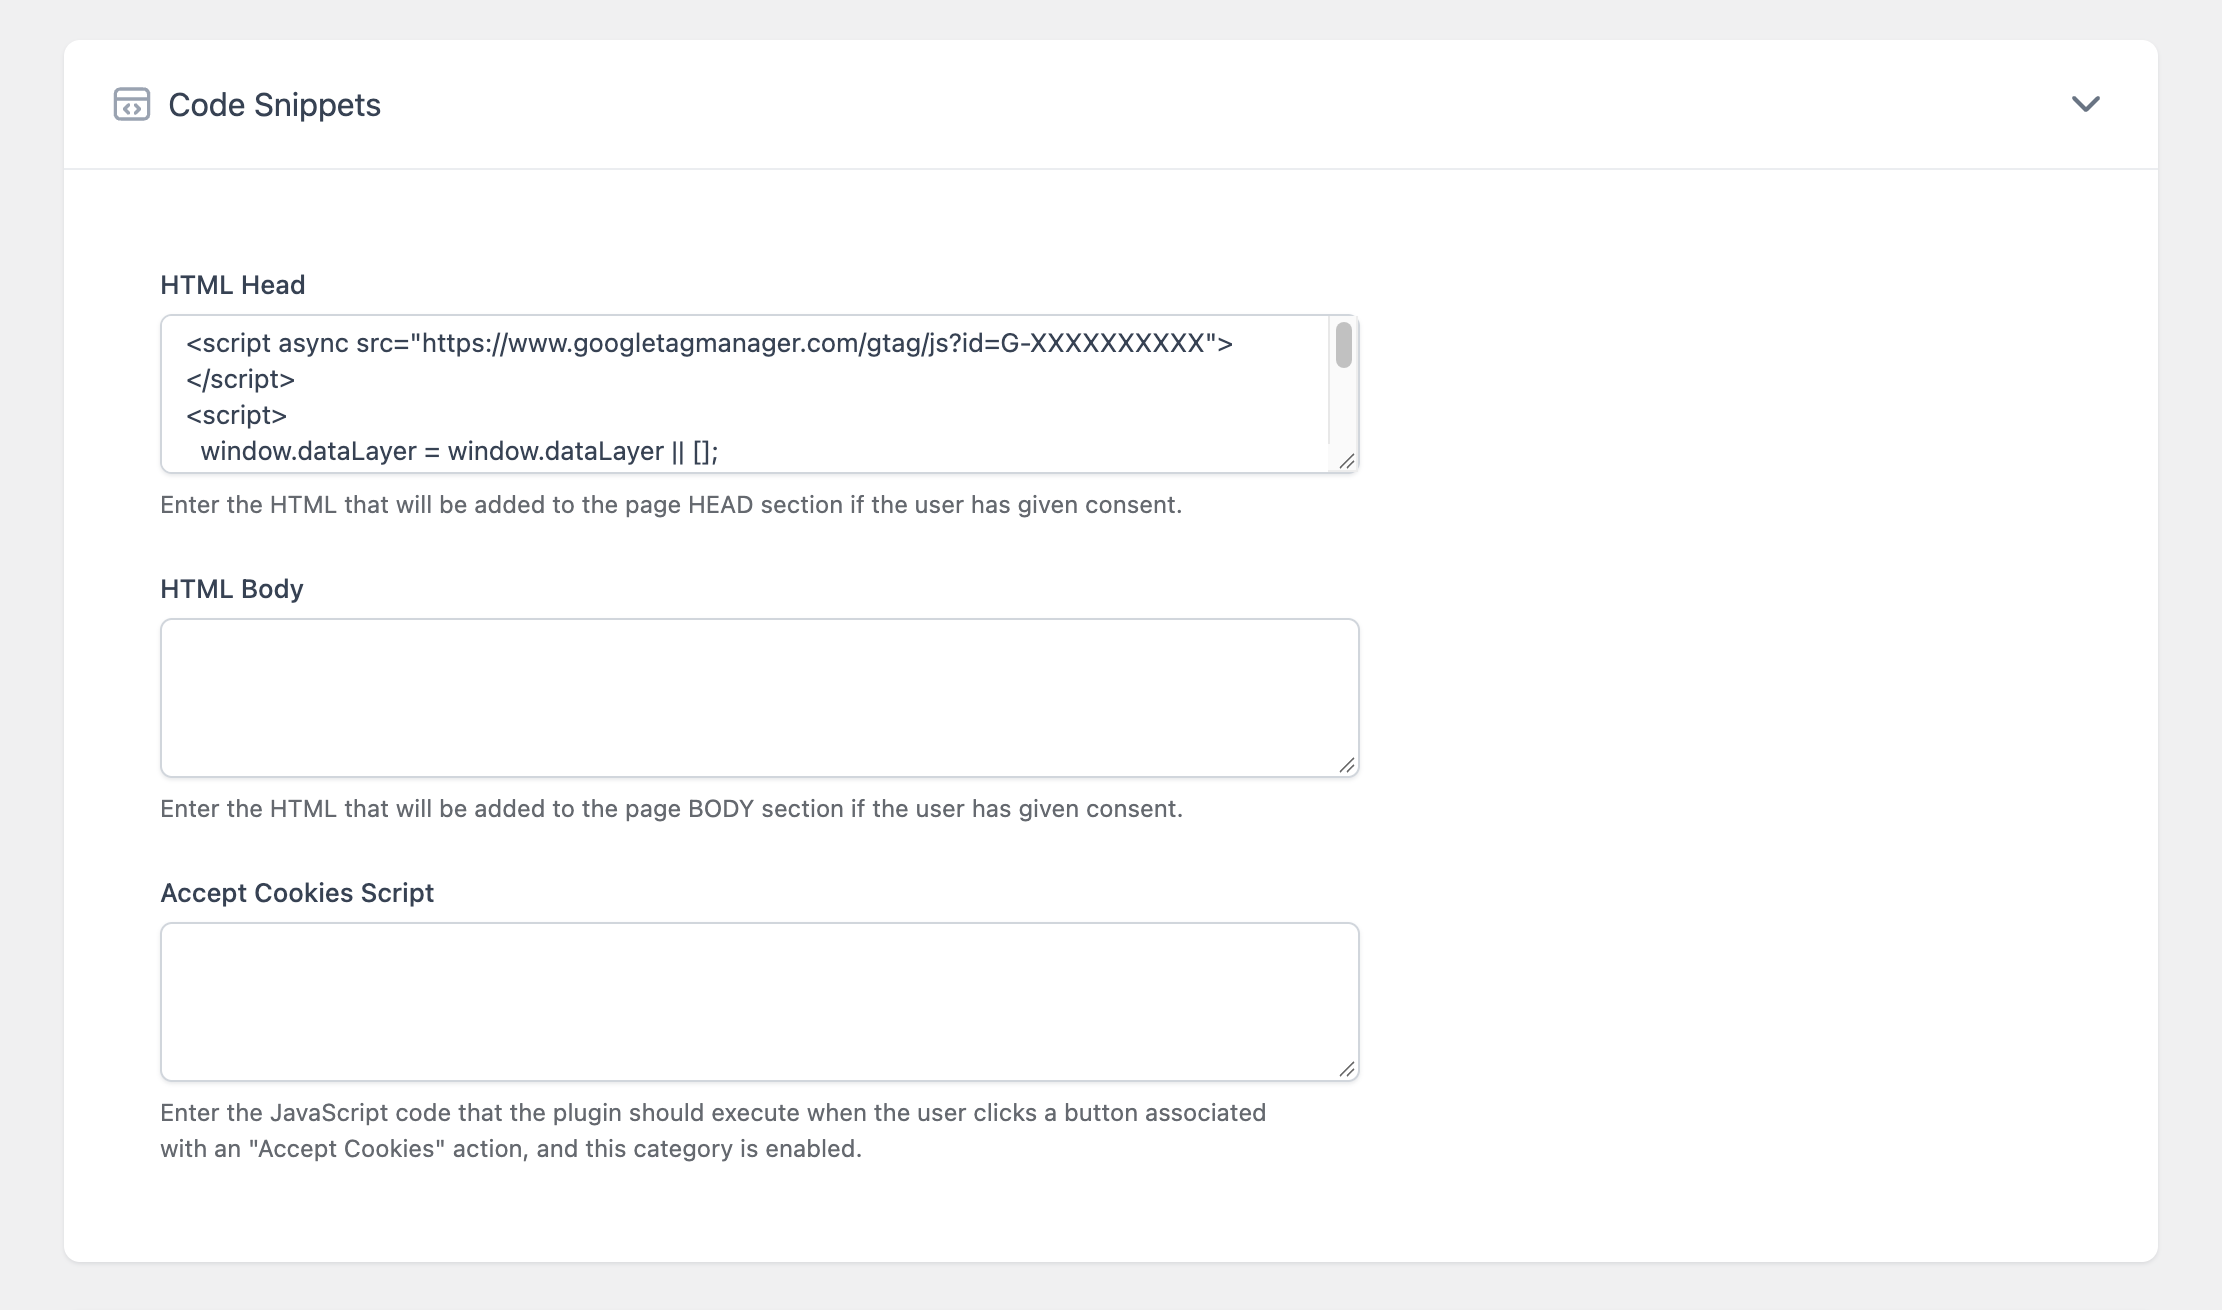
Each category has fields where you enter code:
| Field | Where the code is added | When |
|---|---|---|
| HTML Head | In the <head> section of the page. | On every page load, for visitors who have the category enabled. |
| HTML Body | At the end of the <body> section of the page. | On every page load, for visitors who have the category enabled. |
| Accept Cookies Script (Pro) | Not added to the page as a tag. The code is executed. | Once, at the moment the visitor clicks a button with an accept action. |
For a visitor who has not made a choice, or who has the category disabled, the code of the category is not present in the page. The script does not run and cannot set its cookies.
Important: the plugin controls only the code entered in these fields. It does not find or block scripts added by your theme, by other plugins, or pasted elsewhere. To put a script under consent you must move it into a category.
Put a script under consent
Step 1 — Find where the script is added now
Tracking scripts are usually added in one of these places:
- An option of your theme (for example “Header scripts” or “Google Analytics ID”).
- A dedicated plugin (for example an analytics plugin or a “header and footer code” plugin).
- A custom code area of your page builder.
- The
header.phporfunctions.phpfile of your theme.
Step 2 — Remove it from there
Delete the script or clear the option, so the script is no longer added unconditionally. If you skip this step, the script keeps running for every visitor, whatever they choose in the notice.
Step 3 — Add it to a category
- Go to Cookie Notice → Categories.
- Edit the category that matches the purpose of the script, for example “Analytics”, or create it.
- Paste the script in HTML Head or HTML Body. Use the position recommended by the provider of the script. Most providers recommend the head.
- Click Save Changes.
Paste the complete code given by the provider, including the <script> and </script> tags. The fields accept any HTML, so you can also add <noscript>, <iframe>, or <link> tags.
Step 4 — Decide when the script starts
The HTML Head and HTML Body code is added when a page is loaded. After the visitor clicks the accept button, the code is added from the next page the visitor opens.
To add the code immediately after the click, turn on Reload Page in Options → Advanced → Behavior. The current page is reloaded as soon as the visitor accepts, and the scripts start on that page.
| Reload Page | First page where the script runs |
|---|---|
| Off | The next page the visitor opens after accepting. |
| On | The page where the visitor accepted, right after the automatic reload. |
Leave Reload Page off if you do not need to track the first page view. Turn it on if the first page matters, for example on landing pages.
Examples
Google Analytics 4
Category: Analytics. Field: HTML Head. Replace G-XXXXXXXXXX with your measurement ID.
<script async src="https://www.googletagmanager.com/gtag/js?id=G-XXXXXXXXXX"></script>
<script>
  window.dataLayer = window.dataLayer || [];
  function gtag(){dataLayer.push(arguments);}
  gtag('js', new Date());
  gtag('config', 'G-XXXXXXXXXX');
</script>
Google Tag Manager
Category: the category that covers the tags of your container. Replace GTM-XXXXXXX with your container ID.
Field HTML Head:
<script>(function(w,d,s,l,i){w[l]=w[l]||[];w[l].push({'gtm.start':
new Date().getTime(),event:'gtm.js'});var f=d.getElementsByTagName(s)[0],
j=d.createElement(s),dl=l!='dataLayer'?'&l='+l:'';j.async=true;j.src=
'https://www.googletagmanager.com/gtm.js?id='+i+dl;f.parentNode.insertBefore(j,f);
})(window,document,'script','dataLayer','GTM-XXXXXXX');</script>
Field HTML Body:
<noscript><iframe src="https://www.googletagmanager.com/ns.html?id=GTM-XXXXXXX"
height="0" width="0" style="display:none;visibility:hidden"></iframe></noscript>
With this setup the whole container is loaded only after consent to that category. If your container holds tags with different purposes (analytics and advertising), consider Google Consent Mode (Pro), which tells Google which purposes were accepted. See Setting Up Google Consent Mode.
Scripts of different purposes
Use one category per purpose and paste each script in its own category:
| Category | HTML Head |
|---|---|
| Analytics | The analytics script |
| Marketing | The advertising pixel script |
A visitor who enables only Analytics gets only the analytics script.
Accept Cookies Script (Pro)
Accept Cookies Script contains JavaScript code that runs once, at the moment the visitor clicks a button with the Accept Cookies, Accept All Cookies, or Reject All Cookies action. The code runs only for the categories that are enabled after the click.
Differences from HTML Head and HTML Body:
- Enter only JavaScript code, without the
<script>tags. - The code runs immediately, without a page reload.
- The code does not run again on the following pages.
Use it for something that must happen at the moment of consent. Example: load a script on the current page without reloading it.
var s = document.createElement('script');
s.src = 'https://example.com/tracker.js';
s.async = true;
document.head.appendChild(s);
For a script that must run on every page, combine the two: put the provider’s code in HTML Head (it runs on the following pages) and use Accept Cookies Script to start it on the page where the visitor accepted.
Order of the scripts
When several categories are enabled, their code is added following the Priority of the categories, from the lowest to the highest value.
Verify the result
- Open your site in a private browser window.
- Before clicking any button, view the source of the page (right click → View Page Source) and search for a part of your script, for example your measurement ID. It must not be present.
- Click your accept button and open another page (or wait for the reload if Reload Page is on).
- View the source again. The script must be present.
- Click the revisit consent button, then click your reject button. View the source again. The script must not be present.
You can also check the cookies in the developer tools of your browser (in Chrome: Application → Cookies). The cookies of the script must appear only after acceptance.
If the script is still present before consent
- The script is still added somewhere else. Repeat Step 1 and Step 2.
- A caching plugin is serving a page generated for a visitor who had accepted. See Using the Plugin with Caching Plugins.
If the script is not present after consent
- The category is not assigned to a section. Set its Section option.
- The accept button uses the Accept Cookies action and the category has Initial State off. Use Accept All Cookies. See Understanding Button Actions.
- Reload Page is off and you are still on the page where you accepted. Open another page.
- A caching plugin is serving a page generated for a visitor who had not accepted. See Using the Plugin with Caching Plugins.
- You made your choice before the category was created. Click the revisit consent button and choose again.