Setting Up Google Consent Mode
Google Consent Mode is the way Google tags (Google Analytics, Google Ads, and the tags managed with Google Tag Manager) receive the consent choices of your visitors. With this integration, the plugin tells Google which purposes each visitor accepted, based on the cookie categories the visitor enabled.
The plugin implements the basic consent mode: the Google Tag Manager container is not loaded until the visitor grants consent. This article describes the behavior of version 1.56 and later.
How the integration works
Google Consent Mode uses seven parameters. Each parameter is either “granted” or “denied”.
| Parameter | Purpose |
|---|---|
ad_storage | Storage, such as cookies, related to advertising. |
ad_user_data | Sending user data to Google for advertising purposes. |
ad_personalization | Personalized advertising. |
analytics_storage | Storage, such as cookies, related to analytics. |
functionality_storage | Storage that supports the functionality of the site, such as language settings. |
personalization_storage | Storage related to personalization, such as video recommendations. |
security_storage | Storage related to security, such as authentication and fraud prevention. |
When the integration is on, the plugin does the following:
- Sets the default state. On every page, before any tag runs, all seven parameters are set to “denied”.
- Waits for the visitor’s choice. Until the visitor clicks a button with an accept or reject action, no consent update is sent and the Google Tag Manager container is not loaded.
- Sends the visitor’s choice. After the choice, the parameters assigned to the categories that the visitor has enabled are “granted”. If at least one parameter is granted, the plugin sends a consent update with all seven parameters, each one “granted” or “denied”. This happens at the moment of the click and again on every following page load.
- Loads Google Tag Manager (optional). If you entered your container ID, the plugin loads the container right after the consent update. The container is loaded at most once per page.
- Resets on revisit. When the visitor revisits the consent, all the parameters are set back to “denied” and the page is reloaded. The visitor is again in the situation of point 2.
If the visitor makes a choice that grants no parameter, no consent update is sent and the container is not loaded. The default “denied” state stays in place.
| Situation of the visitor | Consent update | Container |
|---|---|---|
| No choice yet | Not sent | Not loaded |
| Choice made, at least one parameter granted | Sent on every page | Loaded on every page |
| Choice made, no parameter granted | Not sent | Not loaded |
You decide which parameters belong to which category. A parameter that is not assigned to any category always stays “denied”.
Before you start
- Create your sections and categories. See Creating Sections and Categories.
- Have your Google Tag Manager container ID at hand (it looks like
GTM-XXXXXXX), if you use Google Tag Manager.
Step 1 — Enable the integration
- Go to Cookie Notice → Options → Advanced.
- Find the Google Consent Mode section.
- Turn on Push Basic Consent Mode to Data Layer.
- In Google Tag Manager Container ID, enter your container ID, for example
GTM-XXXXXXX. Leave the field empty if you prefer to load the Google Tag Manager script yourself, or if you do not use Google Tag Manager. - Click Save settings.
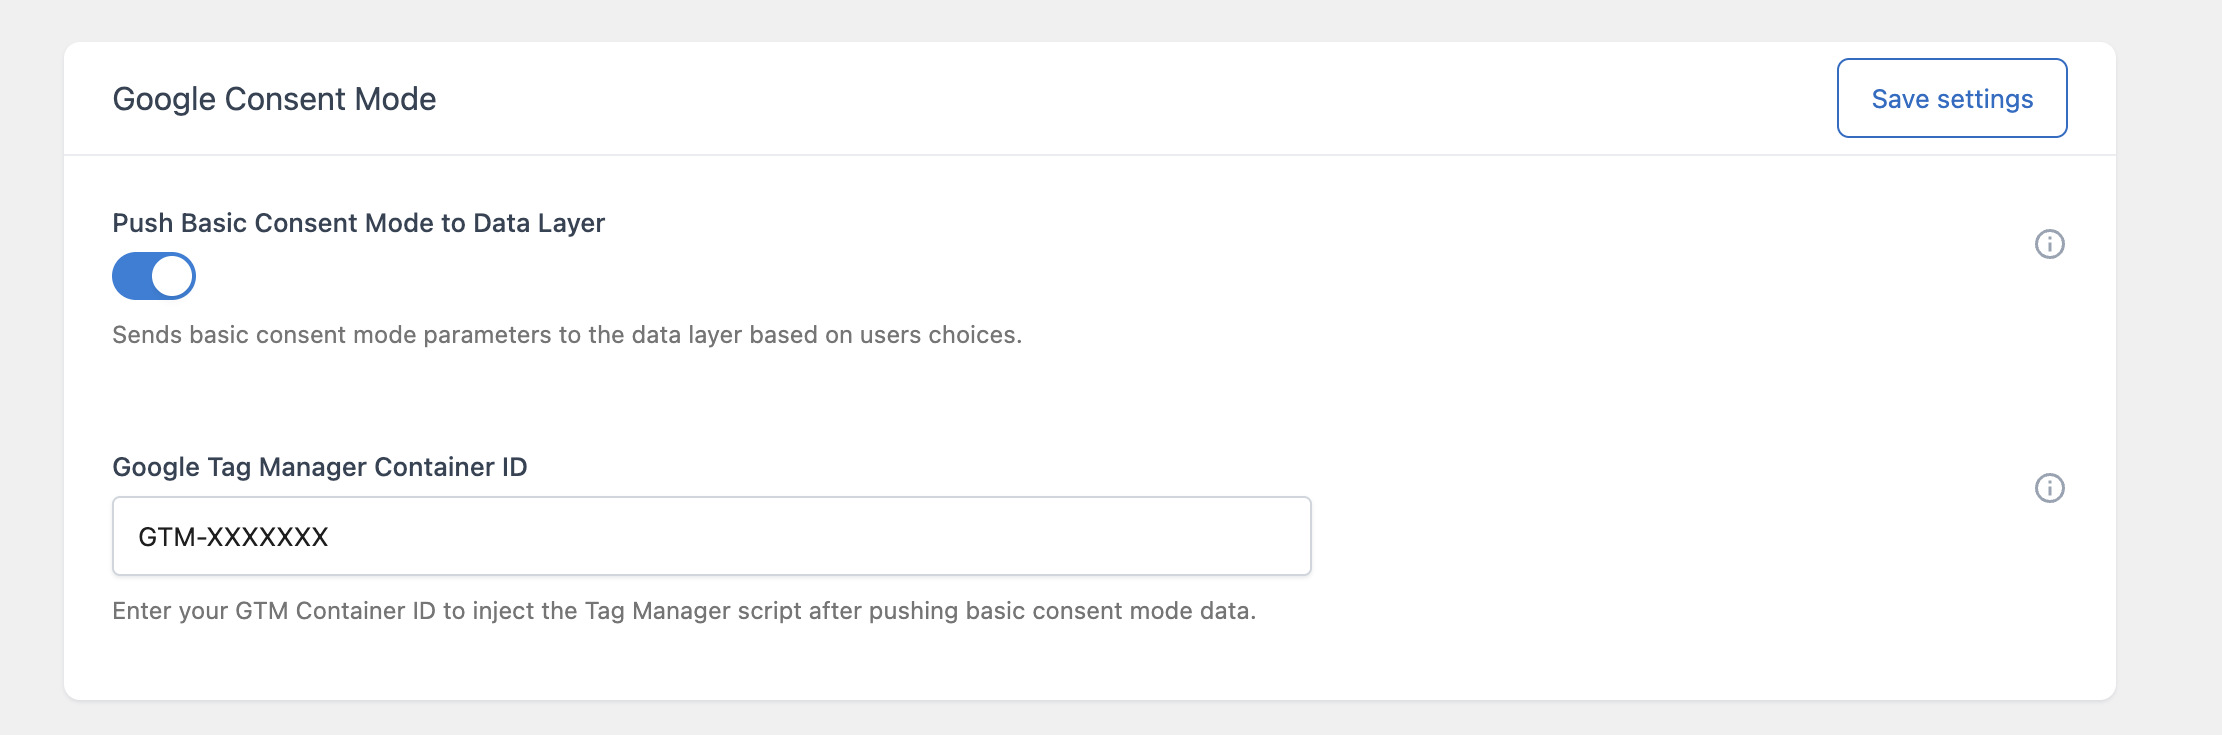
With the container ID empty, the plugin does not load Google Tag Manager. It still sets the default state on every page and sends the consent update after the visitor grants at least one parameter.
Important: if you enter the container ID, remove the Google Tag Manager code from every other place where it is added (theme, another plugin, or the fields of a category). Otherwise the container is loaded twice, and it is loaded also for visitors who have not granted consent.
Step 2 — Assign the parameters to the categories
- Go to Cookie Notice → Categories.
- Edit a category.
- In the Advanced part of the form, select one or more parameters in Consent Mode Parameters.
- Click Save Changes.
- Repeat for the other categories.
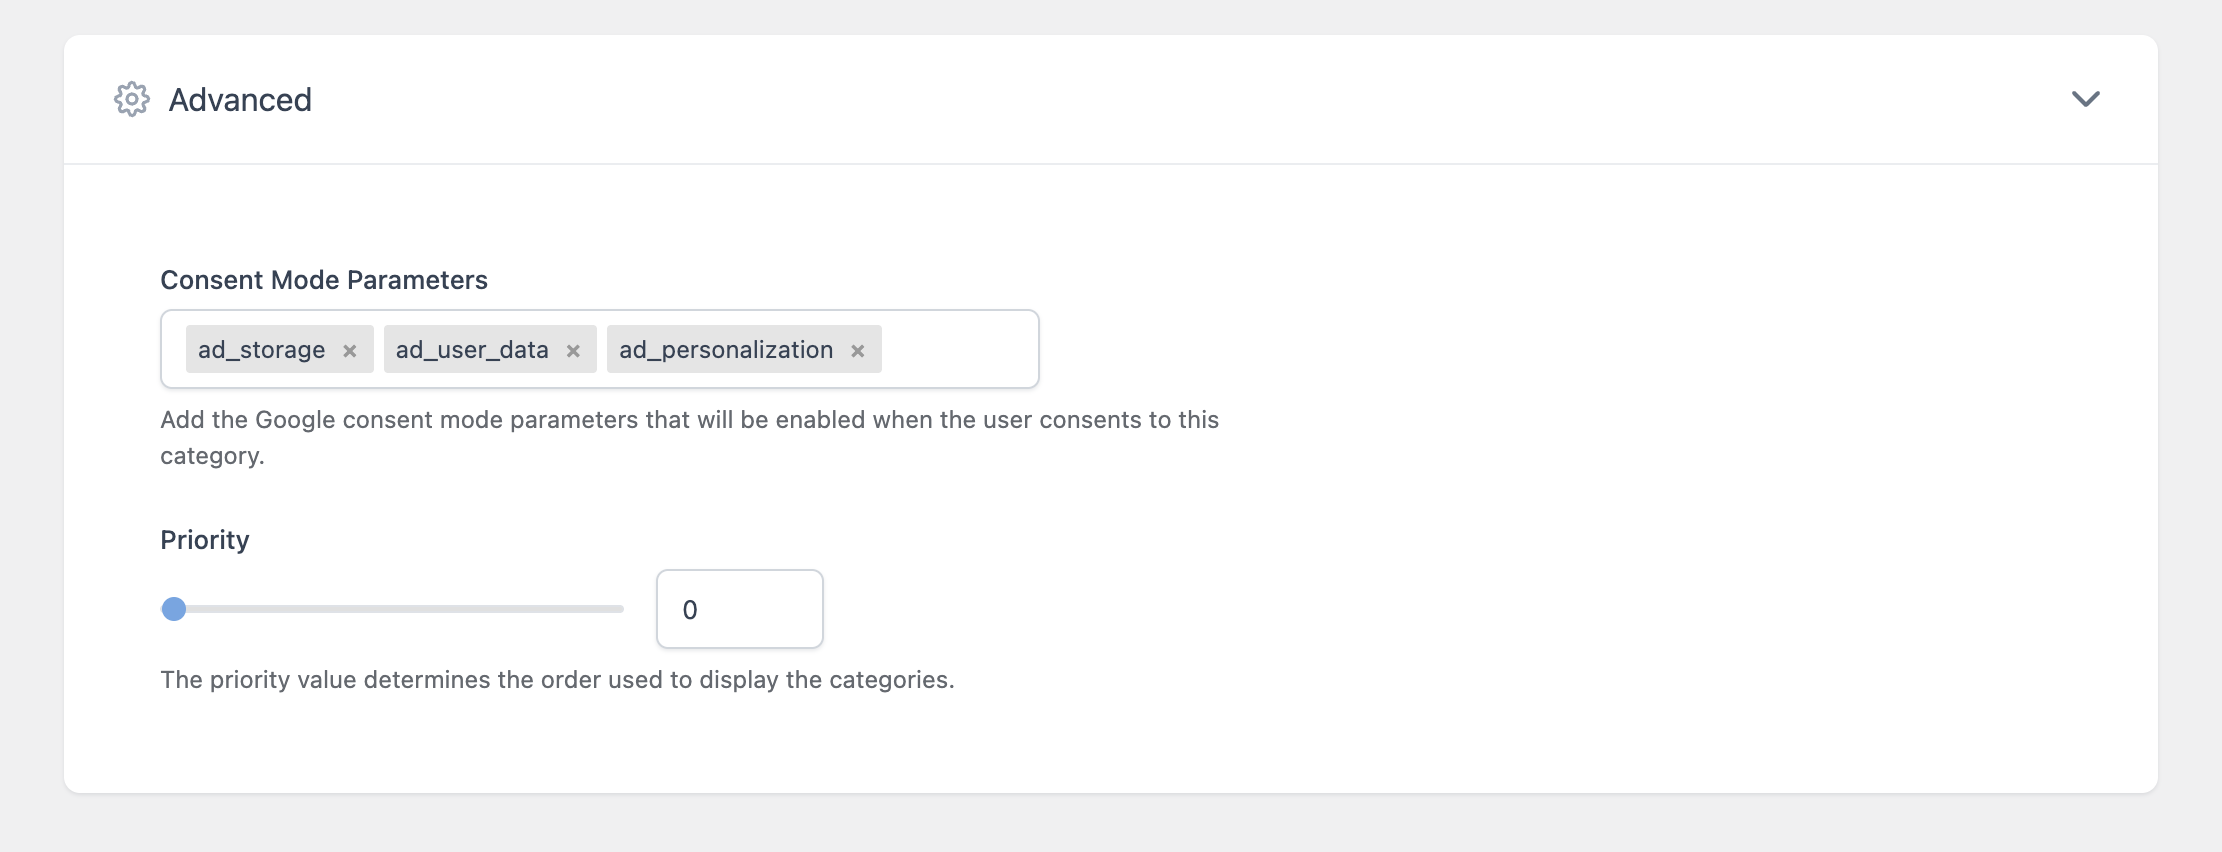
Example mapping
| Category | Consent Mode Parameters |
|---|---|
| Necessary | functionality_storage, security_storage |
| Analytics | analytics_storage |
| Marketing | ad_storage, ad_user_data, ad_personalization |
| Preferences | personalization_storage |
With this mapping, a visitor who enables Necessary and Analytics and disables Marketing produces this consent state:
| Parameter | State |
|---|---|
functionality_storage | granted |
security_storage | granted |
analytics_storage | granted |
ad_storage | denied |
ad_user_data | denied |
ad_personalization | denied |
personalization_storage | denied |
Assign each parameter to one category only, so the result of each toggle is clear.
Parameters assigned to a category that is always enabled
A category with Active Toggle off and Initial State on, such as Necessary in the example, stays enabled also when the visitor clicks a button with the Reject All Cookies action. Its parameters are then “granted” for every visitor who makes a choice.
With the example mapping, a visitor who clicks Reject All Cookies produces this result:
functionality_storageandsecurity_storageare “granted”, and the other five parameters are “denied”.- Because at least one parameter is granted, the consent update is sent and the container is loaded.
If the container must not be loaded for the visitors who reject, do not assign parameters to the categories that are always enabled.
Step 3 — Configure your tags in Google Tag Manager
The plugin sends the consent state. What each tag does with it is configured in Google Tag Manager:
- Google tags (Google Analytics 4, Google Ads) read the consent state on their own and adjust their behavior.
- For other tags, set the consent they require in the consent settings of each tag, so they fire only when the required parameter is granted.
Refer to the Google Tag Manager documentation for the consent settings of the tags.
When you enter the container ID, the plugin loads the container only for the visitors who have at least one parameter granted. For the visitors who have not made a choice yet, and for the visitors who have no parameter granted, the container is not loaded and its tags do not run.
When the container is loaded, some parameters can still be “denied” (for example, a visitor who enabled Analytics and not Marketing). Make sure the tags of your container respect the consent state.
Step 4 — Test
Use a private browser window and the developer tools of the browser. In the Network tab, the container is the request to www.googletagmanager.com/gtm.js. In the Console tab, type dataLayer to see the consent commands sent by the plugin.
- Open your site. Before clicking any button of the notice, check that there is no request to
gtm.js. ThedataLayercontains only the default consent state, with all the parameters “denied”. - Click your accept button. Check that the
dataLayercontains a consent update with the parameters of the enabled categories “granted”, and thatgtm.jsis requested. - Open another page. The consent update is sent again and the container is loaded again.
- Click the revisit consent button. The page reloads and the container is not loaded.
- Click your reject button. If no parameter is granted, there is no consent update and no request to
gtm.js. If a category that is always enabled has parameters, the consent update is sent with those parameters “granted” and the container is loaded.
Geolocation
When Geolocation is on, the Behavior option changes what happens for the visitors outside the selected countries:
| Behavior | Consent update and container |
|---|---|
| Disable cookie notice | No choice is saved. No consent update is sent and the container is not loaded. |
| Disable cookie notice and enable all cookie categories | The categories are enabled automatically. The consent update is sent and the container is loaded, as for a visitor who accepted. |
| None | Same as without geolocation. |
See Showing the Notice Only in Selected Countries.
Using the category fields together with Consent Mode
Consent Mode and the HTML Head and HTML Body fields of the categories are two separate mechanisms:
| Mechanism | What it does | Use it for |
|---|---|---|
| Category fields | The script is not in the page at all without consent. | Scripts that are not managed by Google Tag Manager, or that do not support Consent Mode. |
| Consent Mode | The container is loaded after the visitor grants at least one parameter. The Google tags then adapt their behavior to the consent state. | Google Analytics, Google Ads, and the tags managed in Google Tag Manager. |
You can use both on the same site. For example, manage Google tags with Consent Mode and add a third-party pixel to the HTML Head field of the Marketing category.
Do not add the same script in both ways.
Troubleshooting
The consent state is always “denied” and the container is not loaded
- No parameter is assigned to the categories. Complete Step 2.
- The accept button uses the Accept Cookies action and the categories have Initial State off. Use Accept All Cookies. See Understanding Button Actions.
- The category is not assigned to a section.
- The visitor has not made a choice yet. This is the expected behavior.
The container is loaded after the visitor rejects
A category that is always enabled (Active Toggle off and Initial State on) has parameters assigned. See “Parameters assigned to a category that is always enabled” above.
The container is loaded twice
The Google Tag Manager code is also added by the theme, by another plugin, or in a category field. Remove it and keep only the container ID in the plugin options.
Tags fire before consent
The plugin sets the default state to “denied” in the head of the page and loads the container only after the visitor grants consent. If the Google Tag Manager code is also added by something else, the container is loaded for every visitor, also before a choice. Remove that code and let the plugin load the container by entering the container ID.