Importing Markdown to Posts
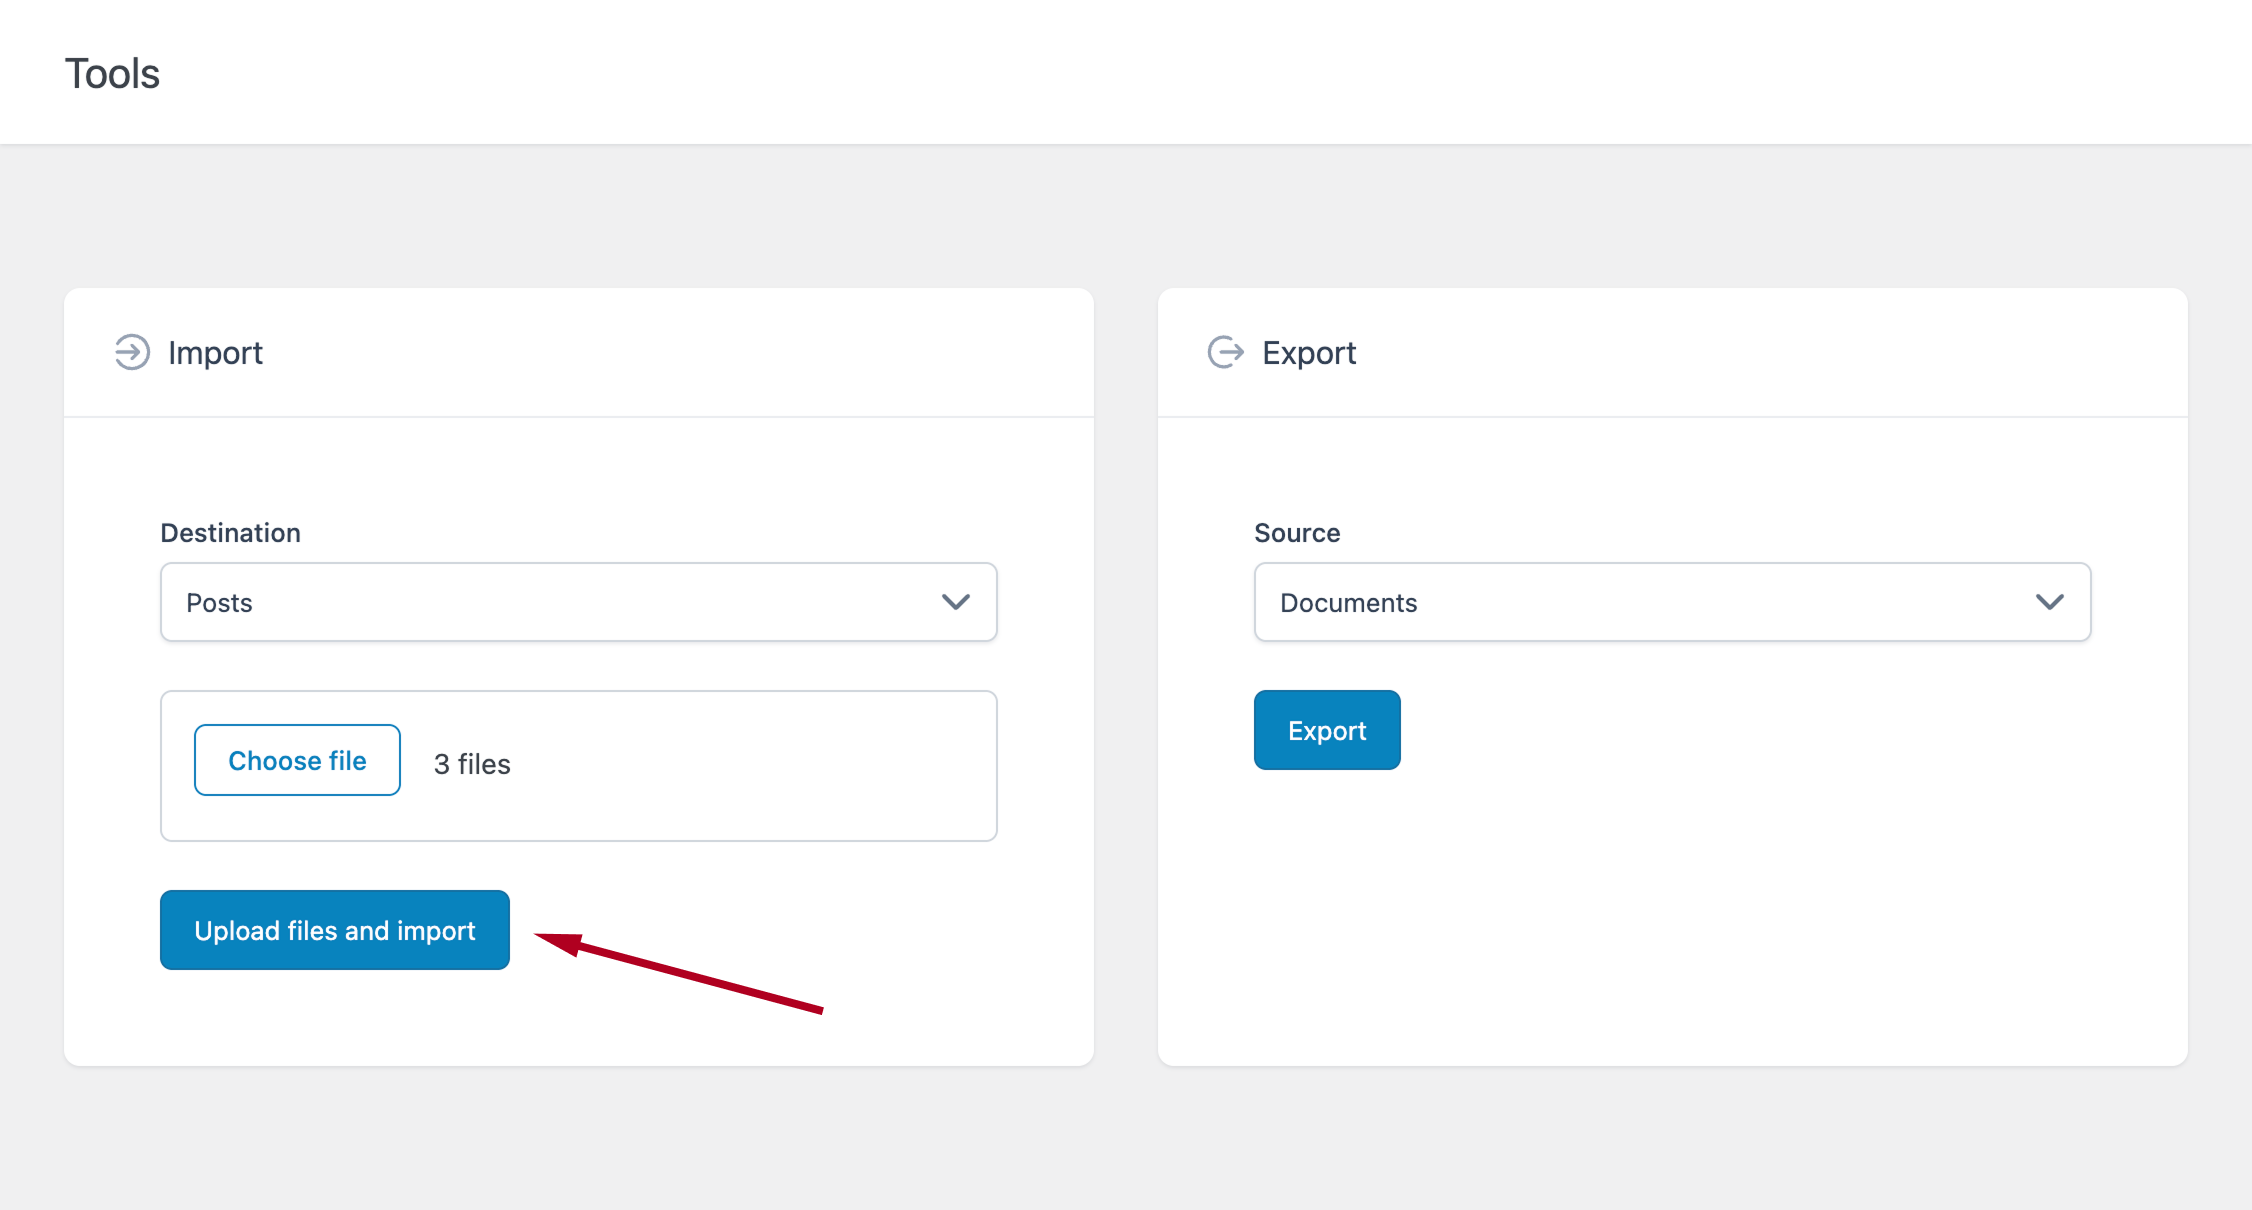
To begin, go to the Tools menu. This menu provides centralized access to bulk import and export operations.
It includes two main sections:
- Import – Import Markdown files into the plugin
- Export – Export WordPress posts or plugin-managed documents
In this guide, you will use the Import section to generate WordPress posts from Markdown files stored on your computer.
Importing to Posts
Start by selecting the import destination.
- Choose Posts as the Destination
- Imported content will be created as Draft posts
Click the Choose files button and select one or more files from your computer.
Supported inputs include:
- Plain text Markdown files (supported extensions)
- ZIP files containing a Markdown file and related images (see Importing Images documentation)
Click Upload files and import to start the process.
After the import completes:
- A notification displays the list of generated posts
- Each file is converted into a WordPress post (Draft status)
Configuring Imported Posts
You can configure how imported posts are created in:
Options → Advanced → Import
Available settings include:
- Post Type – Choose the post type (e.g., Post, Page, or custom post types)
- Category – Assign imported posts to a specific category
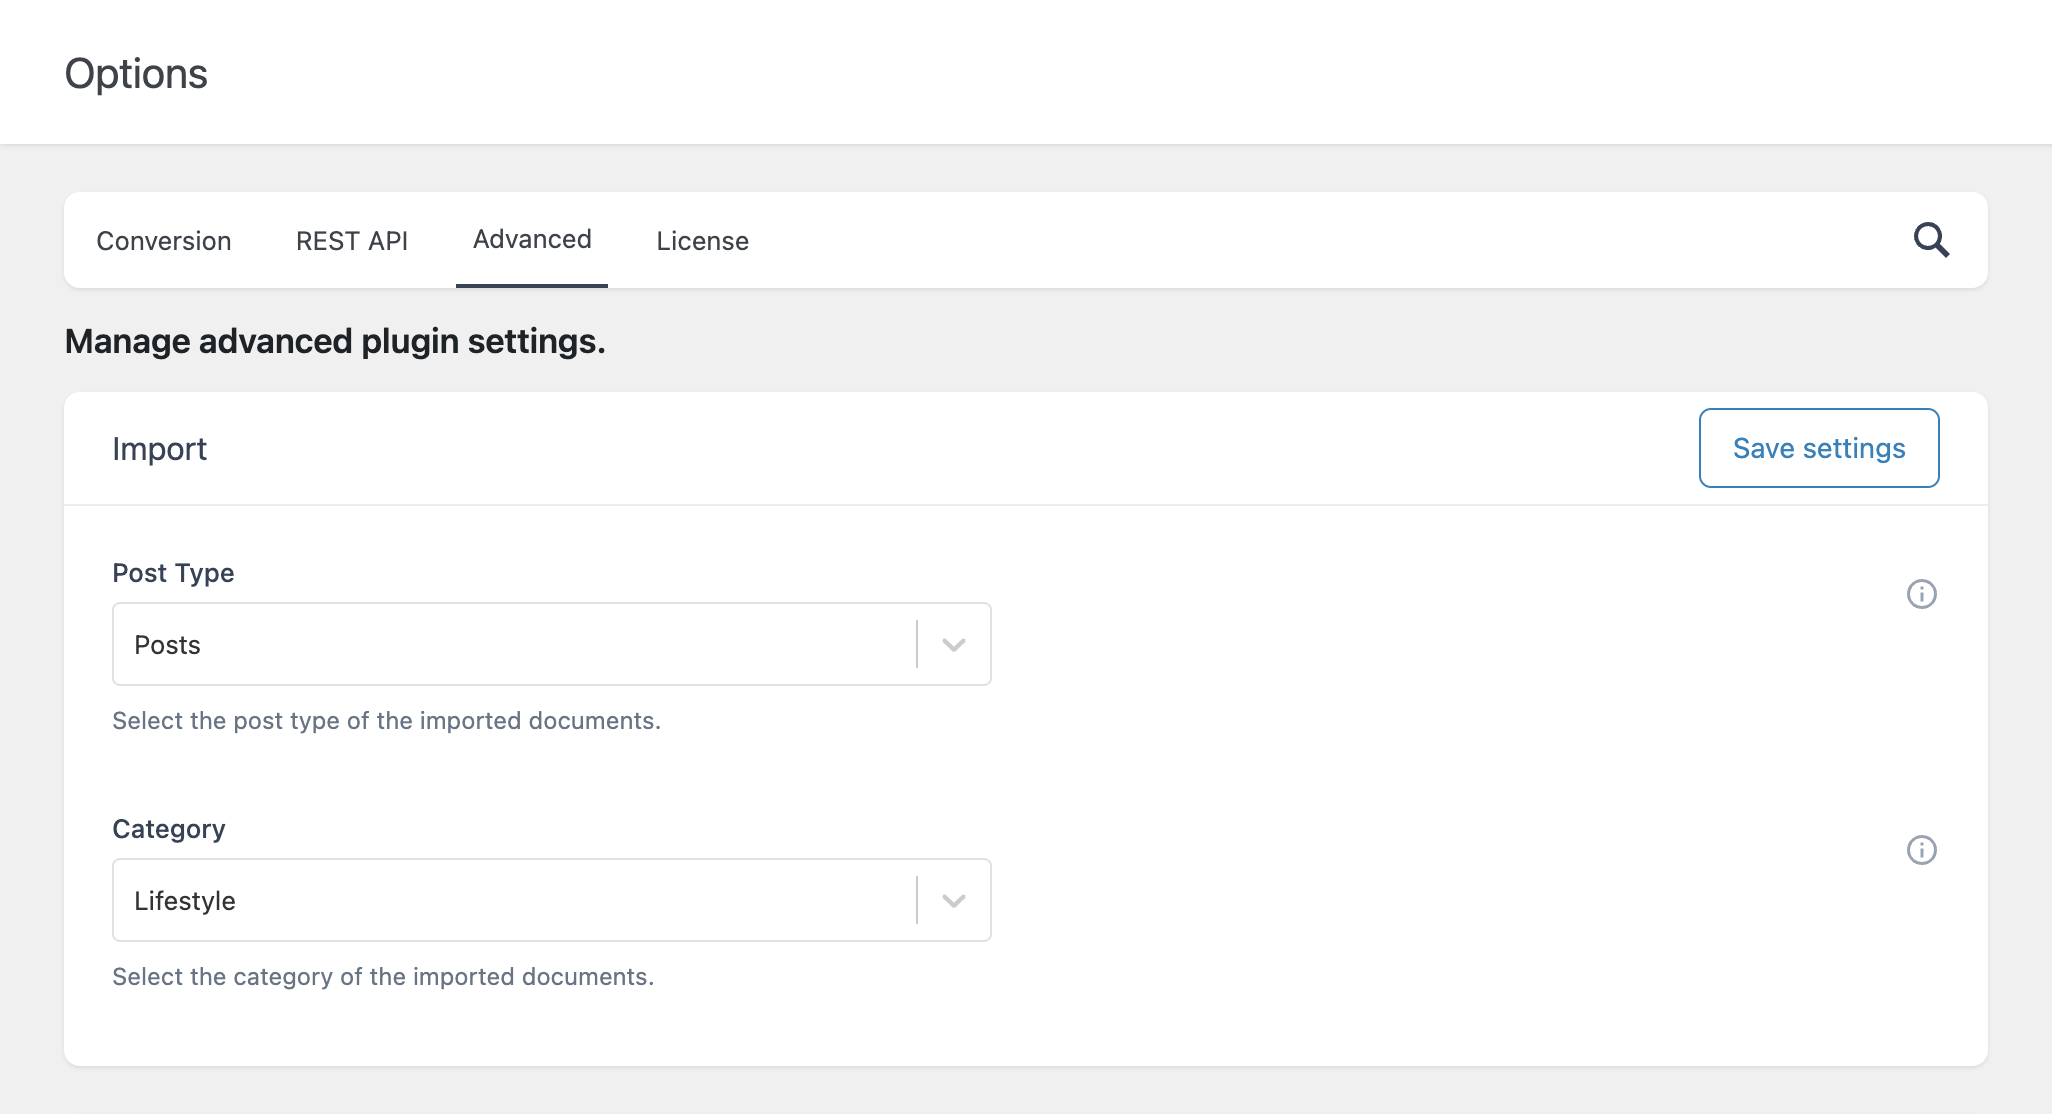
After updating these settings, click Save Settings.
All future imports will use the configured post type and category.
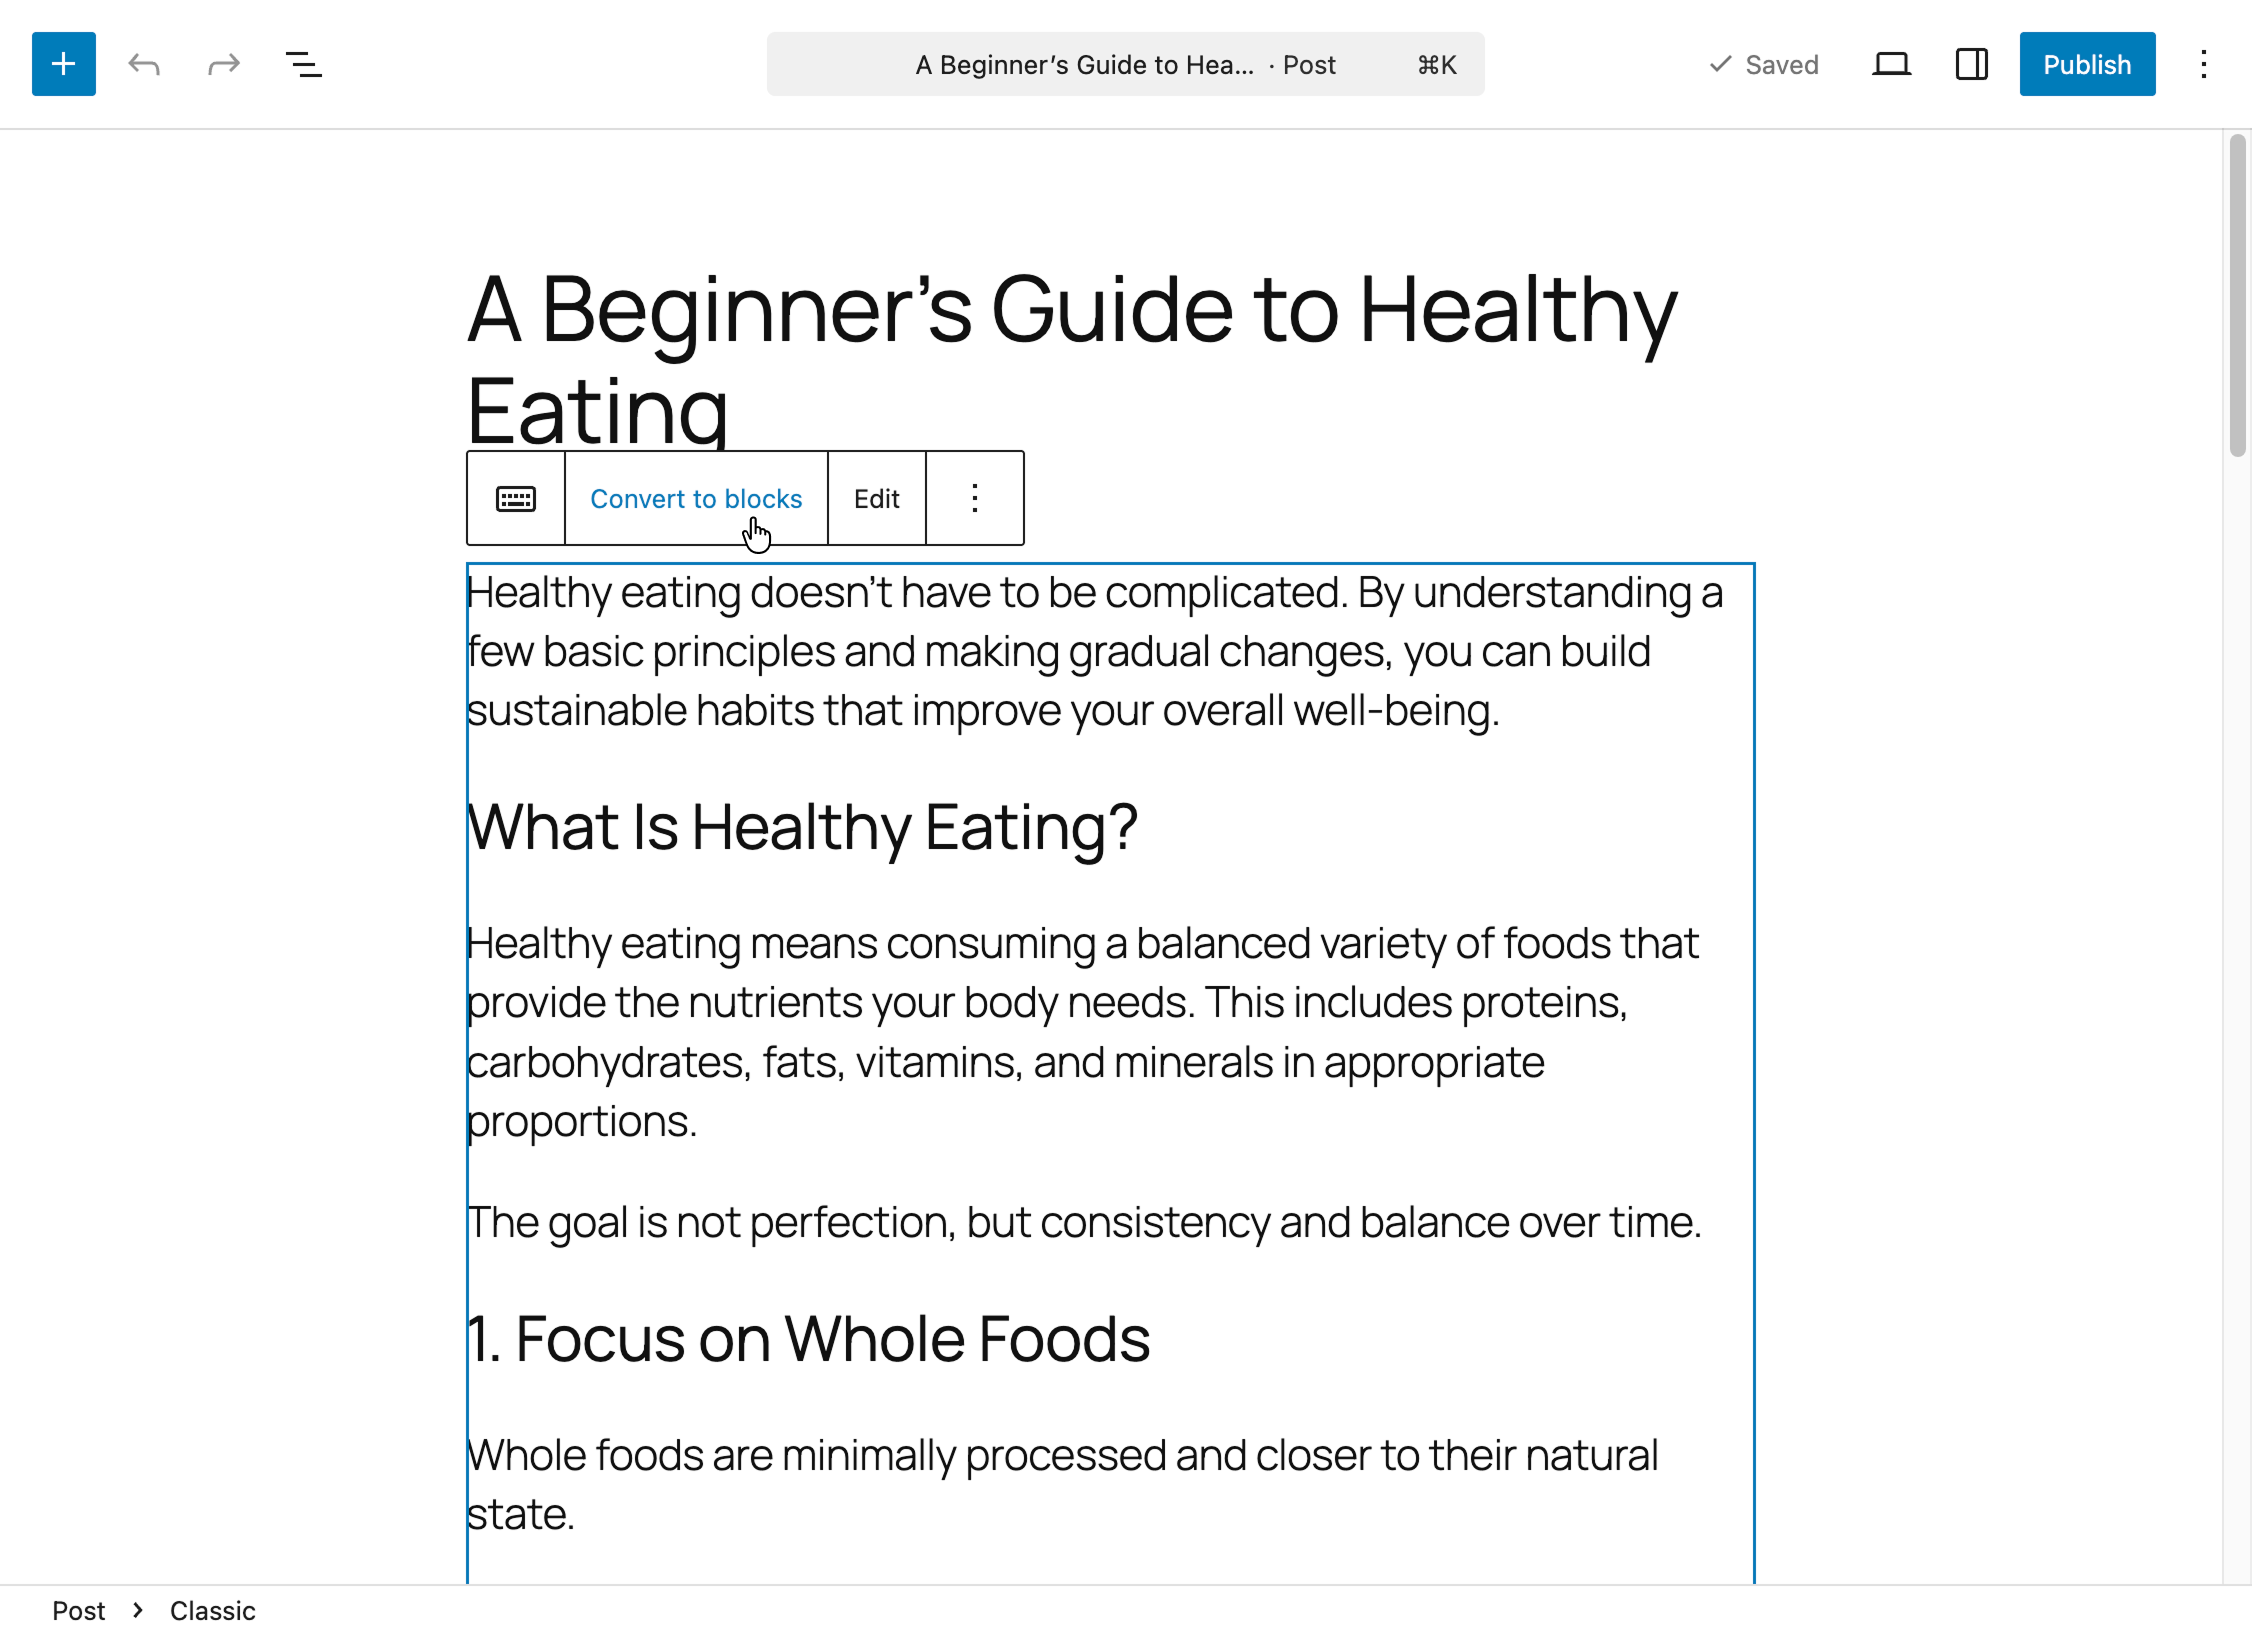
Block Editor Considerations
When using the Block Editor, imported content is placed inside a Classic Block, not automatically split into individual blocks.
This happens because WordPress does not currently provide a server-side HTML-to-block conversion for this type of operation.
If needed, you can manually convert the content:
- Select the Classic Block
- Click Convert to blocks
Alternative Workflow
If you frequently work with the Block Editor, also consider this workflow:
- Import Markdown files into Documents
- Open a post in the editor
- Use the Load Markdown panel to insert the content