Creating Auto Link Rules in Bulk
Bulk Add Rules lets you create many Auto Link Rules at once from a spreadsheet-style interface, instead of filling out the full rule form individually for each one. This is the fastest way to set up automatic linking when you already have a list of keyword-to-URL mappings, for example a glossary or a product catalog.
How Bulk Add Rules Works
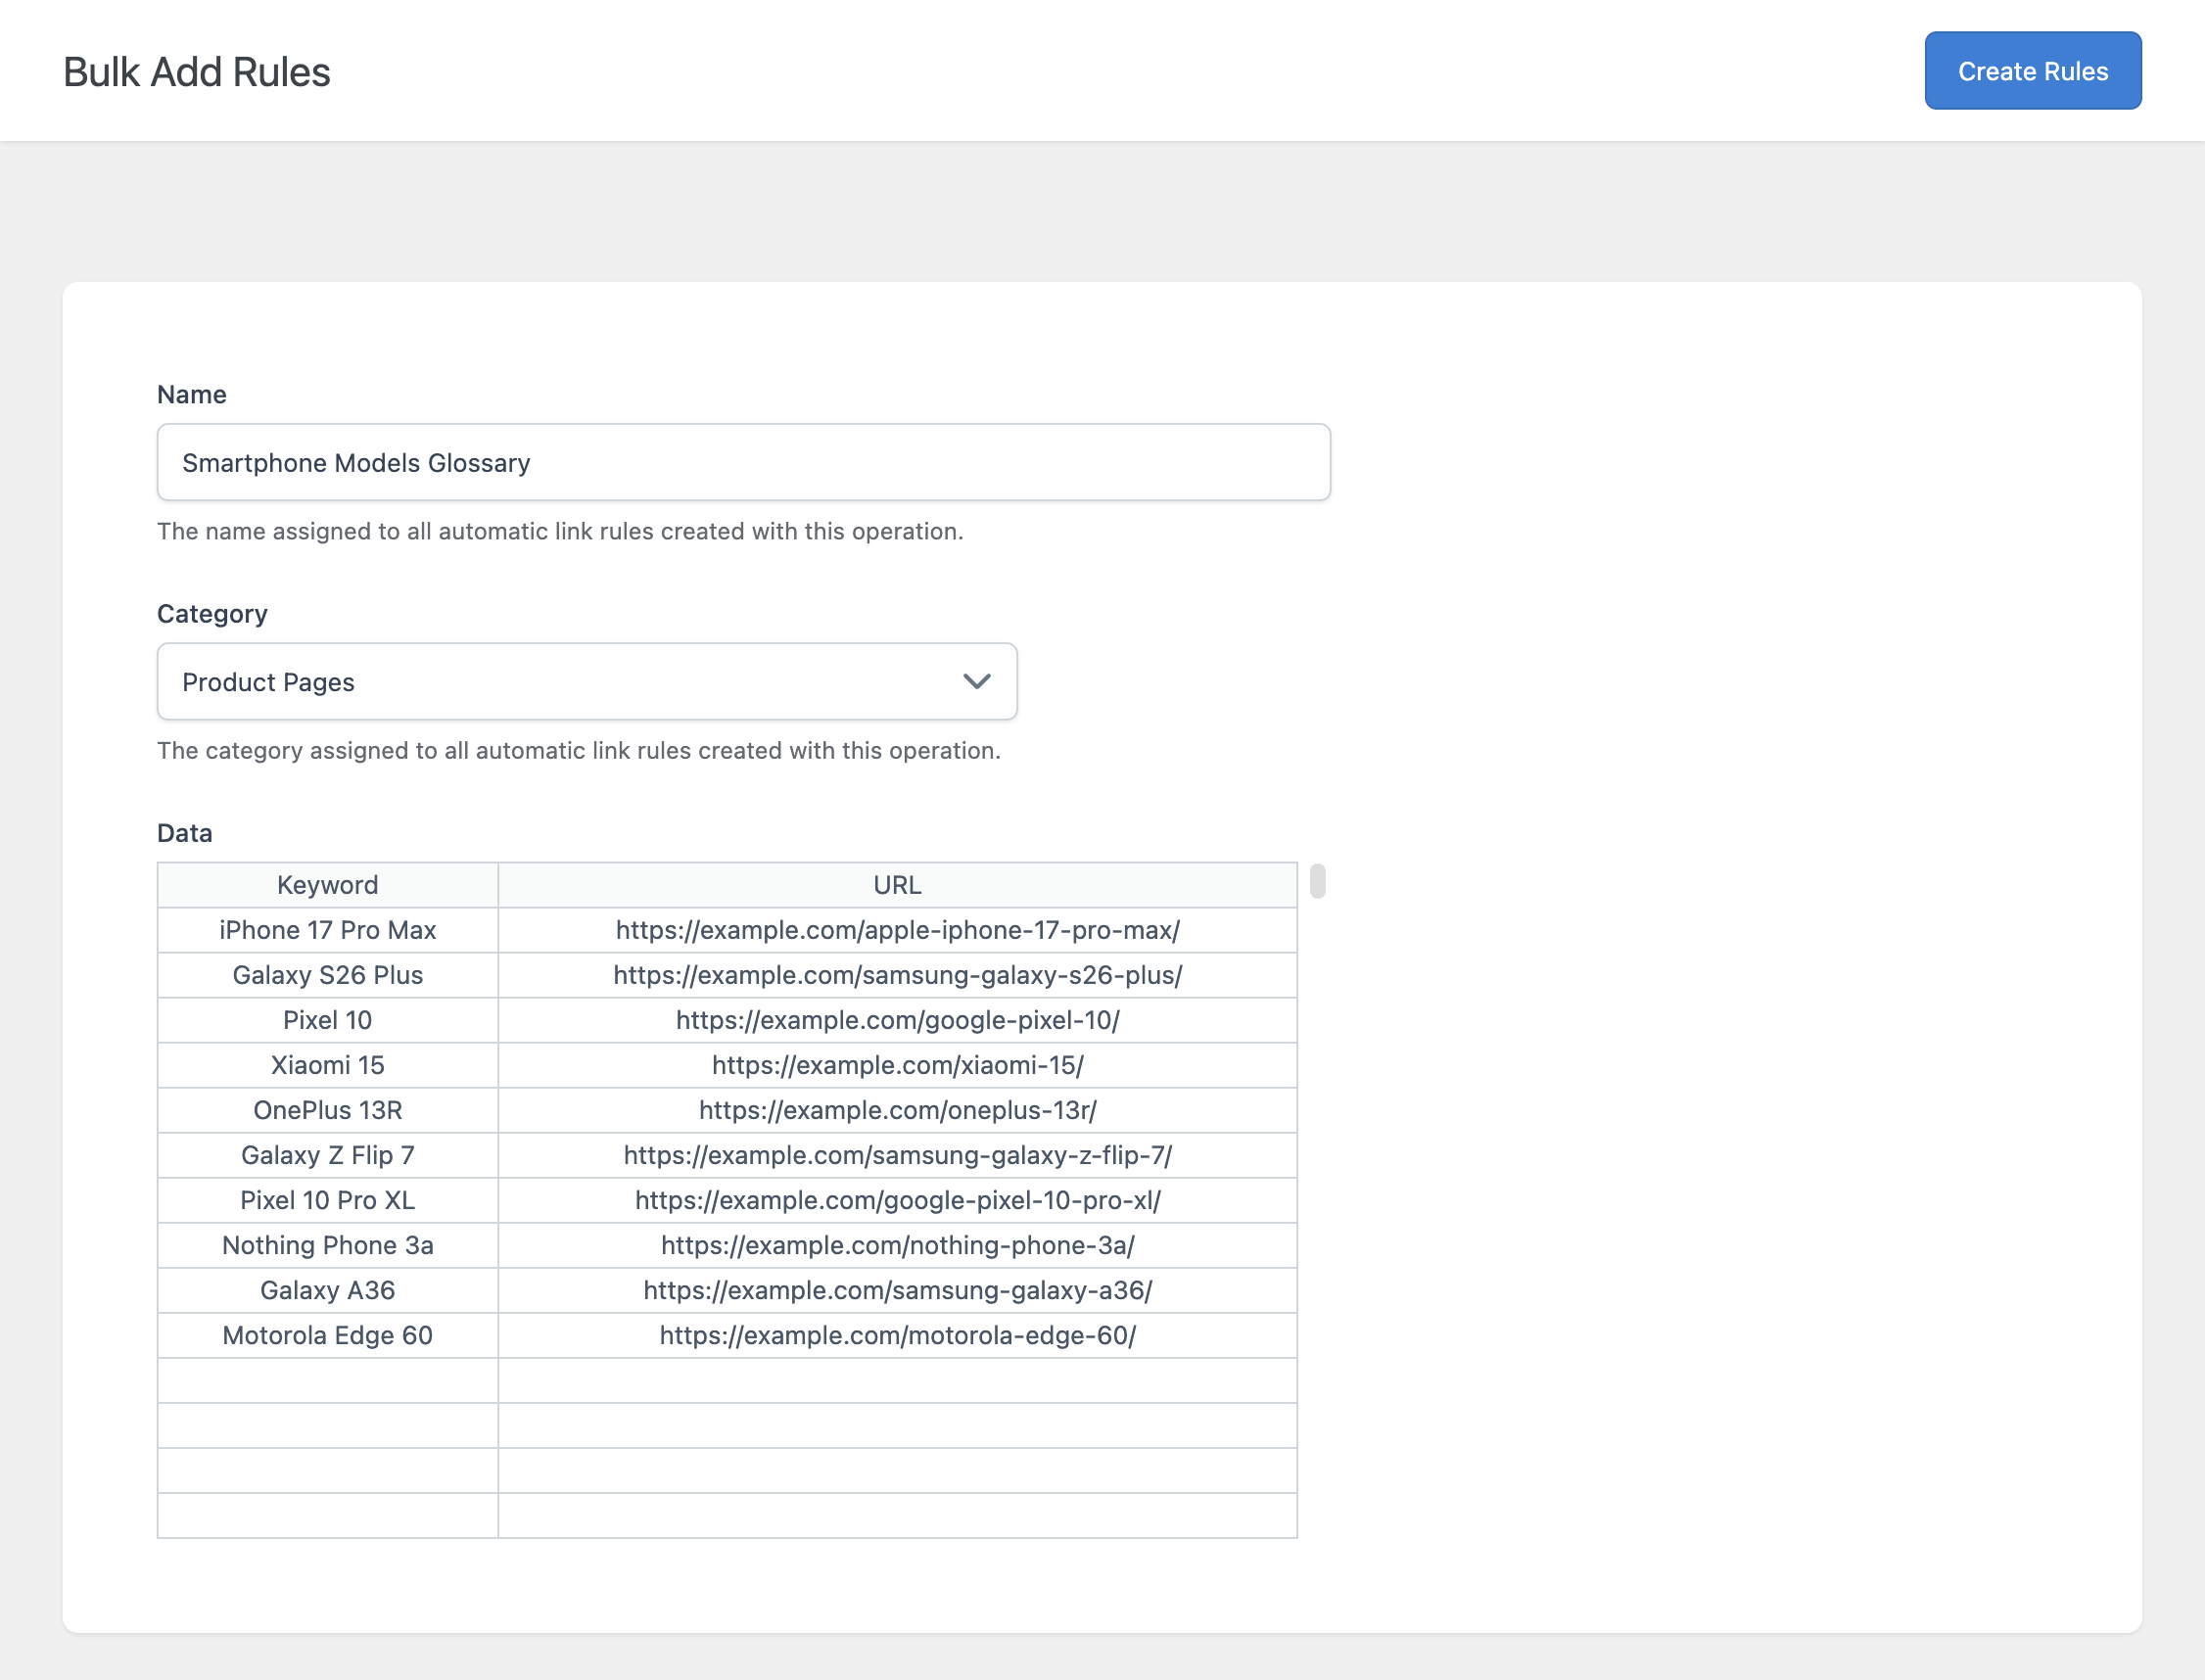
Open the Bulk Add Rules page from the Rules tab of the Auto Link Rules menu. The page has two parts: a small form at the top, and a spreadsheet below it.
- Name – A single name applied to every rule created in this batch. All rules generated from this operation will share the same name, so they can be easily identified together in the Auto Link Rules list.
- Category – A single category applied to every rule created in this batch. Select None if you don’t want to assign a category.
In the Data spreadsheet, enter one row per rule:
- Keyword – The keyword that will be converted into a link
- URL – The destination URL for that keyword
Once you’ve filled in your rows, click Create Rules at the top of the page to generate the rules.
What Bulk Add Rules Does Not Let You Configure
Bulk Add Rules only exposes the Keyword and URL fields directly. Every other setting normally available on the full rule form, such as Link Attributes, Apply To conditions, and Advanced Matching options, is not configurable from this page on a per-row basis.
Instead, every rule created through Bulk Add Rules automatically uses the values configured in the Defaults section of the Settings menu, including:
- Title, Open New Tab, and Use Nofollow
- Post Types, Categories, Tags, and Term Group
- Case Sensitive Search, Left Boundary, and Right Boundary
- Keyword Before and Keyword After
- Limit and Priority
If you need a batch of rules with specific Link Attributes or Apply To conditions, set those values in the Defaults section of the Settings menu before running the bulk operation. After the rules are created, you can still edit each one individually from the Auto Link Rules list if a subset of them needs different settings.
For details on configuring these defaults, refer to the dedicated documentation on Settings.
Row Validation
When you click Create Rules, each row is validated independently. A row is skipped, without stopping the rest of the batch, if:
- The Keyword field is empty
- The URL field does not match a valid URL format
- The Keyword consists only of numbers
- The Keyword matches certain reserved character sequences used internally by the plugin
After processing, a notice tells you how many rows were successfully added as rules. Rows that were skipped due to validation are not reported individually, so it’s worth reviewing your data before submitting if you expect every row to result in a new rule.
Row Limit
The spreadsheet has a maximum number of rows, controlled by the Bulk Import Rows option in the Settings menu. If you have more keyword-to-URL pairs than the configured limit, run the operation multiple times, or increase the limit before starting.
Verifying the Created Rules
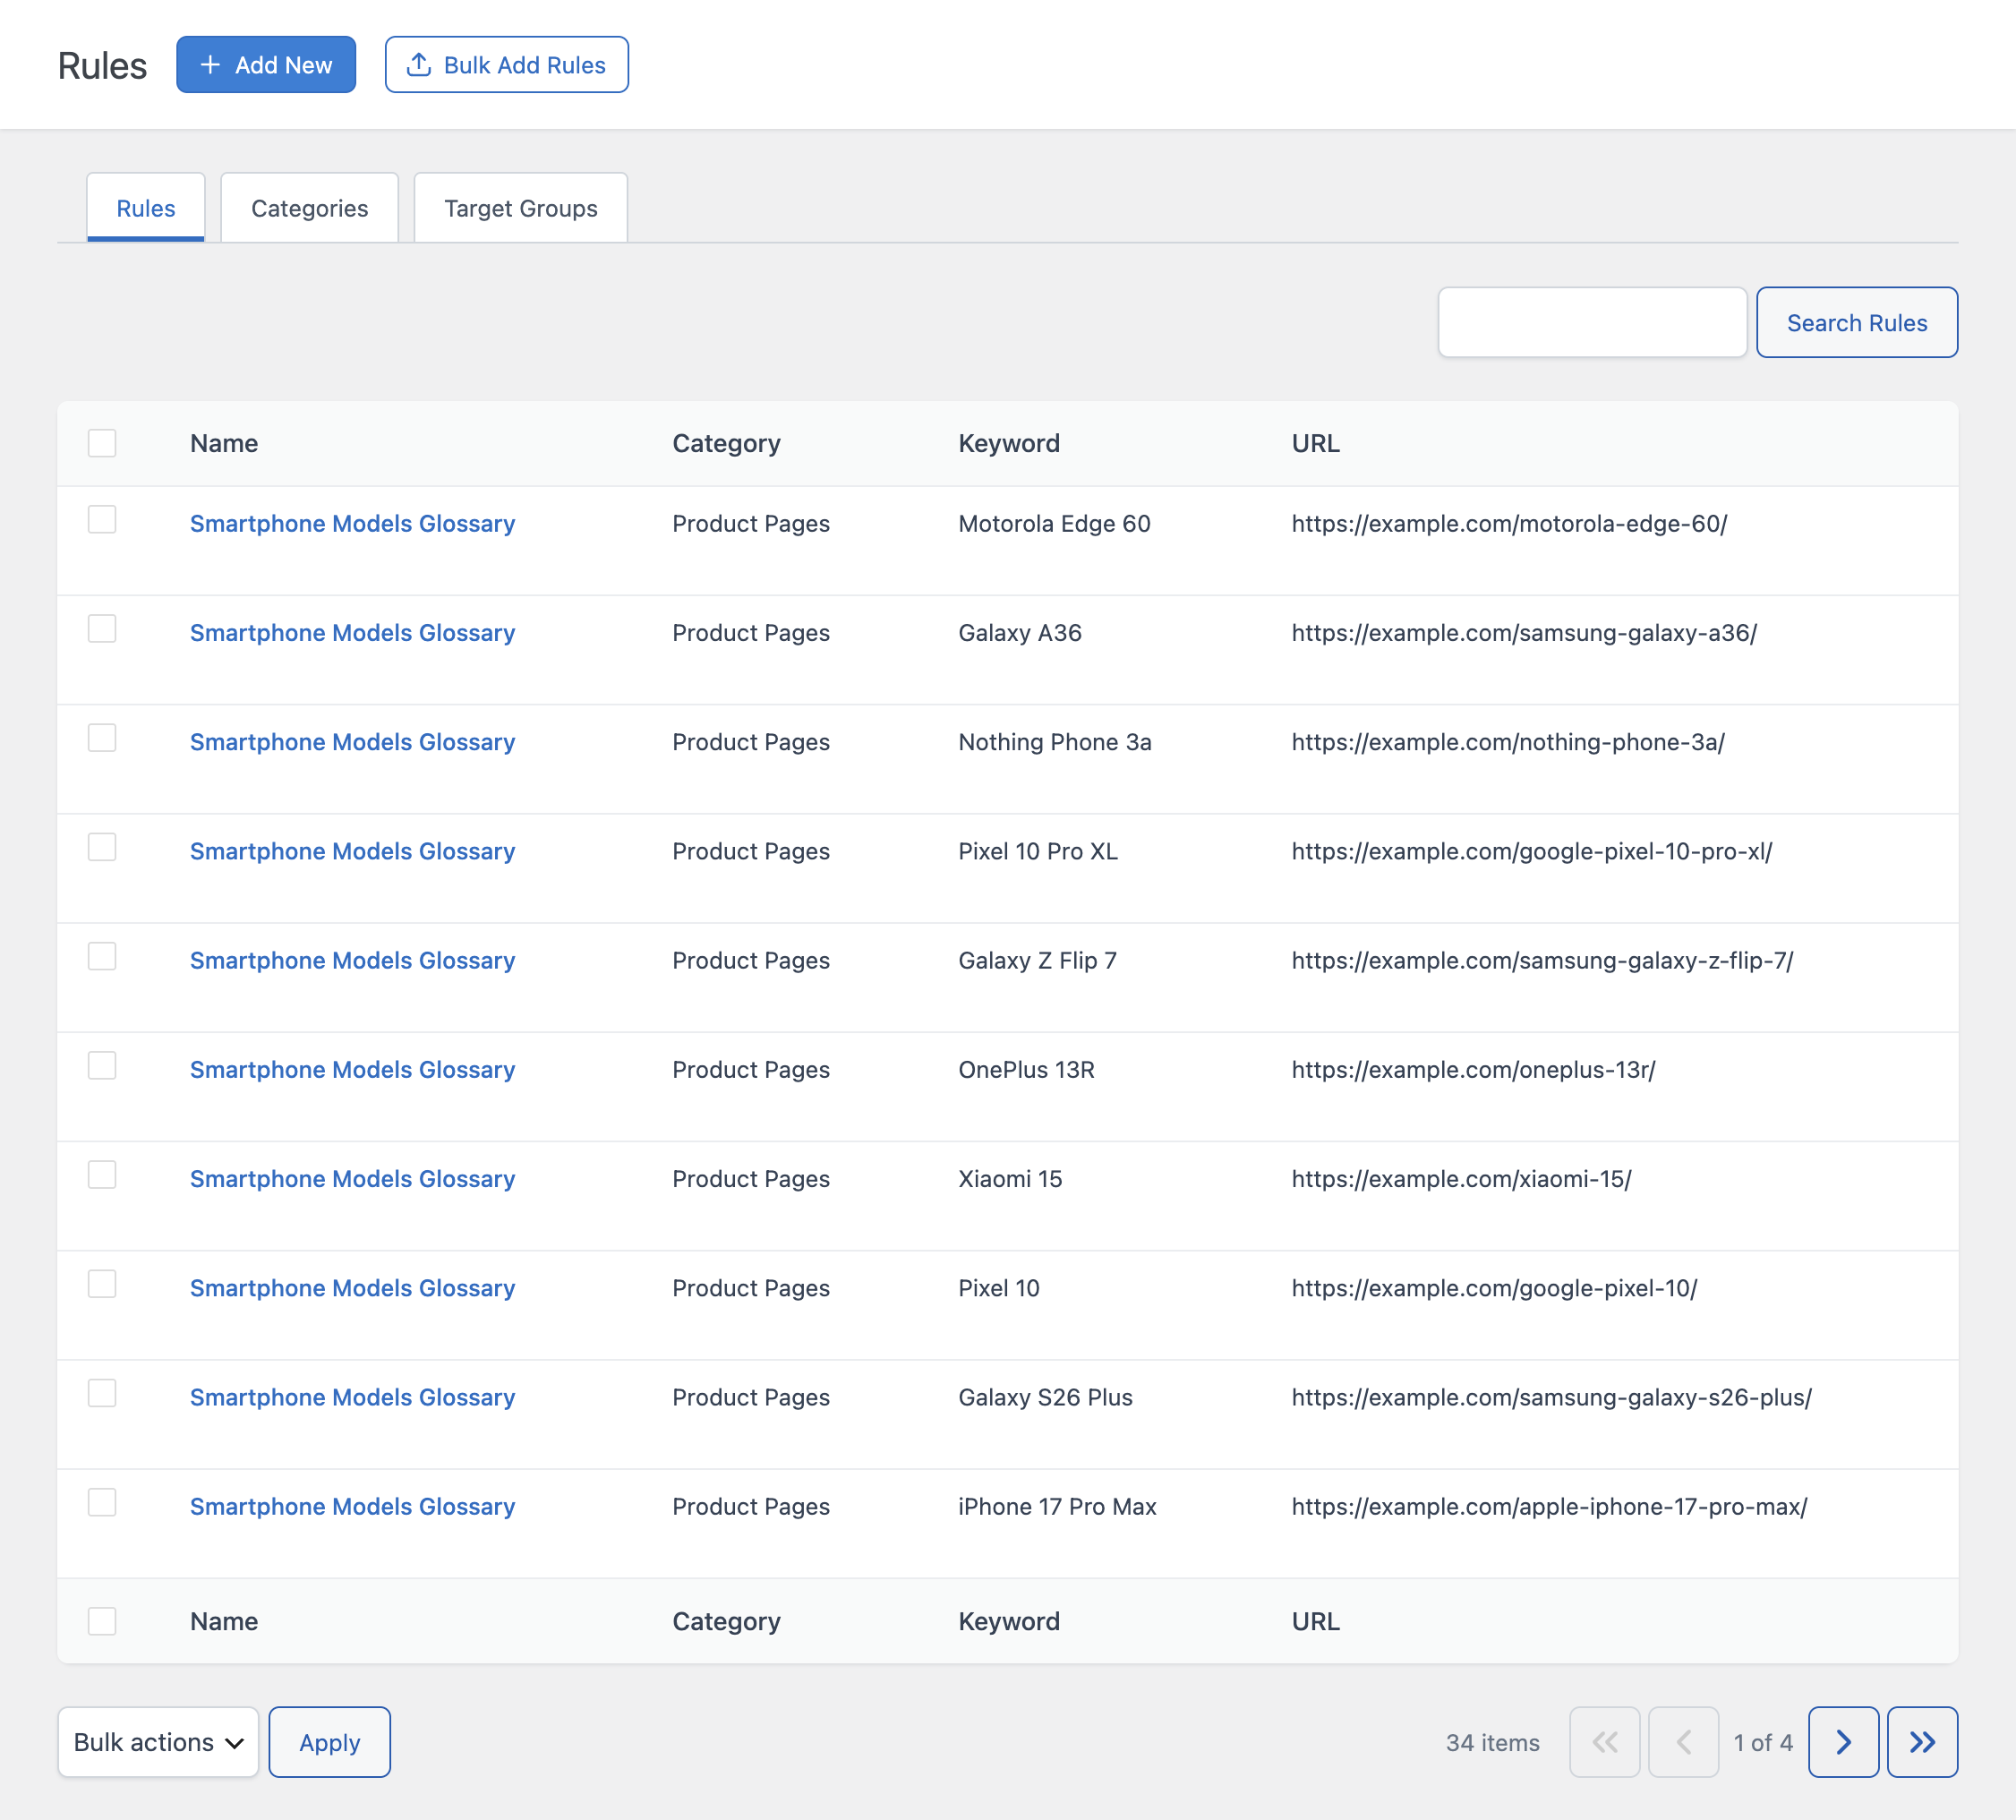
After the operation completes, open the Rules tab to confirm the new rules were created. Since every rule from a single batch shares the same Name, you can quickly identify them together in the list.